Member Management
The Member Management page is used for managing and maintaining the organizational structure and member information of the current organization.
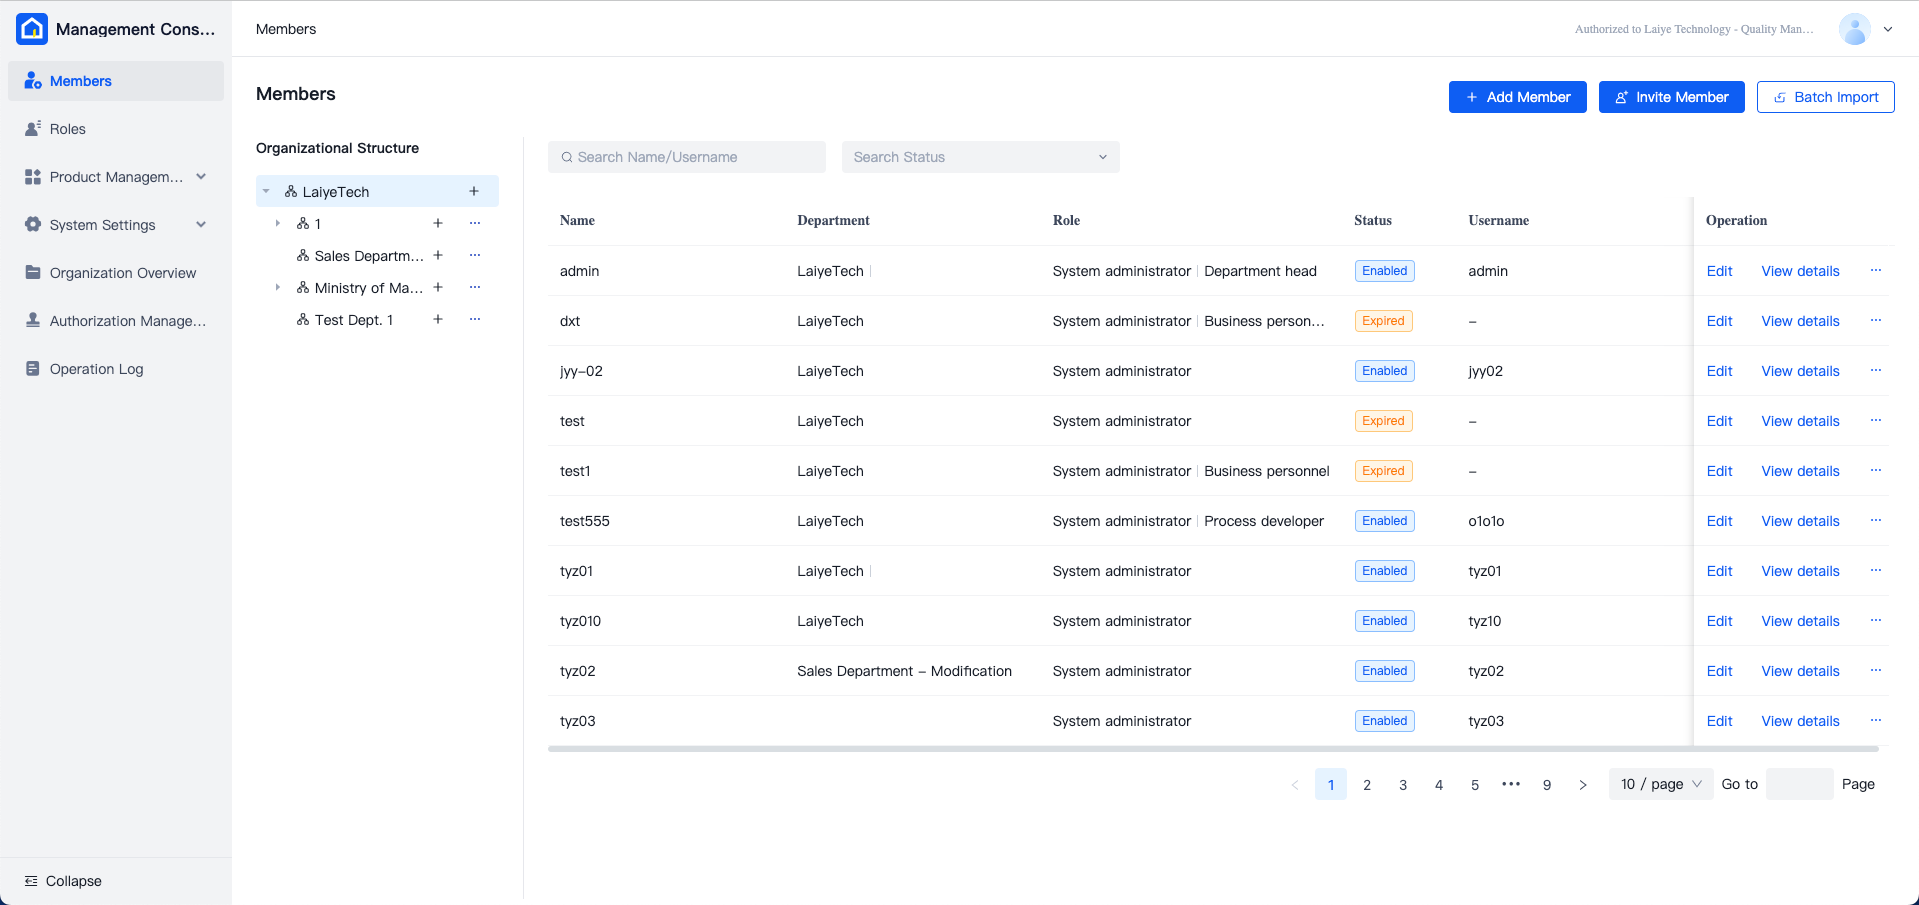
Organizational Structure Management
On the left side of the Member Management list, you can perform various maintenance operations on the organizational structure, including creating a new department at the same level, adding a sub-department, renaming a department, and deleting a department.
The root department of the organization is fixed and is determined at the time of organization creation. To modify the name of the root department, the initial administrator of the organization must make the change under the "Organization Overview" menu. The following are the operation instructions for the department on the right side:
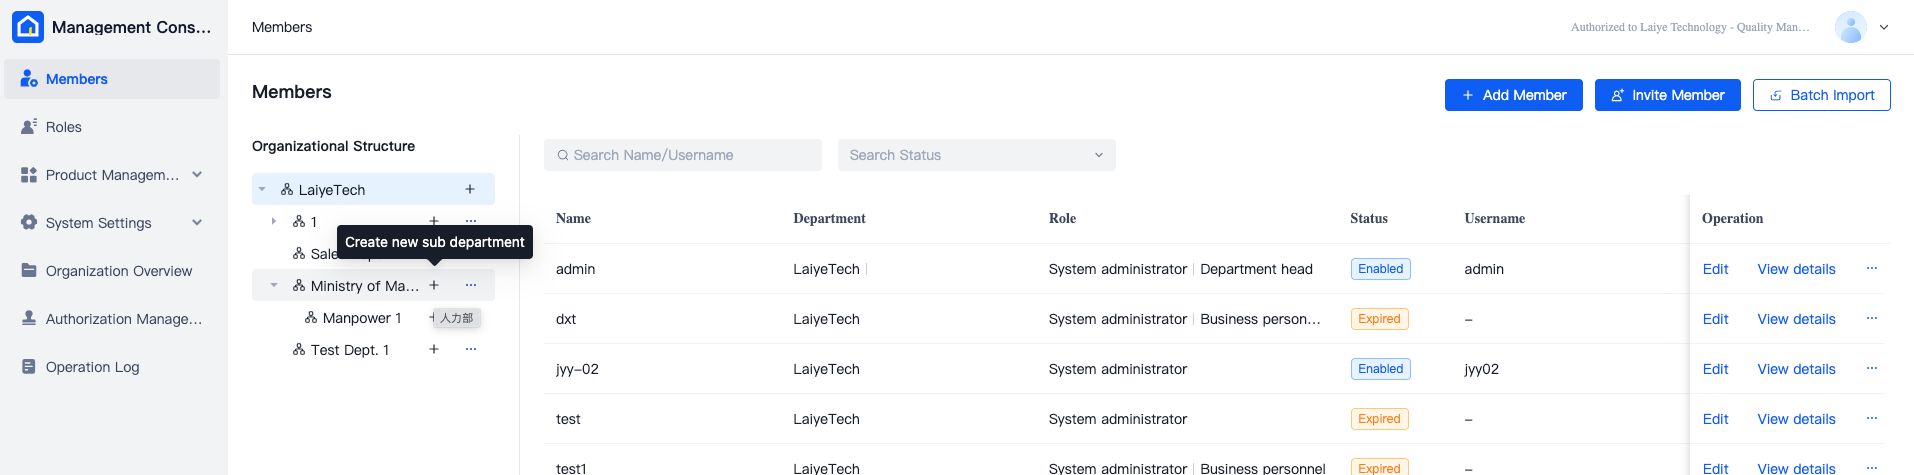
- Click the "+" button next to "Create Sub-department" to add a new sub-department under the current department.
- Click the "More" button and select "Add Sibling Department" to add a new department at the same level as the current department.
- Click the "More" button and select "Rename" to rename the current department.
- Click the "More" button and select "Delete" to delete the current department. Note that before deleting a department, you must transfer or remove the members under it; otherwise, the deletion cannot be completed.
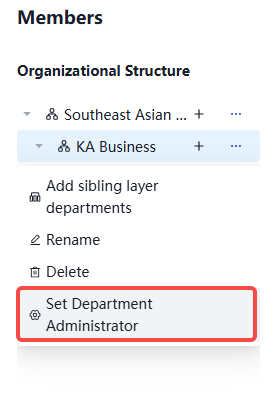
- Only after the primary administrator under the current tenant logs in to the [Management Console], they can perform the [Set Department Administrator] operation on each organizational node (department) in [Member Management - Organizational Structure].
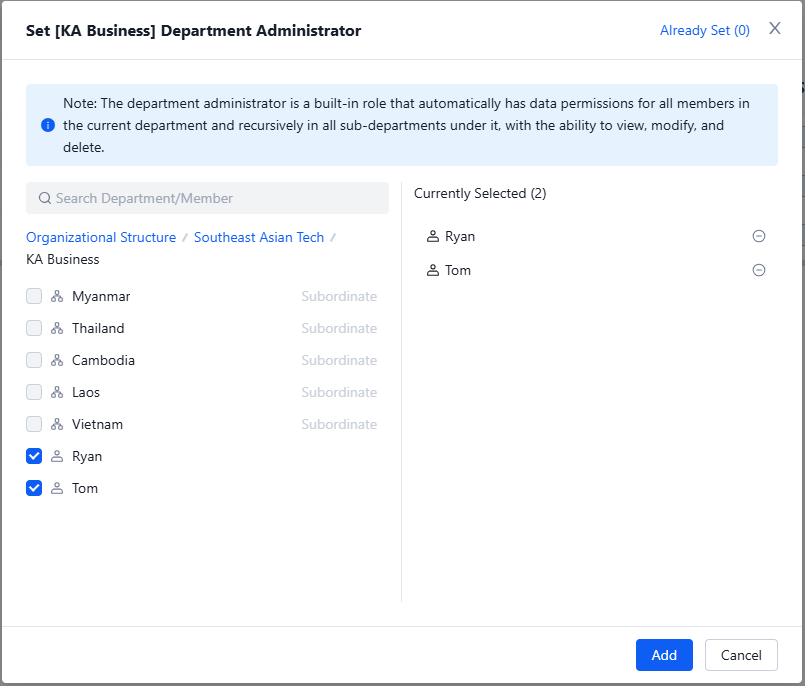
The primary administrator under the current tenant can set (or remove) multiple members as department administrators for a certain organizational level (department). Department administrators are built-in roles, which not only include data permissions for all members under the current department, but also include data permissions for all members under the current department's subordinate recursive sub-departments, with the capabilities of viewing, editing, and deleting operations.
Members who have been set as department administrators, when accessing [Automation Commander], can operate on data within the scope of the union under the authorized menu permissions, including relevant data entities created by themselves, those for which they have been actively granted collaborator status by other members, and those created by all members under the department and its recursively subordinate departments to which they have been granted access, as detailed below:
- Process worker: Unattended, Real-time Monitoring
- Data assets: parameters, queues, files, credentials
- Process: Process List
- Triggers: Time Trigger, Queue Trigger
- Tasks: Task Template, Department Task
Member Search
Above the member list, you can perform a fuzzy search for members by name or username. Additionally, you can filter the member list by the statuses "Pending Join," "Enabled," and "Disabled."
Adding Members
Adding Members via Username and Password
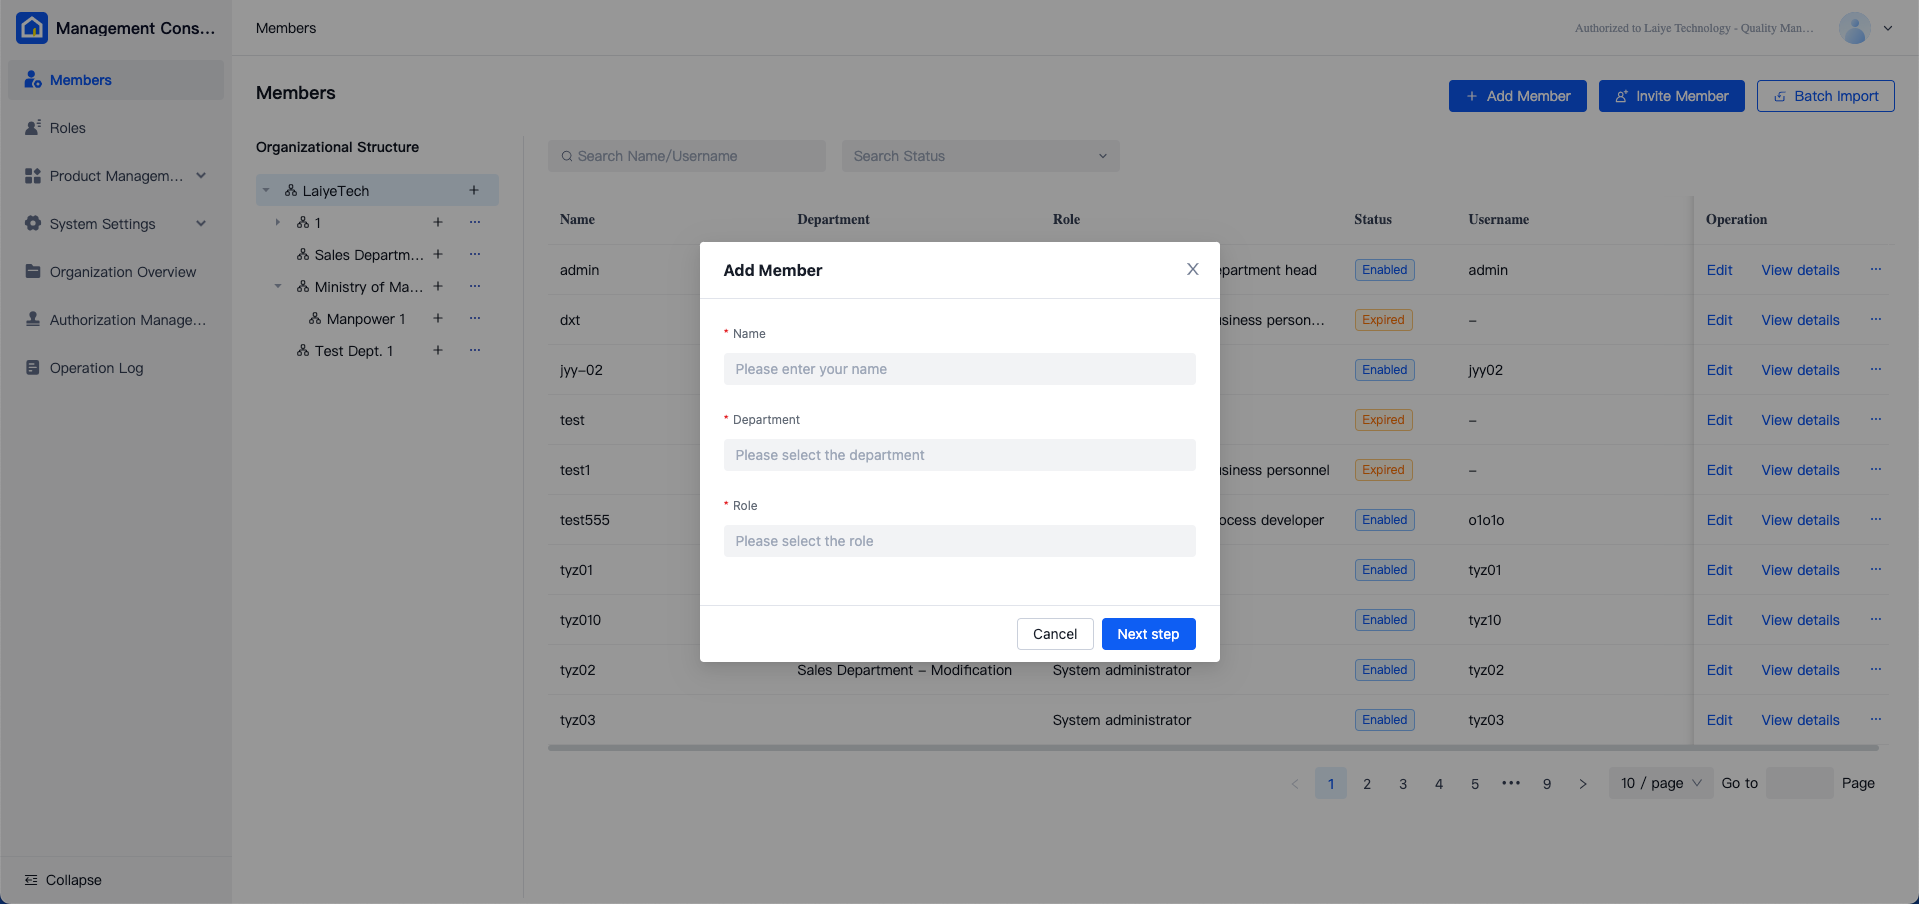
Click the "Add Member" button in the top-right corner of the page to initiate the member addition process. This process consists of two steps: confirming member information and sending member information.
In the first step, enter the member's "Name," select the "Department" and "Role," and then click "Next." A user can belong to multiple departments and have multiple roles, which can be achieved by making multiple selections.
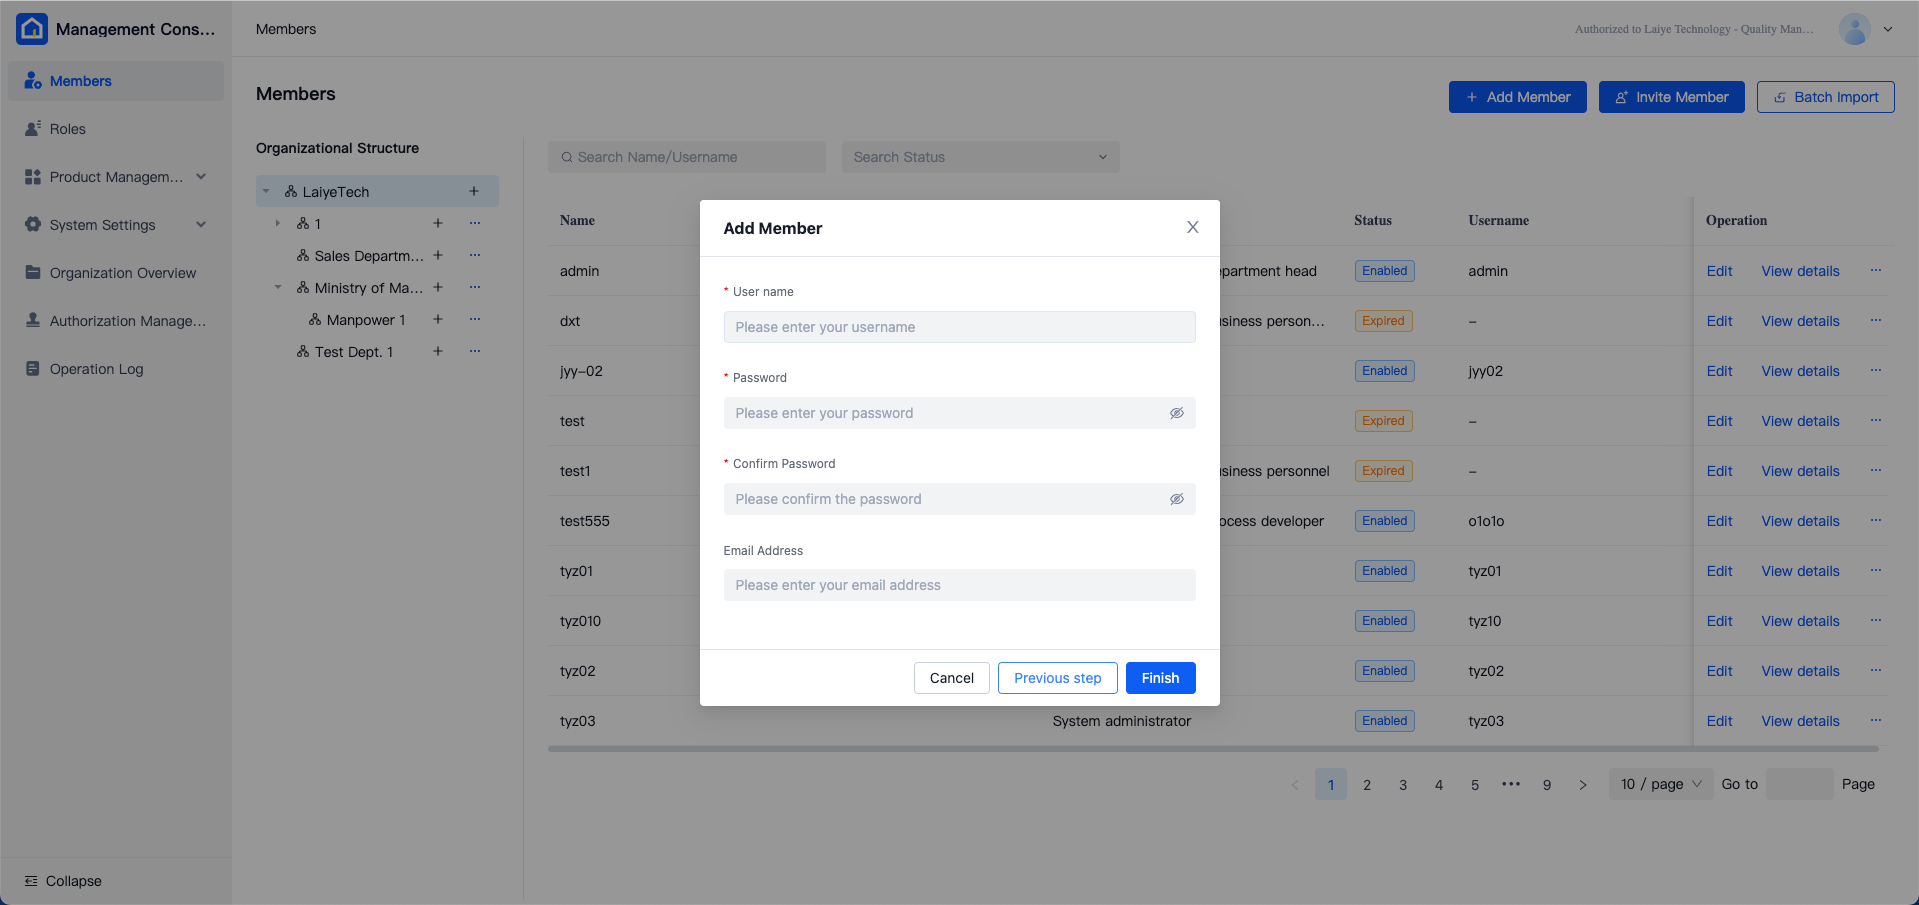
In the second step, you need to specify the member's "Username," "Password," and optional "Email." The email address is used to receive system notifications, such as task failures or authorization expirations. The email server must be configured in the "Operating Management Console" for the email to receive notifications. After filling out the form, click "Finish" to save and add the member.
Adding Members via Invitation
Click the "Invite Member" button in the top-right corner of the page to choose between "Manual Invitation" and "Email Invitation." The differences are as follows:
- Manual Invitation: After adding a member, copy the invitation link from the member list page and send it to the user. The user can open the link in a web browser to register an account.
- Email Invitation: After adding a member, the system automatically sends an invitation email to the member's email address. The user can register an account by clicking the registration link in the email.
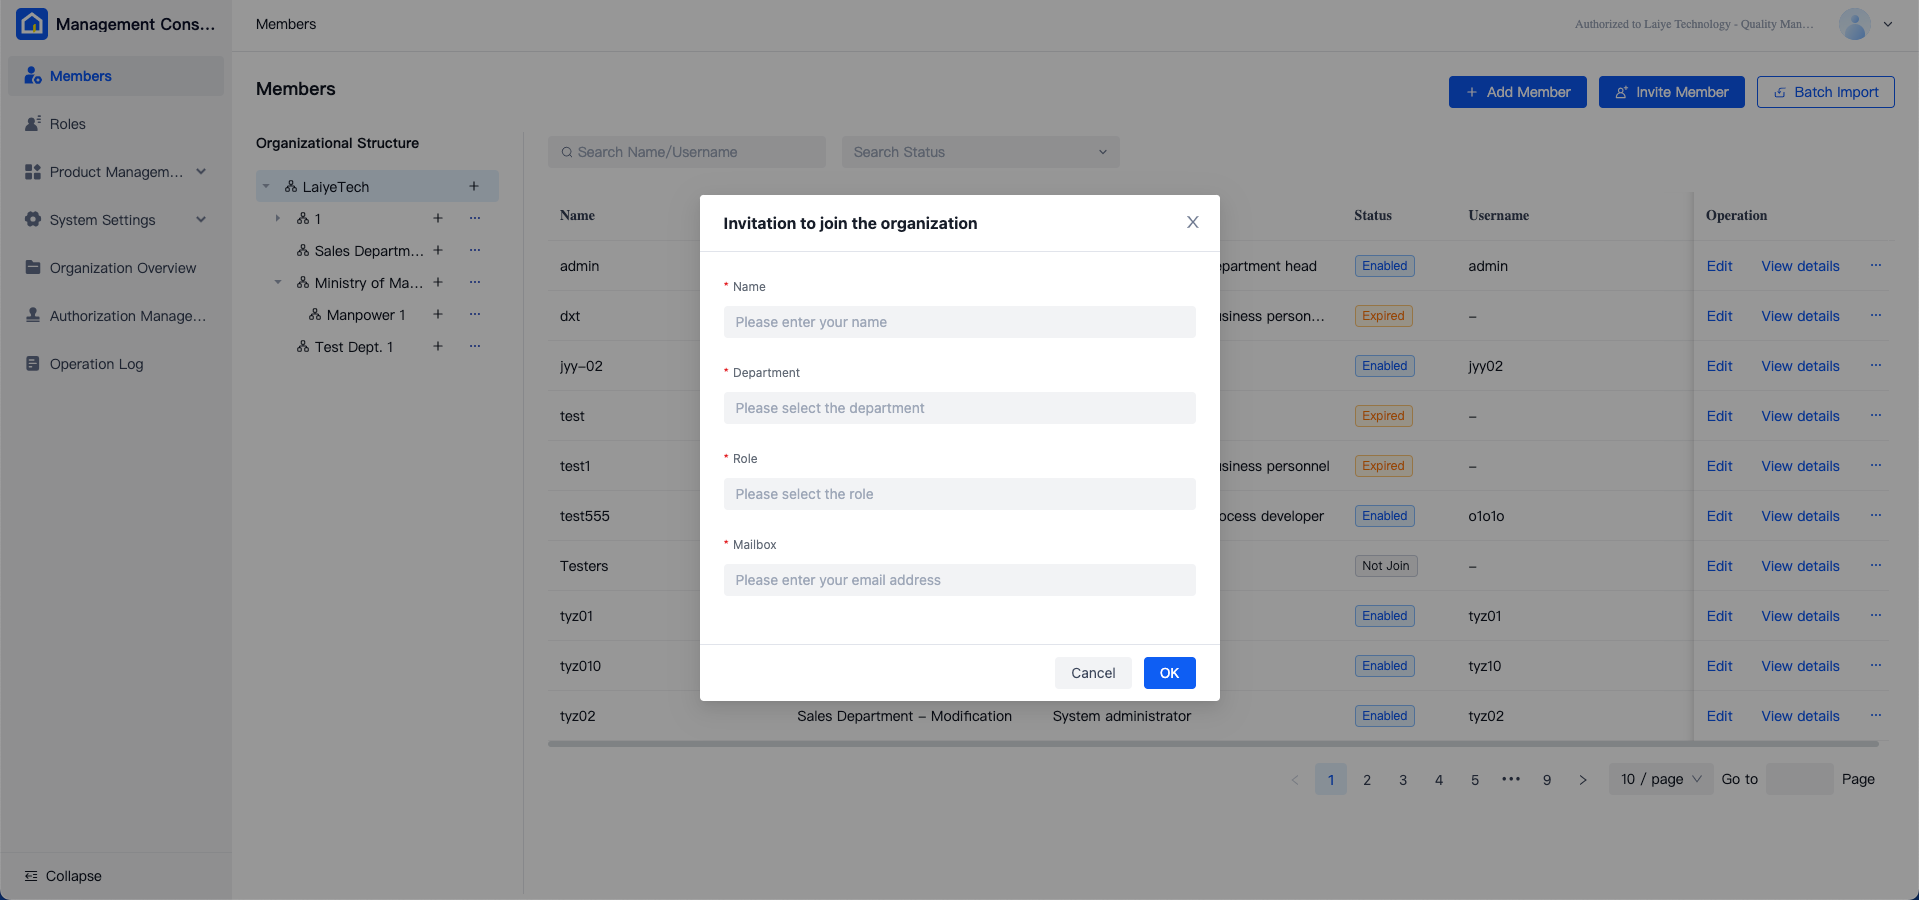
For "Manual Invitation," enter the member's "Name," select the "Department" and "Role," then click "Confirm." The system will automatically copy the invitation link to the clipboard, which can then be sent directly to the corresponding user.
Members invited through "Manual Invitation" will remain in the "Pending Join" status until they successfully register using the invitation link. Upon successful registration, their status will change to "Enabled." Note that the invitation link is valid for 3 days and must be re-generated after it expires.

For "Email Invitation," in addition to entering the member's "Name," "Department," and "Role," you must also provide the member's email address. After clicking "Confirm," the system will automatically send the invitation email.
Below is an example of a member invitation email:
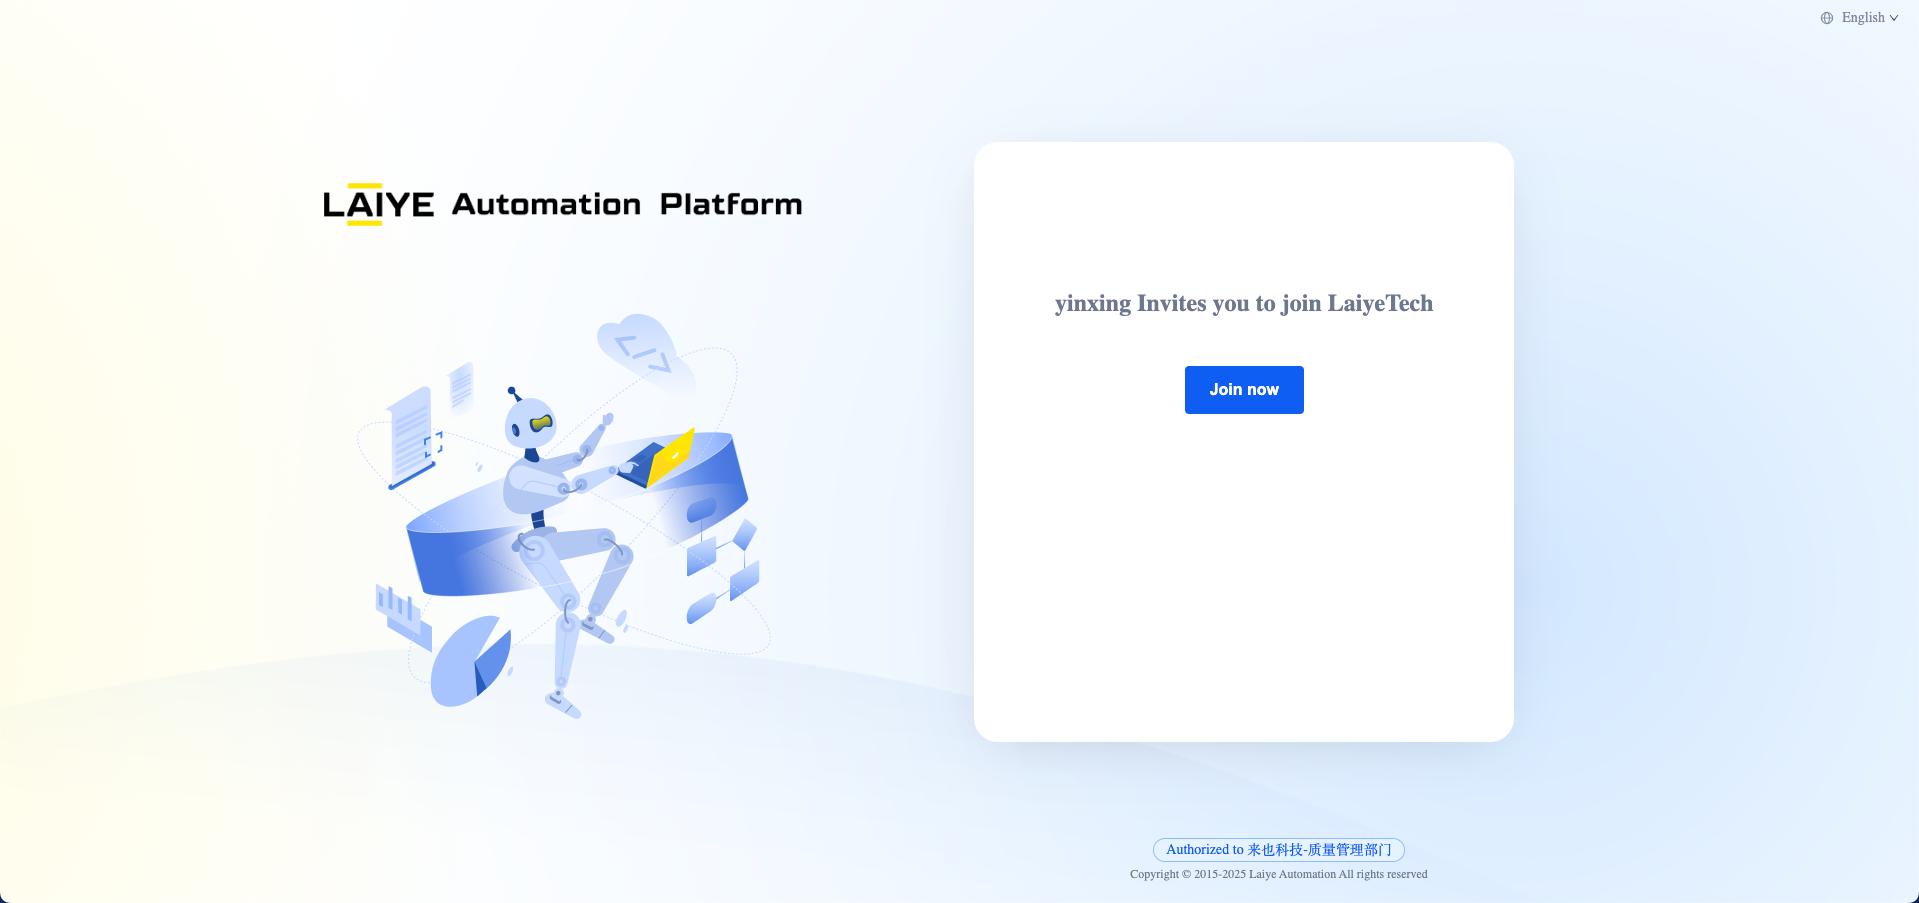
Joining an Organization via Invitation Link
When members open the invitation link, they will see the following prompt screen. Clicking "Join Now" will take them to the account registration/login screen. If they do not have an account, they can register and join the organization; if they already have an account, they can log in and join.
Batch Import
Click the "Batch Import" button, download the import template, fill in the member information as required, and upload the file to create members in bulk.
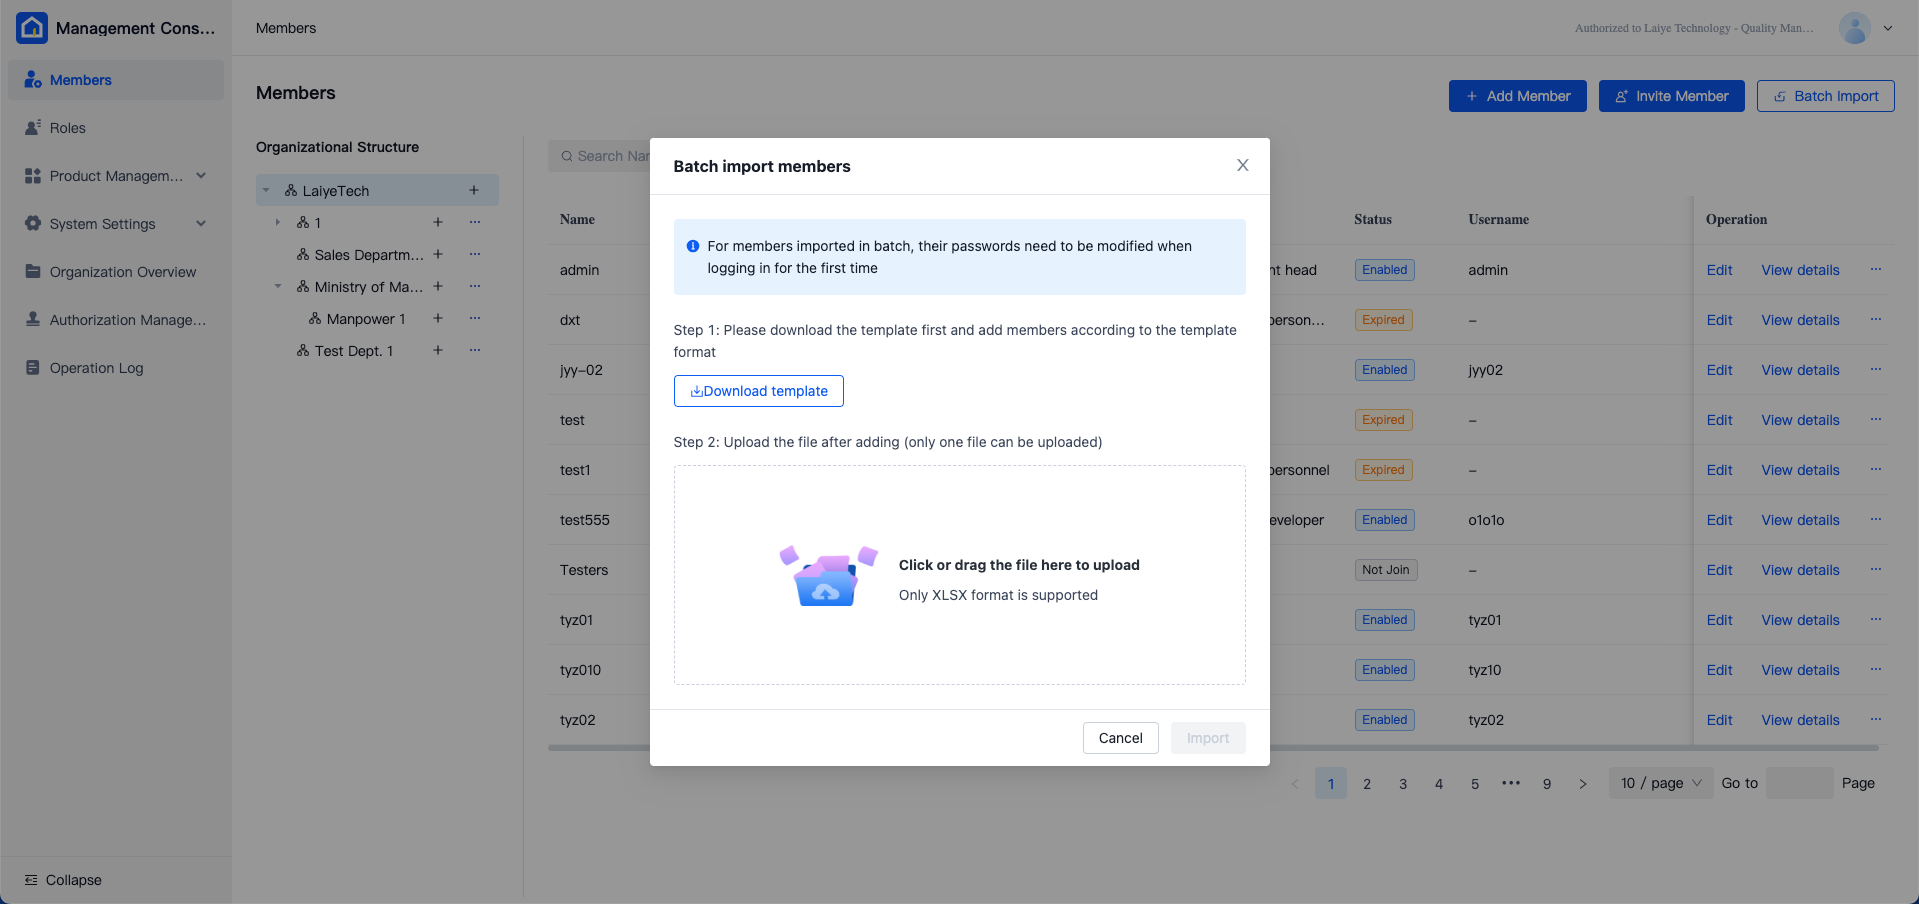
Below is an example of an import file (Excel file):
After importing the file, the system will display the import results.
If the import fails, click "Download Import Results" to download a file that shows the results and reasons for failure for all members. Adjust the import file according to the prompts and import it again.
Member Operations
For individual members, the following operations are supported: edit, view details, reset password, invite, remove, disable, and enable. These operations are accessible under the "Actions" column for each member.
The explanation for each operation is as follows:
Edit: Modify the member's name, organizational email, department, or role.
Note: After modifying the member's department or role, they need to re-login to Automation Creator/Attended Worker to avoid potential issues.
View Details: Display all the member's information in a drawer format, including name, organizational email, department, role, username, current status, activation time, last login time, creator, and invitation email.
Reset Password: Generate a password reset link that can be sent to the member. The member can use the link to set a new password. Note that the link is valid for 24 hours.
Invite/Re-invite: For members in the "Not Joined" status, click "Invite" to generate an invitation link. If a member's status is "Declined" or "Expired," indicating the invitation was declined or not clicked within the validity period, you can perform the "Re-invite" operation.
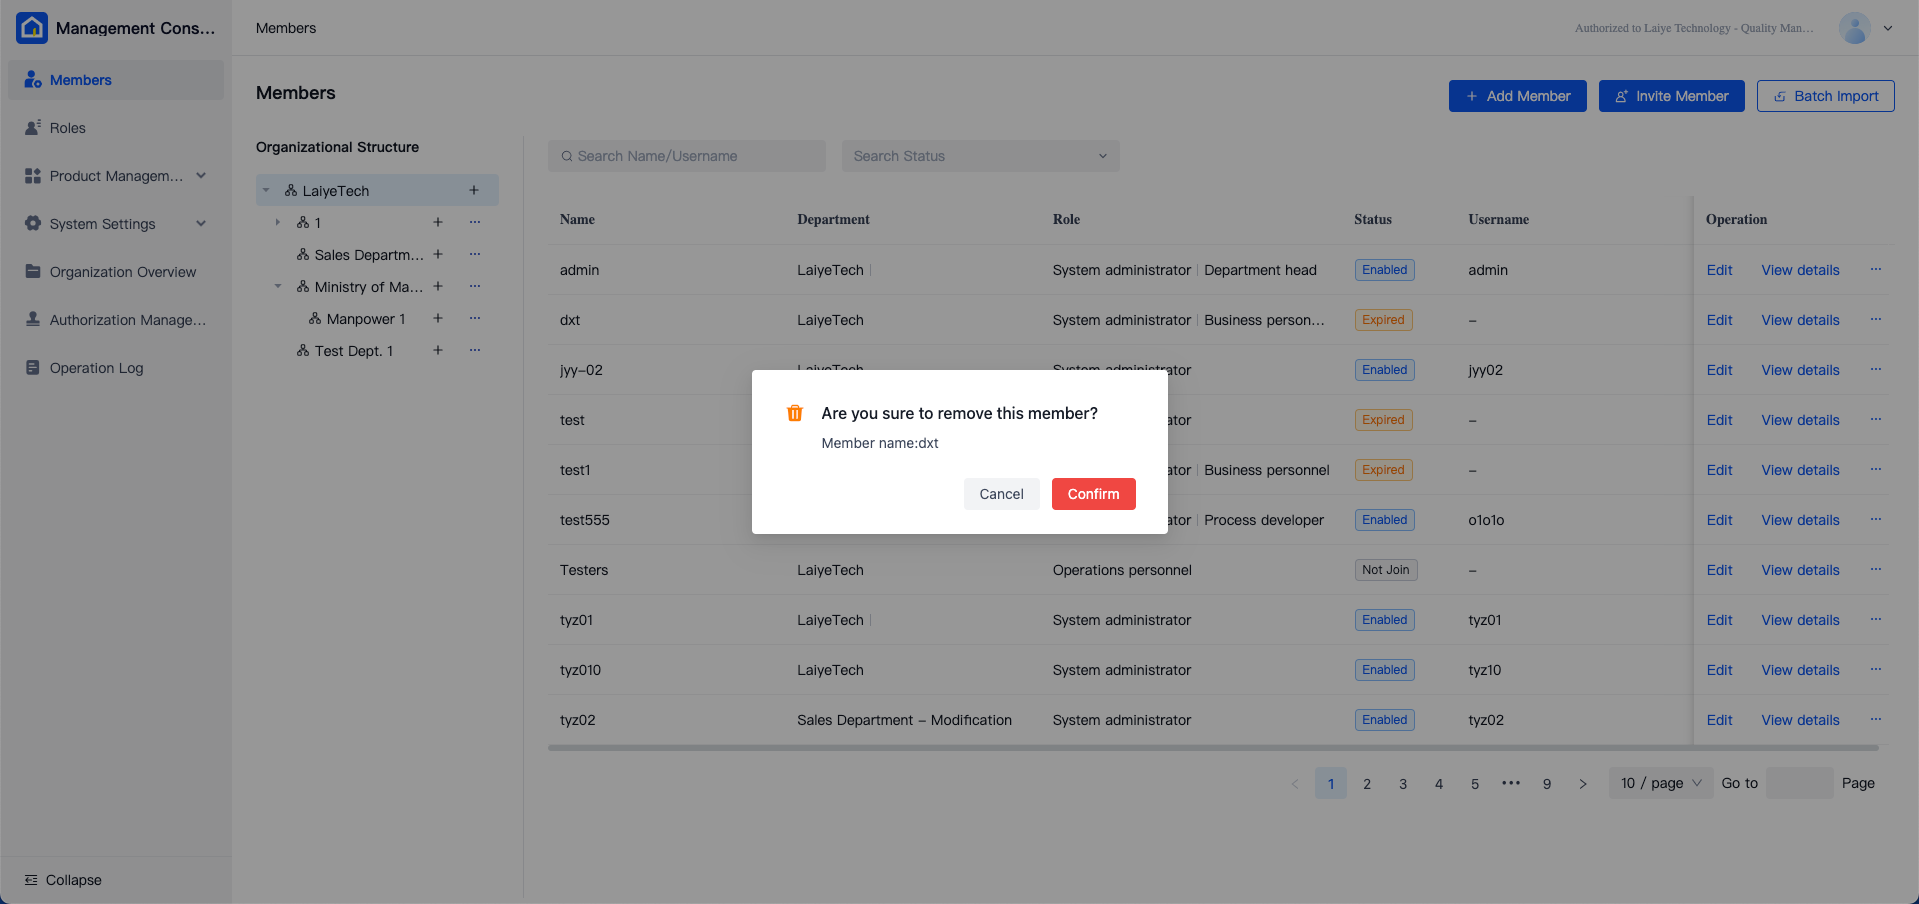
Remove: Remove the member from the organization, after which they will no longer have access to the organization. Note the following:
- If the member is in the "Not Joined" status, they can be removed directly.
- Before removing a member, their data must be transferred to another member.
- Removing a member does not delete their account; they can still log in to the platform but will not have access to the organization.
- Disable/Enable: Members are "Enabled" by default. Disabling a member changes their status to "Disabled," preventing access to the organization. Member data is retained and can be restored by enabling them.