Web Widget
This chapter will introduce: how to configure Web Widget channels.
How to configure Web Widget channels
Click "Config" to enter the configuration page.

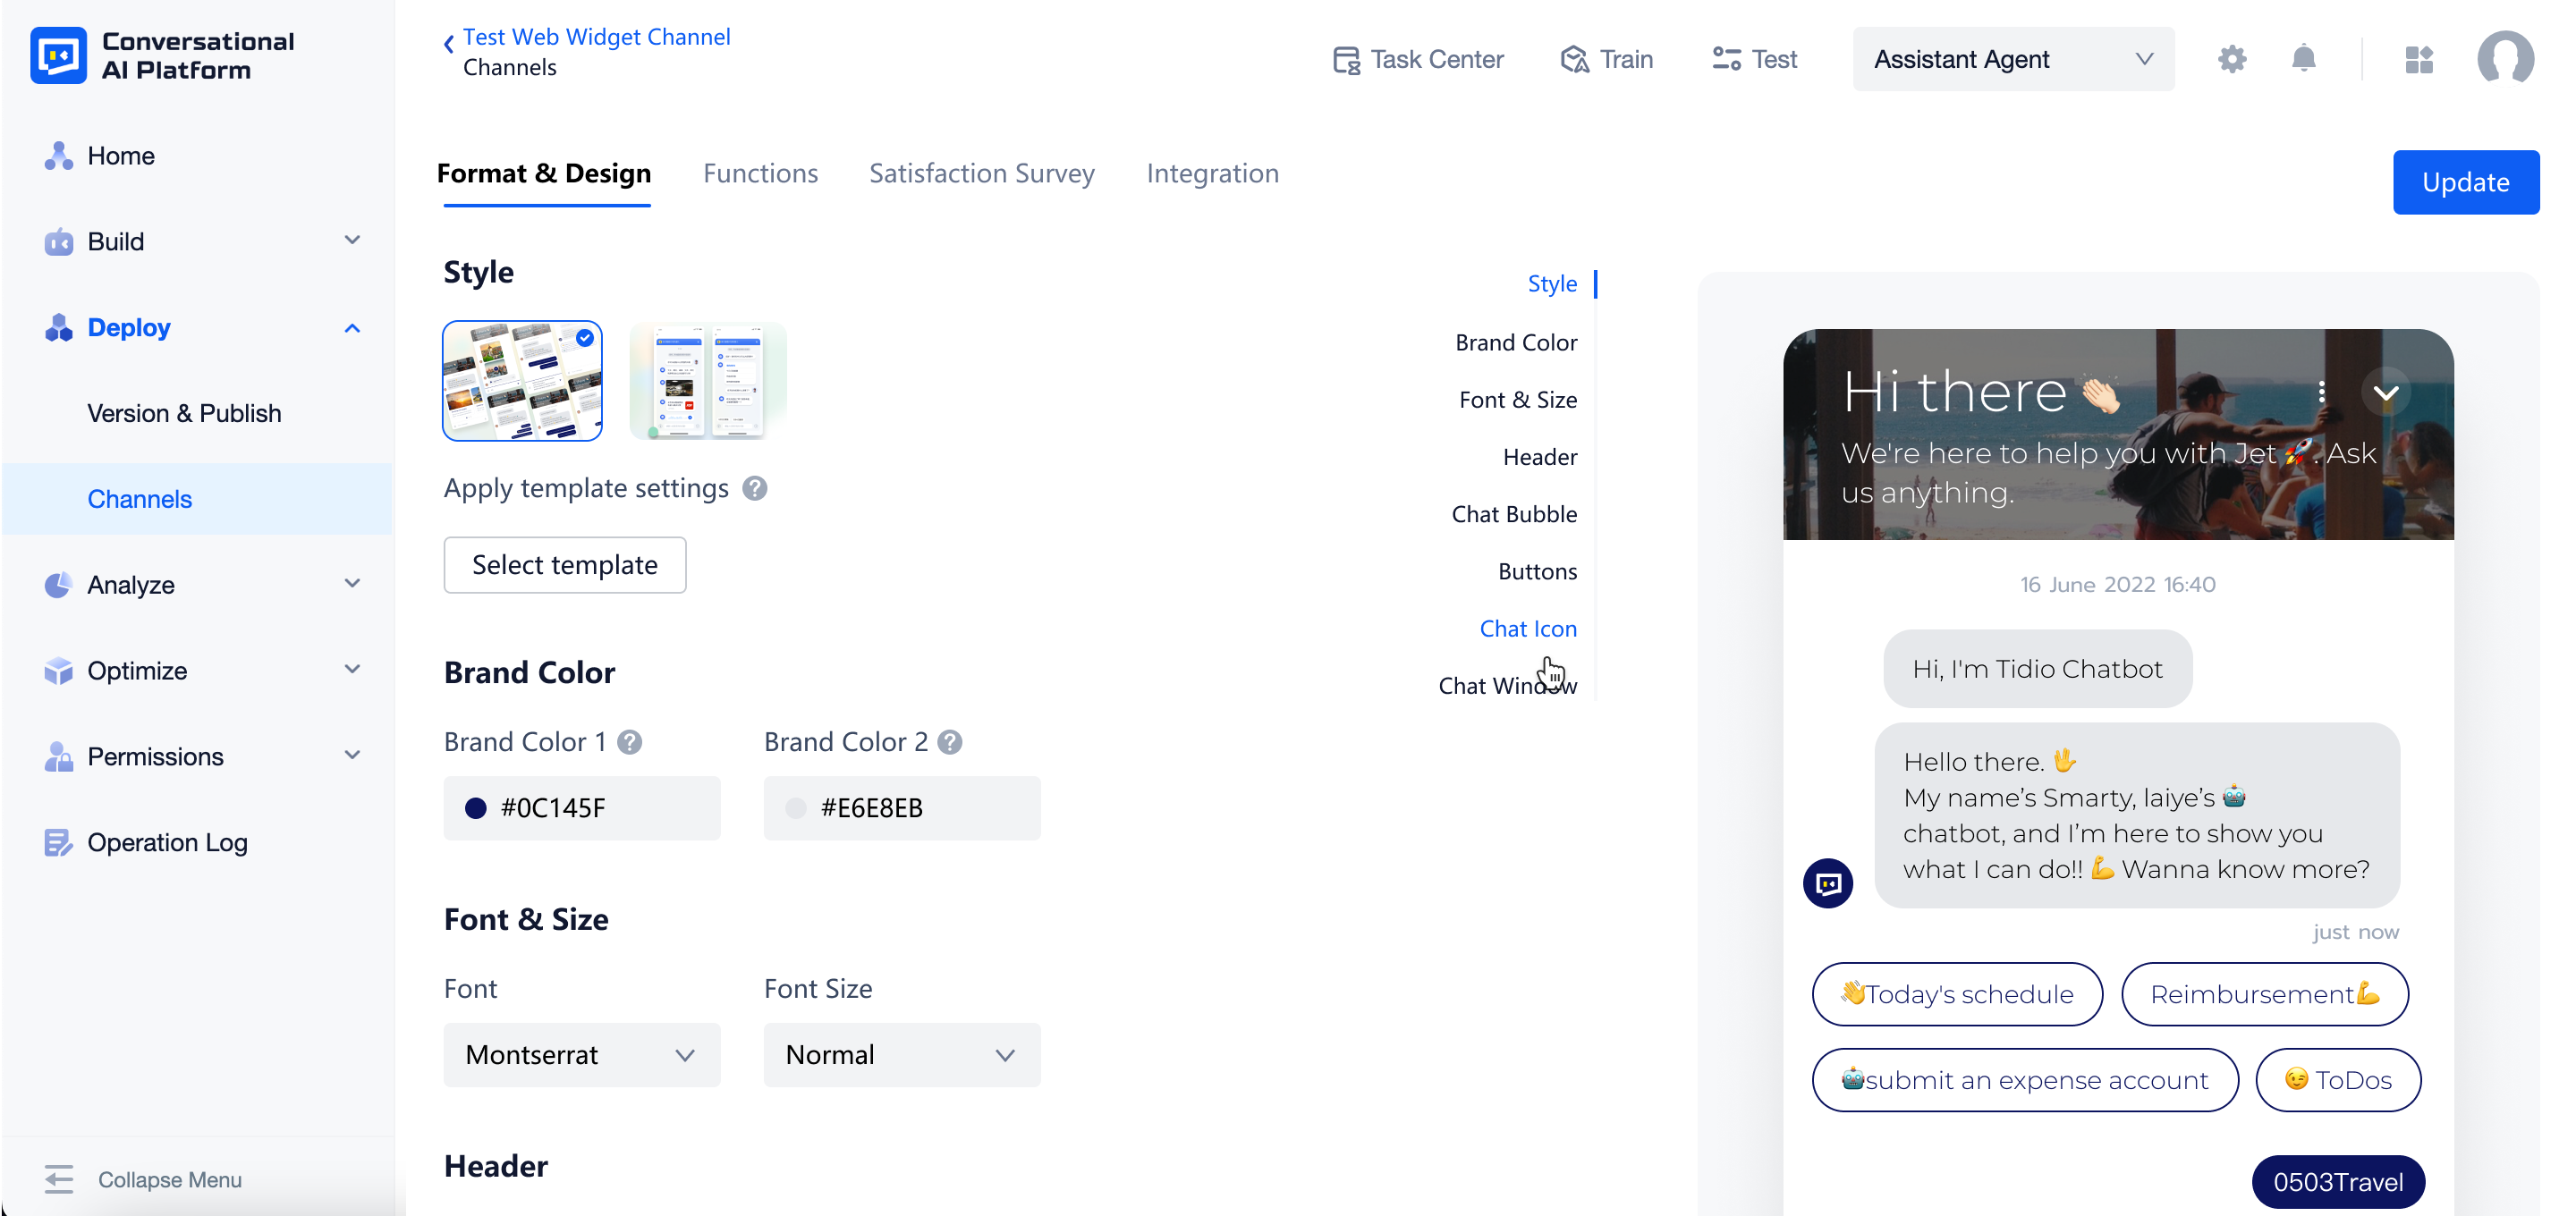
Format & Design
- Style Currently, the platform offers two preset styles for you to choose from.
- When creating channels, the platform will select one as the default style based on the language used by the agent. You can also change to other styles to better meet your needs.
- Apply template settings Currently, the platform offers three preset templates for each style.
- After choosing the style, you can select the templates of it and apply template settings to the channel. It can help you configure the items in a more convenient way.
- Apart from the preset templates, you can also save customized format settings as new templates. It may can you make a quick configuration in other channels.
note
- Styles can not be created, deleted or renamed.
- Preset templates can not be deleted or renamed
- The customized templates you created can be deleted or renamed.
Items that can be configured for now are:
| Section Name | Item Name | Descriptions |
|---|---|---|
| Brand Color | Brand Color 1 | Brand Color 1 will be applied to: agent avatar, chat icon, user bubble, send button, quick reply, relevant intent (both border and font), loading, input cursor |
| Brand Color 2 | Brand Color 2 will be applied to: agent bubble | |
| Font & Size | Font | Font setting will be applied to: all text in the agent |
| Font Size | Font size setting will be applied to: all text except from that of header | |
| Header | Title | Maximum 24 characters |
| Subtitle | Configurable for specific styles, maximum 100 characters | |
| Font Color | - | |
| Close Icon | - | |
| Logo | Configurable for specific styles | |
| Background Image | Configurable for specific styles | |
| Background Color | - | |
| Chat Bubble | User Avatar | - |
| User Bubble Font Color | - | |
| Agent Avatar | - | |
| Agent Bubble Font Color | - | |
| Buttons | Quick Reply Font Color | - |
| Relevant Intent Font Color | - | |
| Chat Icon | Icon | - |
| Icon Size | - | |
| Chat Window | Background | - |
| Placeholder | Maximum 24 characters |
Function
- General
- Chat History: When enabled, chat history will be shown when user opens chat window. Otherwise, there will be a blank window.
- Associated Input: When enabled, the four questions most relevant to user's input will be provided.
- Greetings
- Greeting Message: When enabled, answers of the skill related to the trigger intent will be sent as a greeting message.
- Trigger Intent: Currently, the intent needs you to configure manually. For the intent you want to set as a trigger, add
__INTERNAL_WELCOM_TEXT_MESSAGE__to "Keyword - Equal to".
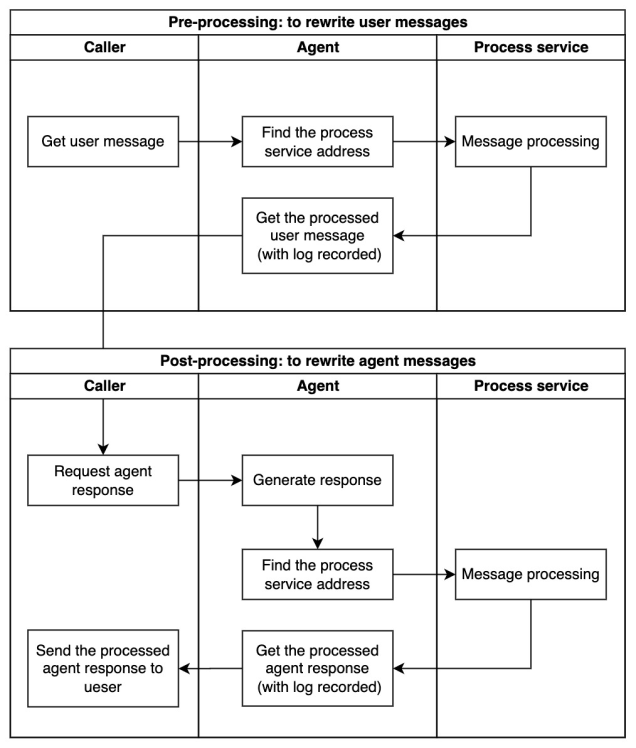
- Message Processing: In some scenarios, you may need to rewrite the user message or agent message. For example, customized responses based on user attributes, only recalling specific skills based on channels, or transferring to a live agent when the agent has sent fallback responses more than 3 times. In these cases, you can configure pre-processing service and(or) post-processing service to better meet your need.
- Pre-processing: to rewrite user messages.
- Post-processing: to rewrite agent messages.
caution
Process services need to be developed by callers. For more details, see Message Processing.
Satisfaction Survey
- Session Satisfaction Survey
- Rating: When enabled, the satisfaction survey will be sent to users at the end of a session.
- Rating: Message to guide users to rate.
- Add a follow-up question: When enabled, aside from giving feedback by simply choosing an emoji, users can also enter text messages to share further information.
- Thank you message: You can set thank you message for both positive feedback and negative feedback.
Integration
- Preview Link: The publish environment of this link is SKETCH. Only when you save the configuration settings will it be updated in test environment. You can click the link to interact with the agent in test environment.
Notes on the preview page and the "load more messages" use the same lanauge as agent's model language, and will not change with the system language.
- Integration: When creating a Web Widget channel, its integration code will be generated automatically. To integrate the channel, you only need to copy the code, fill in the service account ID and secret, and insert it in the HTML of every web page where you want to display the Widget. For more details, see Widget Developer Docs.
tip
To ensure the experience of users currently in the session, newly trained skills or newly published versions won't work in the preview link or product environment in real-time, but in the next session.
If you want a quick test of the newly trained skills in the preview link, you can send "exit" to trigger the Exit intent to end the session proactively.