Attended Worker
Note: Currently supports Windows operating system.The login and logout logic remains consistent in versions 6.5 - 6.7.
Login and Logout
After installing the Automation Worker client program, double-click the desktop shortcut icon "Automation Worker Enterprise Edition" to access the authorization login window.
The authorization methods are divided into "Attended-Node-locked License" and "Attended-Floating License." Specific login methods are detailed below.
Attended-Node-locked License
Prerequisites: A CDKEY must first be purchased through business channels, and it is not compatible with Automation Commander.
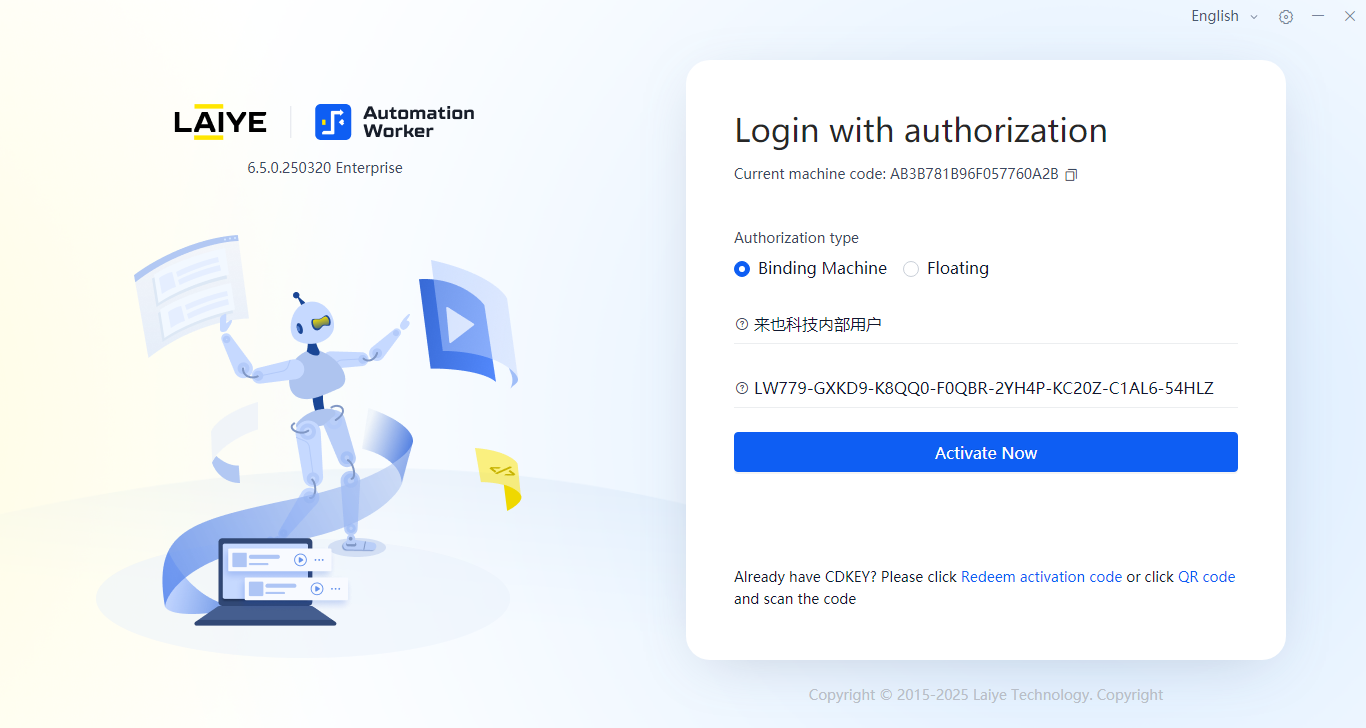
This authorization method for Automation Worker is suitable for offline standalone usage scenarios and is often used in conjunction with Automation Creator.
Redeem Activation Code
The official CDKey grants access to retrieve or query the authorized enterprise name and activation code on the redemption page. In intranet environments, you can scan the QR code with a mobile phone to redeem.
When connected to the internet, you can click "Redeem Activation Code" to navigate to the redemption page, as shown below. Enter the CDKey to obtain the authorized enterprise name and activation code.

Verification Code Validation
If more than three months have passed since the last authorized login and the authorization expiration date exceeds one year, a verification code must be entered after inputting the authorized enterprise name and activation code to ensure the activation code's security.
- For intranet environments, scan the QR code with a mobile phone to open the verification code retrieval page, as shown below. Enter the activation code and click "Get Verification Code" to view the code. Note that the code is only valid for the current day.
- When connected to the internet, you can click "Redeem Activation Code" to navigate to the verification code retrieval page, as shown below. Enter the activation code and click "Get Verification Code" to view the code. Note that the code is only valid for the current day.
Activate Immediately
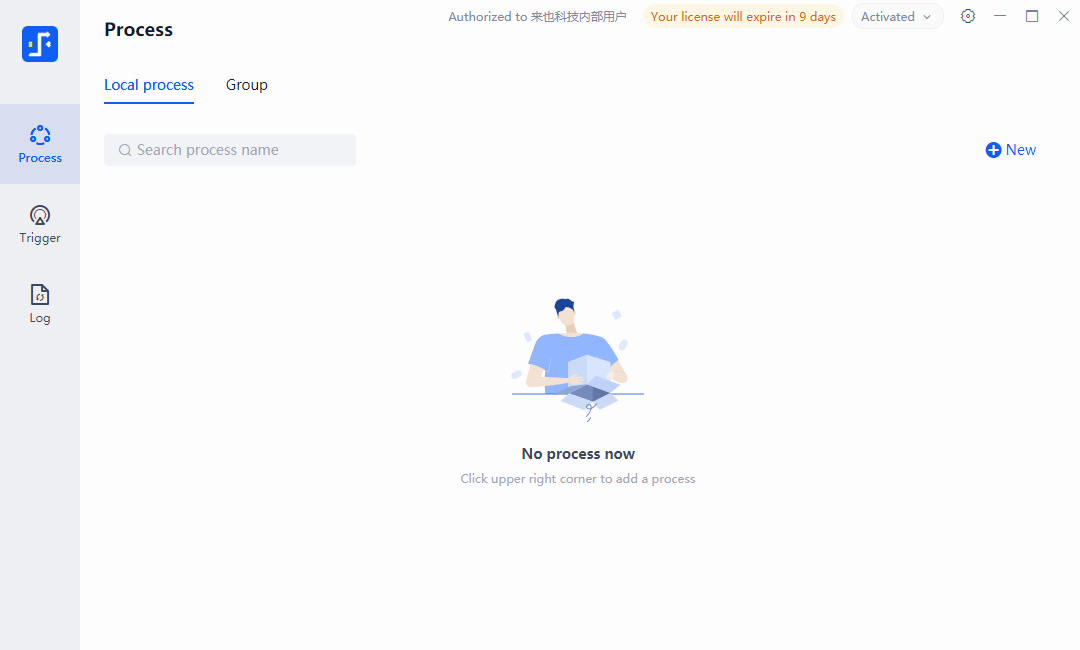
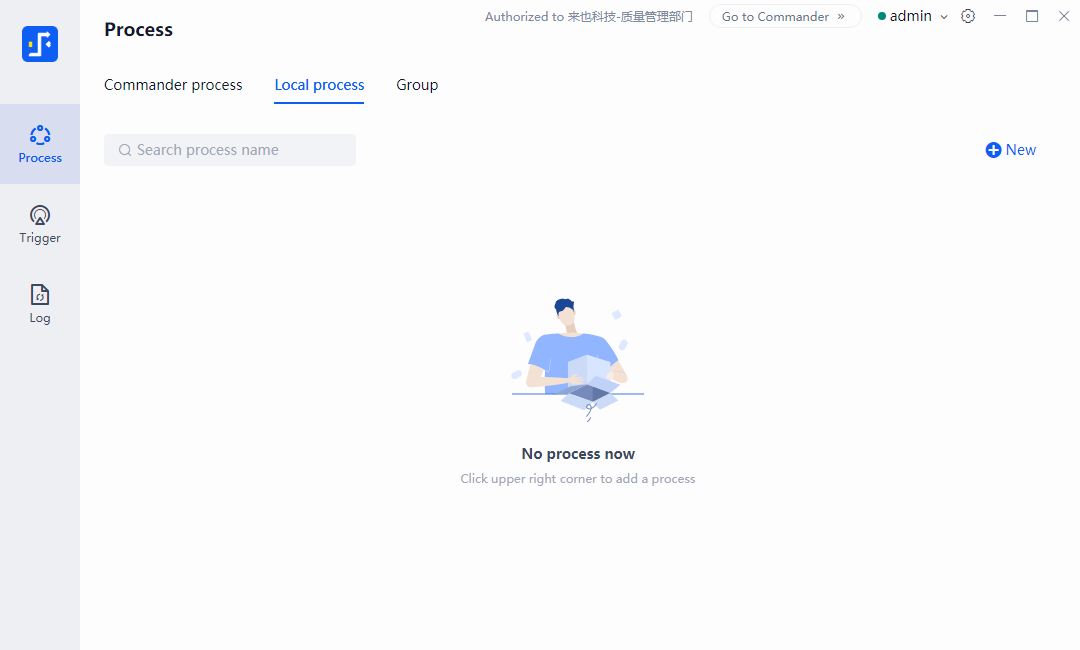
Enter the "Enterprise Name" and "Activation Code" obtained from the redemption page, then click the "Activate Immediately" button to access the main interface. The default display shows the "Process" and "Local Process" lists in the left menu.
If the enterprise name or activation code information is incorrect or the activation code has expired, activation will be blocked.
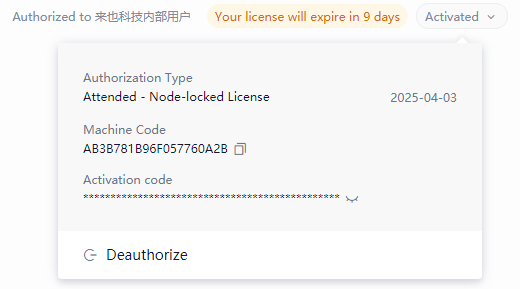
Exit Authorization
There are two ways to exit the current authorization:
- First, click the "Activated" label in the top-right corner of the main interface, then click the "Exit Authorization" button in the activation information panel to complete the exit.
Second, go to "Settings > Authorization" and click the "Exit Authorization" button to complete the exit.
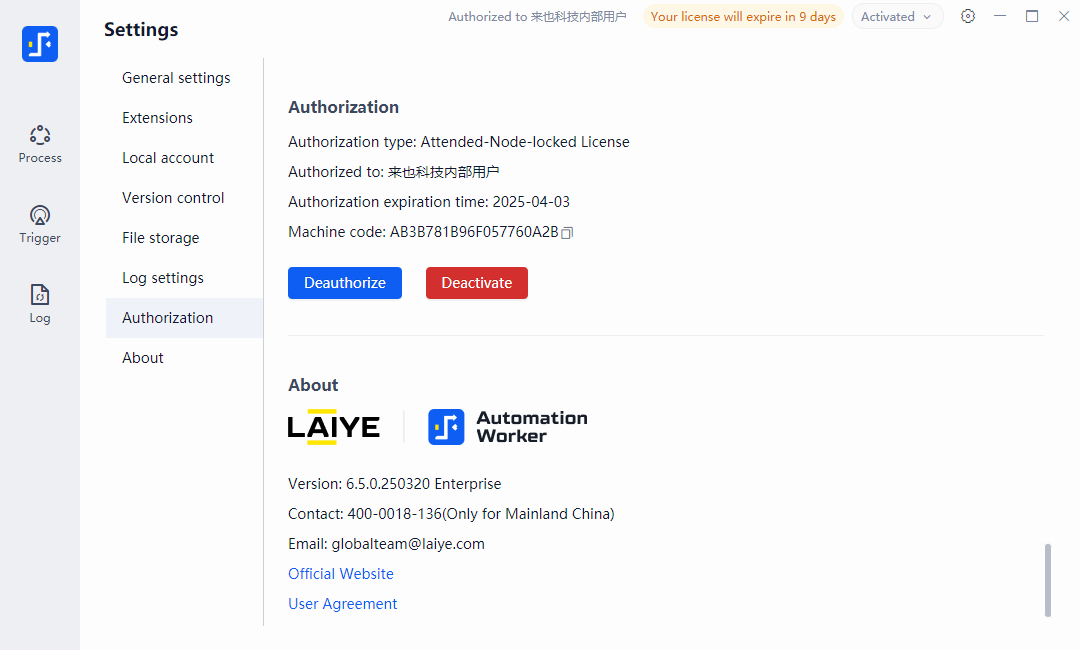
Note: The next activation may trigger verification code validation (if more than three months have passed since the last authorized login and the authorization expiration date exceeds one year).
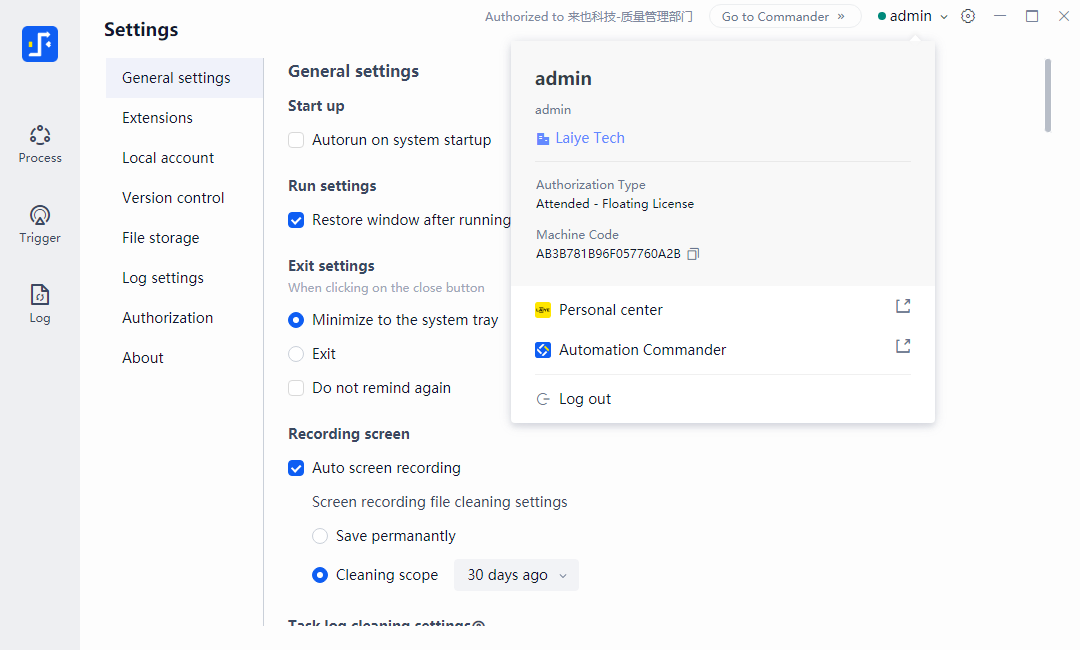
Attended-Floating License
This authorization method for Automation Worker is designed for use with Automation Commander, allowing users to run automation processes on multiple machines using the same username/password.
Prerequisites:
- Obtain the User Center address provided during Automation Commander deployment, typically: http://[Deployment IP Address]:8084.
- Obtain an authorized "Username" and "Password" or use the administrator account (admin).
- Ensure the user’s tenant has been allocated sufficient "Automation Worker-Attended-Floating License" capacity (greater than or equal to 1).
Notes:
- Prerequisite: Add members via "Unified Management Console > Member Management > Add Member" and ensure they are granted the "Login Floating License Automation Worker" permission; otherwise, "Attended-Floating License" authorization will fail.
- If you receive the message "Worker connection count exceeds authorization limit," it means the current number of "Attended-Floating License" Automation Workers has reached the maximum authorization limit.
- Upon successful authorization, Automation Worker automatically sends the client’s version number, machine code, last connection time, and IP address to Automation Commander.
- If the user's password, role, or department is edited in Automation Commander, Automation Worker will return to the "Authorization Login" page, requiring reauthorization.
- If the User Center address uses "HTTP" or "HTTPS," include the prefix "http://" or "https://" when entering the address.
Connect Immediately
- Enter the correct User Center address and click "Connect Immediately." If the address is invalid, further actions cannot proceed.
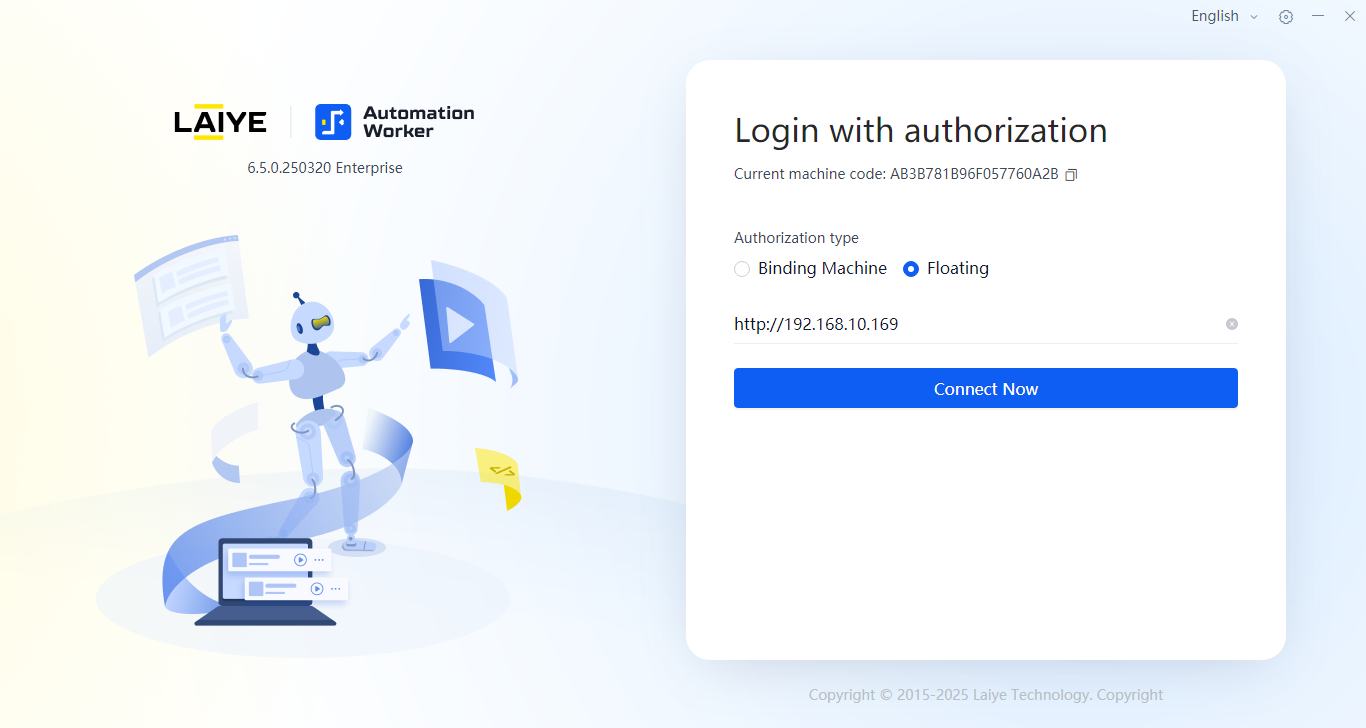
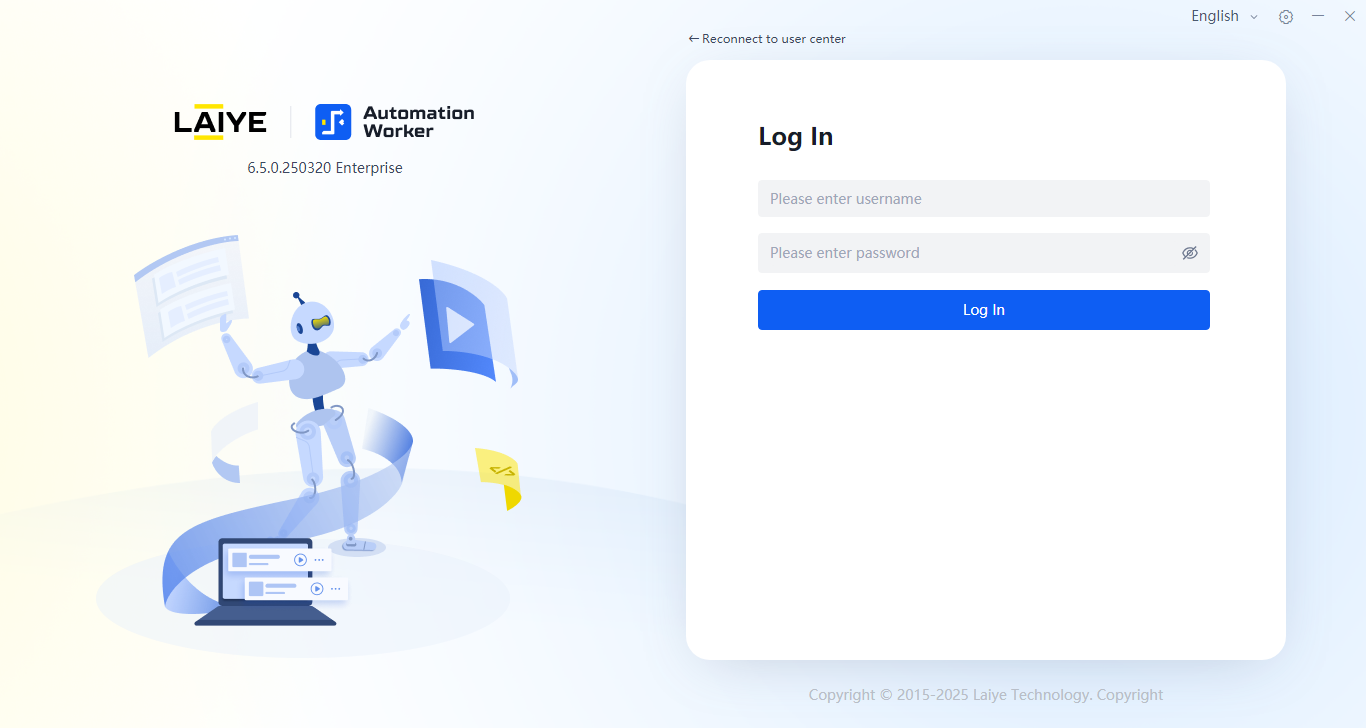
After a successful connection to the User Center, continue by entering the username and password to log in.
- If there is only one tenant, you will directly access the main interface. If multiple tenants exist, select one and click "Enter Organization" to proceed to the main interface.
The main interface includes a left menu area, list area, detail area, and top status bar. By default, the "Process" menu and "Automation Commander Process" list are displayed.
Check Disk Space for Recording Before Running a Process
Available starting from version 6.3
When running a process in Automation Worker (Attended), if the available disk space for storing recording files is less than 500MB, a confirmation prompt will appear. Clicking "Continue Running" confirms the choice to proceed without recording, while clicking "Cancel and Open Disk" cancels the operation and opens the recording storage directory.
Enable Infinite Retry Connection Mechanism by Default
Available starting from version 6.3
The infinite retry connection mechanism is enabled by default. This allows Automation Worker to automatically reconnect to Automation Commander after a network or server (Commander) issue is resolved, preventing automatic logout and ensuring recovery triggers are maintained.
Notes:
- During reconnection attempts, operations like "Run" or "Run Continuously" will fail, displaying "Network Connection Error." Processes already running may fail due to network issues. Triggered processes will directly fail.
- By default, enabling the infinite retry connection mechanism affects the following scenarios:
- If the same user logs in on another machine, the first machine remains on the main interface in a state of infinite reconnection. Users can manually exit.
- If the product authorization expires or the administrator reduces the tenant's authorization capacity, the system will remain in a reconnection state, competing for authorization. Users can manually exit.
- Changes to user information, disabling by an administrator, password resets, tenant dissolution, or role changes will cause the system to stay in a reconnection state. Users can manually exit.
- You can disable the infinite retry connection mechanism manually. For example, in the default installation directory, open the file
C:\Program Files\Laiye Automation Enterprise\6.5.0.250320\config\worker\config.json, locate the "wsAlwaysRetry" configuration item under the "authorizer" level, set its value toFalse, and restart the program.
Logout
In the login information panel or "Settings > Authorization," click the "Logout" button to complete the logout process.
If the same username/password is used to log in on another machine via "Floating License," the Automation Worker on the current machine will automatically log out.
Network Proxy
💡 Network Proxy is a new feature introduced in version 6.2.0.
Automation Worker supports login via network proxy.
Click the "Network Settings" button in the top-right corner of the login window.
Enable "Use Proxy Server" to configure proxy settings. Select the correct proxy type (HTTP or TCP), enter the correct proxy address and port, and click "Test Connection." Once the connection is successful, restart the client to apply the proxy settings.
You can also set a whitelist for more granular control. By default, the whitelist is *, meaning the proxy settings apply to all network requests. To restrict requests, enter domain names or IP addresses (separated by semicolons) and use wildcard rules if needed, e.g., *laiye.com; 192.168..
Note: Once set, the proxy configuration applies to all clients on the current device, including Automation Creator, Attended Worker, and Unattended Worker. There’s no need to configure it again on other clients. If there are online clients during setup, close them before proceeding.
