Command module
The command module includes my collection module, Extension command module and ten official preset Category command modules (60+ modules in total, 500+ commands). The introduction of each module is as follows.
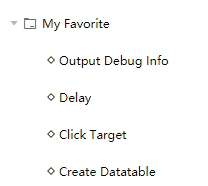
My collection
The current user's favorite commands make it easy to quickly find and select commands. In the command bar, you just need to right-click a command and click "add collection". For example, the "output debugging information" command added from the "basic commands" module.
Extension command
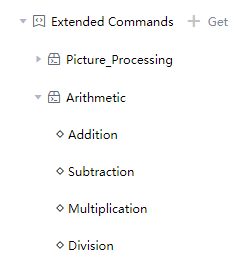
Assemble some functions implemented with Laiye RPA Creator into modules. If you want to reuse similar functions in the future, you don't need to rewrite them. Just use this module directly.
Such modules can be added to the command area for reuse as Extension commands.
An Extension command module can contain a number of commands, which can be used just like the prefabrication in Laiye RPA Creator. It supports direct drag and drop in the visual view, and can also be displayed in the form close to the natural language for easy understanding. It also supports installation, update and uninstall.
Prefabricated command module
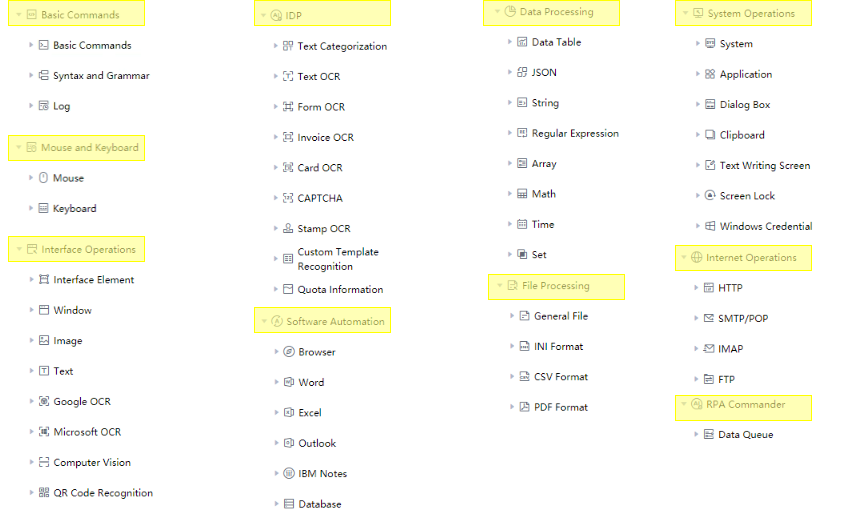
In the current laiye RPA creator 6.0 community version, the preset official command modules are mainly divided into ten categories, as shown in the figure below. 1. Basic commands 2. Mouse and keyboard 3. Interface operation 4. Mage AI 5. Software automation 6. Data processing 7. File processing 8. System operation 9. Network 10. Commander
go toCommand ManualFor more details.
The commands for customizing the dialog box are as follows.
Custom Dialog
Customize the dialog box. You can customize the HTML form interface that meets the business requirements. At run time, the form data filled in by the user will be returned in JSON format. In the command area of UiBot Creator, find "system operation", click expand to find "dialog box", and then click expand to find the custom dialog box command, including dialog box title, custom form, default value, timeout (seconds), timeout auto click, interrupt timeout click and other attributes. Click the icon button on the right side of the custom form.

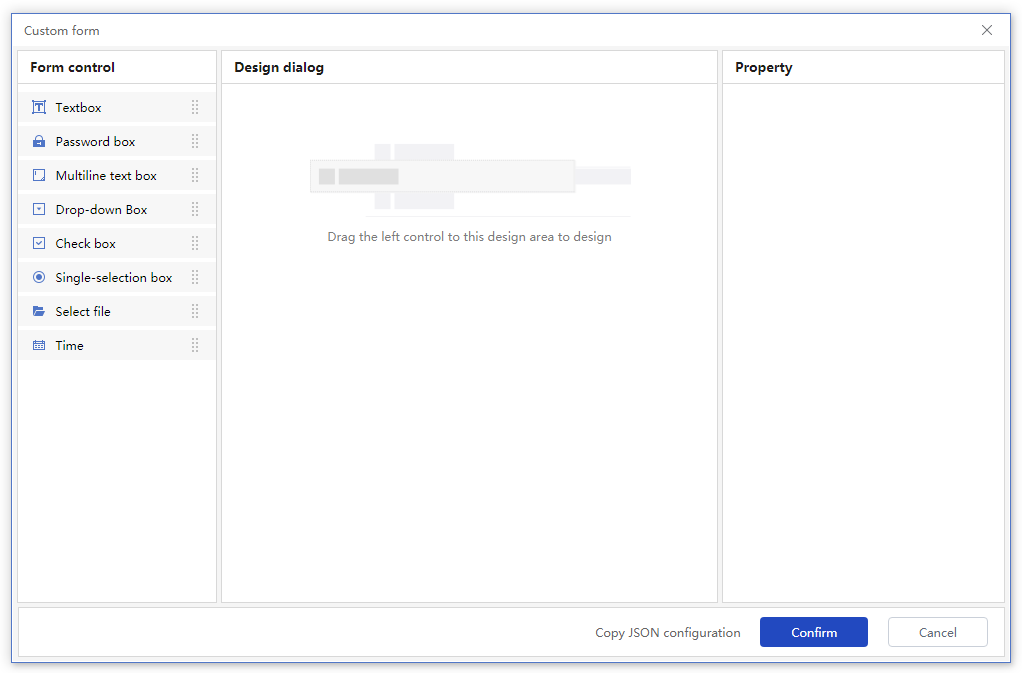
The edit page of the custom form is shown below.
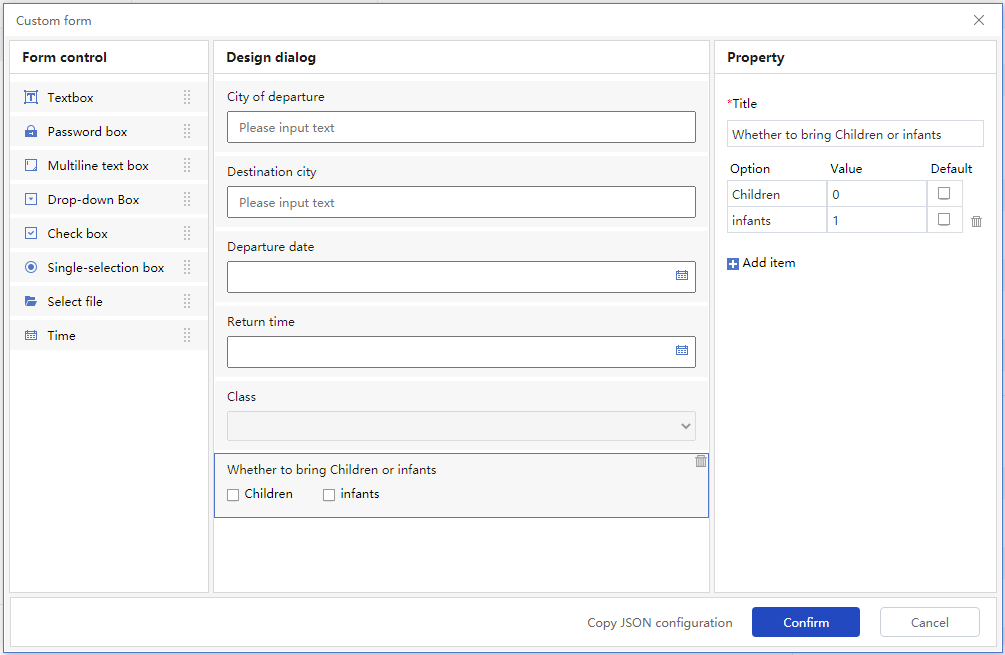
On the left is the form control bar, in the middle is the dialog design interface bar, and on the right is the attribute configuration bar of the form component. The main interaction mode is consistent with the Process editing interface. You can double-click or drag components to the design panel to generate design forms. Copying JSON configuration mainly copies the JSON results of the form configuration. Developers can set the default values of the form at runtime in the "default value" of the attribute in the JSON result format according to the JSON rules. For example: in multiple form filling scenarios, when the Process is running, the value filled in by the previous user can be set to the default value of the next custom form. We try to configure a case of air ticket booking, as shown in the figure below:
After clicking "OK", we run to view the open dialog box, as shown in the following figure:
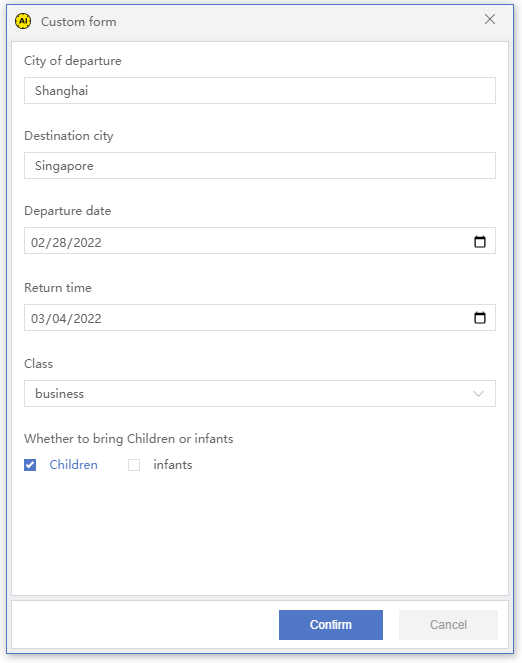
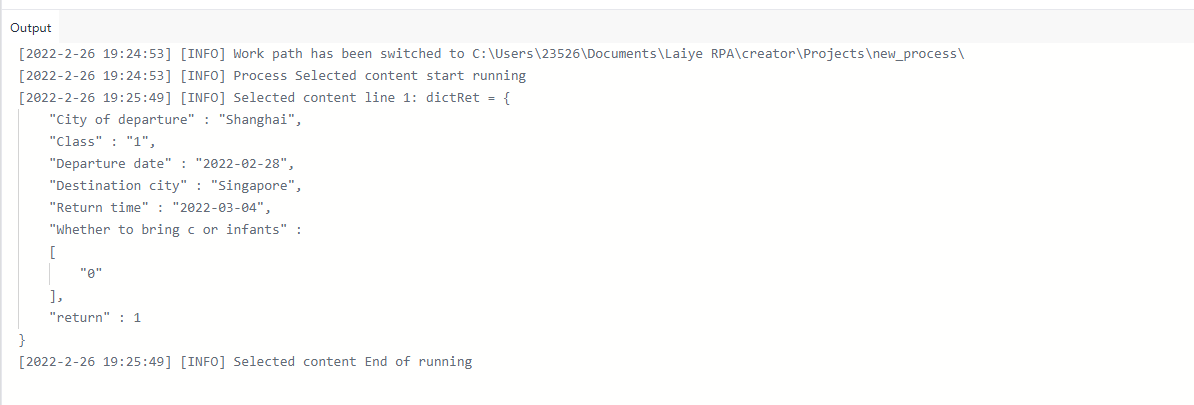
After filling in the form data above according to the user's needs, click "OK" to view the returned result data. Examples are as follows:
