Unattended
The Unattended menu is used to view and manage Worker of the "Unattended - Floating License" type within the current user's permission range.
Unattended - Worker grouping
Users can group unattended robot to manage permissions and schedule task uniformly. Non grouped Worker are suitable for handling specific process independently.
Grouping Worker : It is applicable to the collection of robot dealing with the same type of process. After grouping, users can select a group of Worker to run task when creating task or trigger. The system will schedule the currently idle Worker in this group to execute task, so as to maximize resource utilization.
Pay attention to the following when grouping robot :
- After the Worker is created, the robot can be moved in or out of the group. Note: After moving in or out of the group, the permissions of the Worker's collaborators will change, and the collaborator settings need to be updated in a timely manner.
- If robot are deployed on different operating systems (such as Windows, Kirin, Tongxin, etc.), the stable operation of process may be affected due to different operating system environments. Do not group robot under different operating systems into the same group.
Unattended - Worker
High density deployment supports running multiple Worker on a single device. Users can create multiple local accounts on the device and bind the Unattended Worker to these accounts. This method is applicable to scenarios where the number of device is limited and you want to maximize the utilization of device. There are two types of high-density desktops: local desktop and remote desktop.
- Local desktop : The real user desktop on the device supports calling USB KEY and other hardware on the device.
- Remote Desktop : Desktop launched through virtual services does not support hardware calls.
Note: A single device supports at most one local desktop.
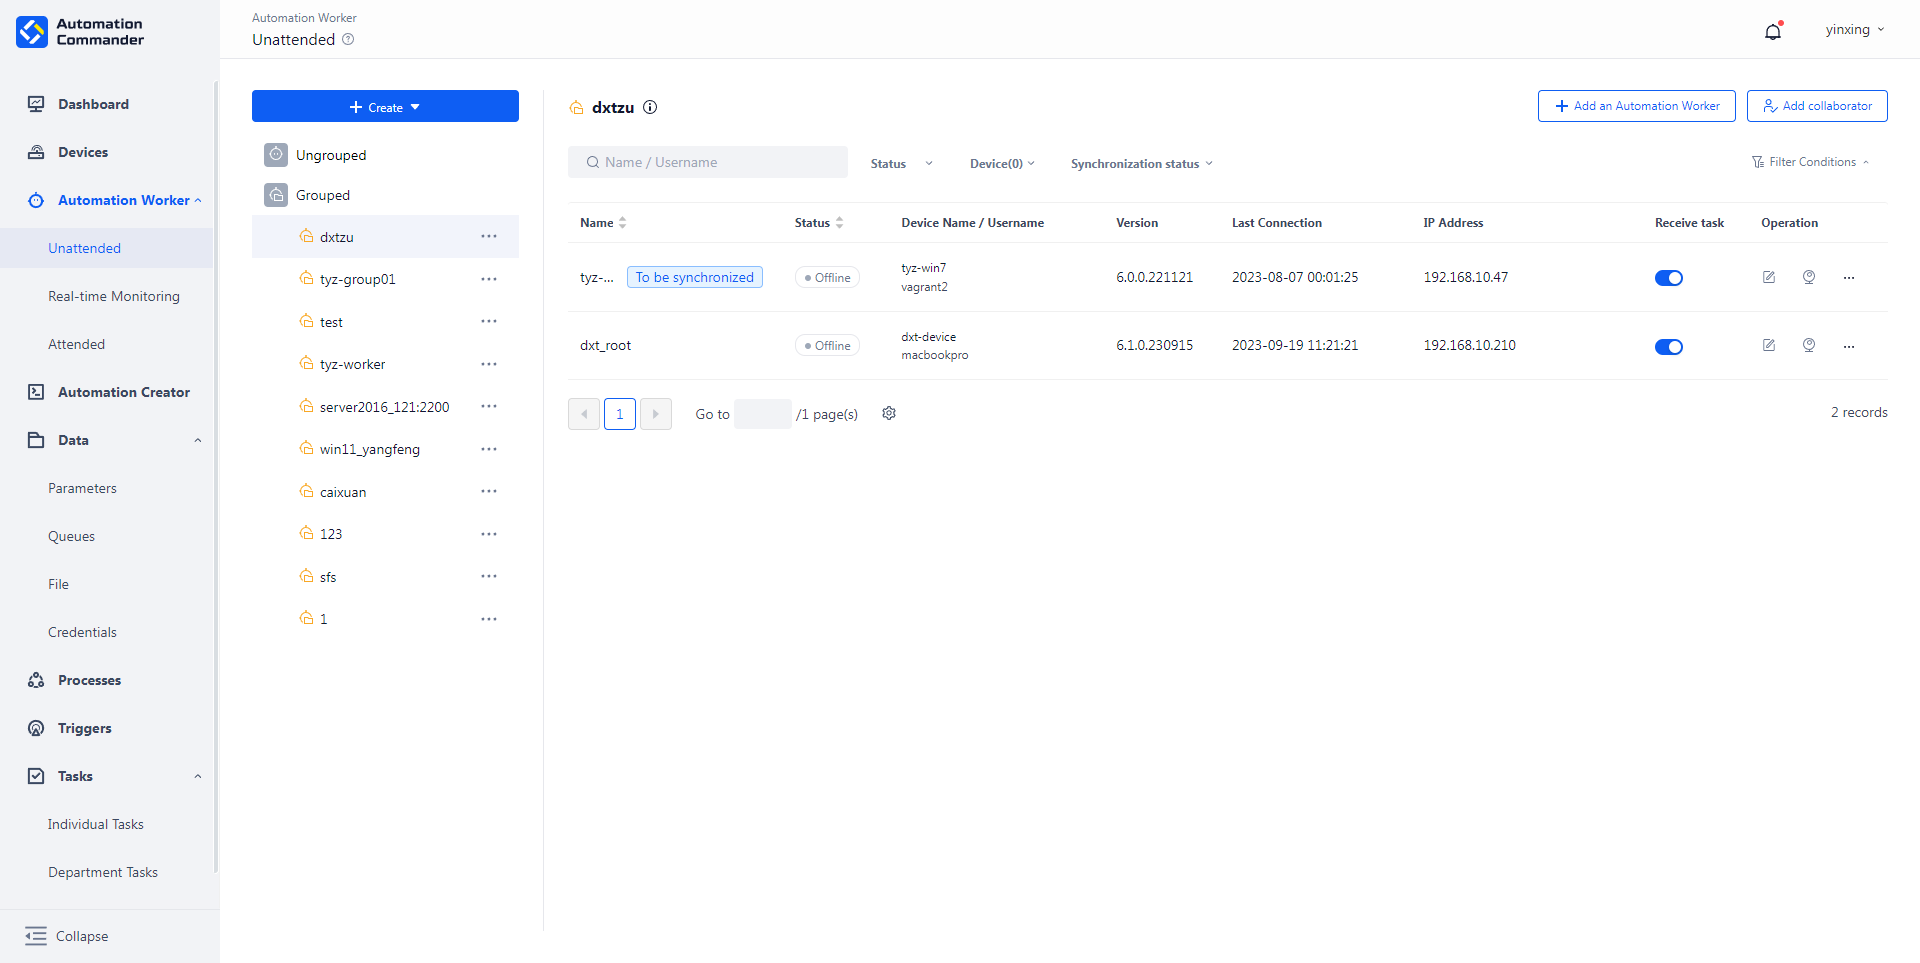
Query Unattended Worker
Users can query the status (online/offline), device name, Worker name or user name of the Worker.
- online : It indicates that the Worker is normally connected to the Commander.
- offline : It indicates that the connection between the Worker and the Commander is abnormal.
Receive tasks
In the Worker list, the user can set whether the Worker receives task. If the task receiving function is turned off, the Worker will no longer receive the task issued by the Commander.
New Unattended Worker
When creating a new Unattended Worker, you need to fill in the following information:
- name : Name of robot, used to distinguish different robot.
- Bind device : Select an existing device to bind.
- Desktop type : Select the desktop type of the Worker. A single device only supports one local desktop. If the current device already has a local desktop, the system will prompt the user to select a remote desktop. Remote desktop supports custom desktop resolution, and users can choose the appropriate resolution.
- Unlock screen when creating a new Worker : If you select the local desktop and enable this function, the screen will automatically unlock when the robot is created. To enable this function, you need to enter the user name and password of the device account.
- account : The account used by the robot must be consistent with the local account name on the device, otherwise the robot cannot go online.
- password : The login password for the account. If the account has not set a password, please leave it blank.
- Forcefully re crowding login when the account is already logged in : When the account has been logged in (such as manual login or remote tool login using this account), the robot may not be able to log in to this account. When this option is enabled, the robot will forcibly disconnect the existing connection to ensure the normal connection of the robot. Attention: Enabling this feature may cause other remote tools to be logged out and require logging back in to the remote tool.
After the creation is successful, please check whether the Worker is connected in the list. If the connection is not successful, please confirm whether the account and password used by the Worker are consistent with the account on the device.
Note: The number of new Worker cannot exceed the maximum number of process machines supported by the device, and one account password can only connect to one Worker.

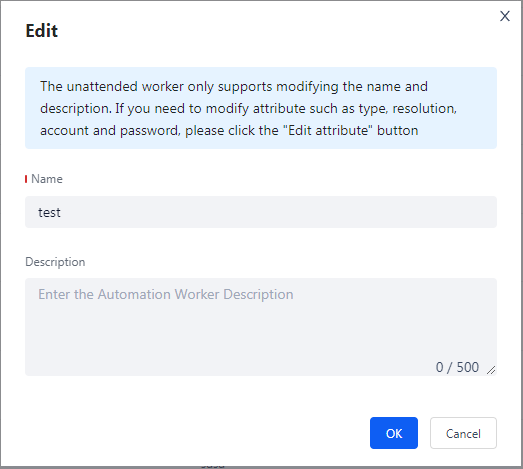
Modify Unattended Worker
Click the "Edit" button in the operation bar of the unattended worker list page to modify the name and description of the robot in the pop-up dialog box.
Click the "Edit attribute" button under the "More" option in the operation bar, and the user can modify the robot's binding device, desktop type, unlock screen when creating a new robot, account and password information in the pop-up dialog box. Depending on the robot version, it may be necessary to manually restart the robot after modification to synchronize the changes. Please follow the UI prompts.
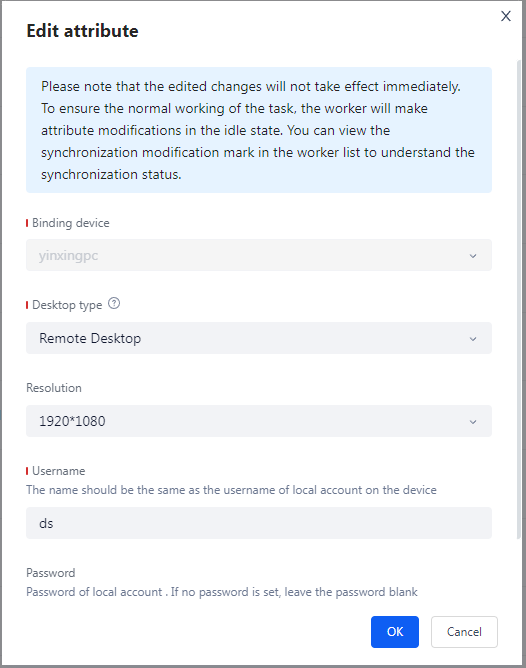
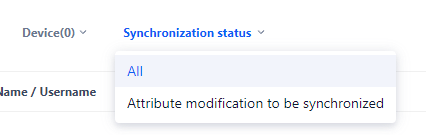
After the robot attribute is modified, the information needs to be synchronized to the Worker client. Before synchronization takes effect, the corresponding robot in the Commander will be displayed as "to be synchronized". The user can find this mark in the list of robot.
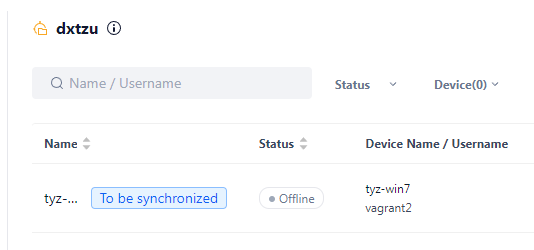
Users can also filter out robot in the "To be synchronized" status from the filter column of the unattended worker list.
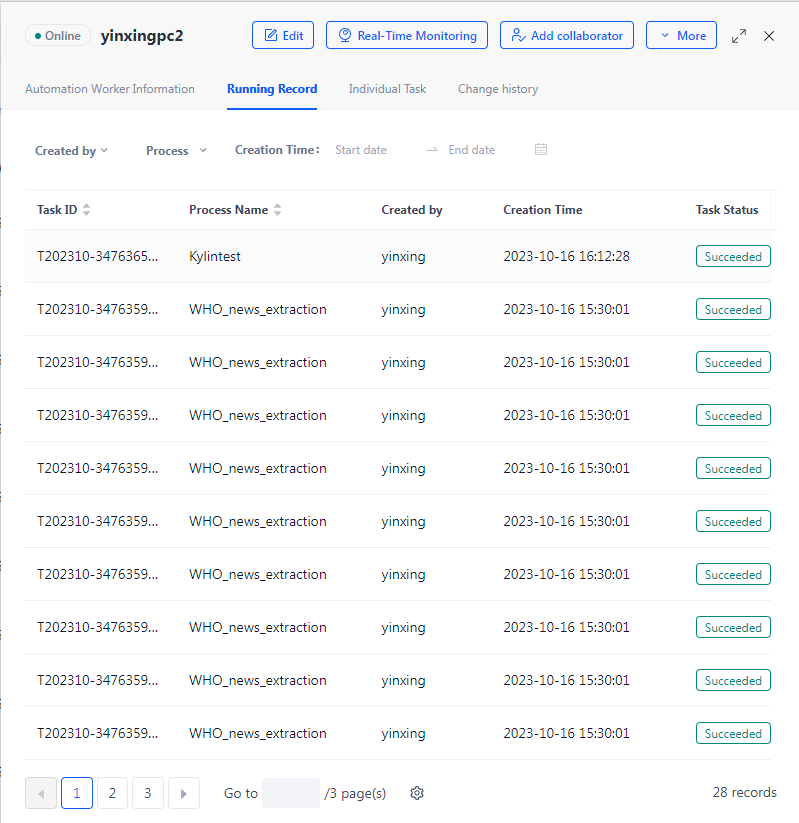
Details of Unattended Worker
Click a Unattended Worker in the list to pop up a drawer to view the details of the robot. Details include basic information, log, Individual Task, change history, editing, Real-time Monitoring, Add collaborator, deleting and other operations.
Unattended worker information
Users can view the basic information of the robot, including grouping, status, IP address and version.
Log
Users can view All log under the Worker to understand its operation.
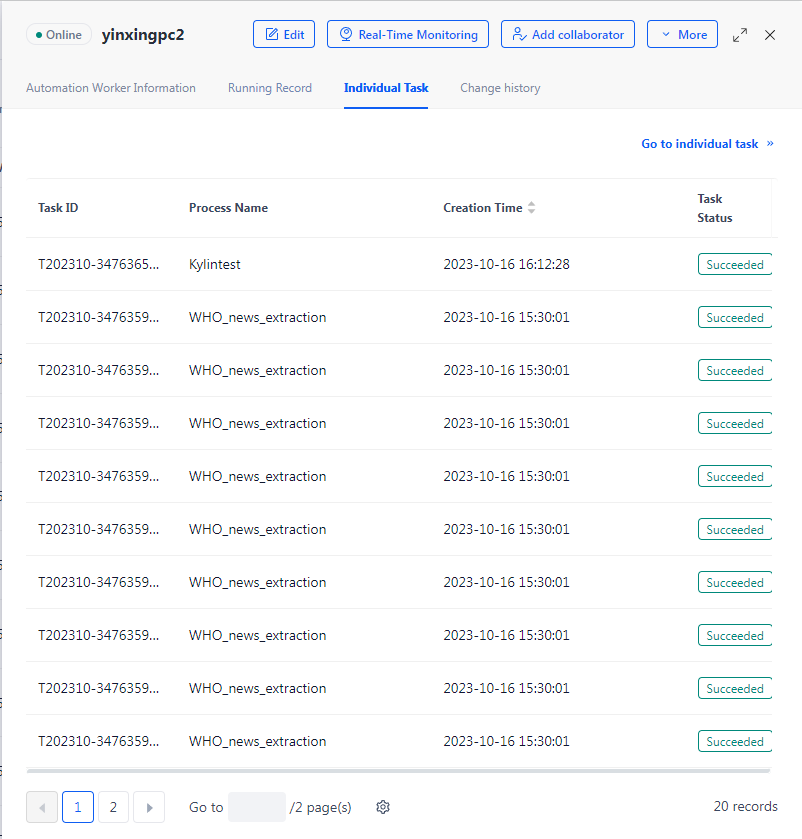
Individual Task
Users can quickly view all task related to themselves. Click the "Go to Individual Task" button to view the details of task.
Change History
The user can view the change history of the Worker and support queries by time and operator. The change history includes time, operator, IP address, operation module, and specific content. The following are the modules and operation types in the change history:
| Module Name | update | turn on | Close |
|---|---|---|---|
| Name of Worker | √ | - | - |
| Worker binding device | - | - | - |
| Description of Worker | √ | - | - |
| Receive task or not | √ | √ | √ |
| version | √ | - | - |
| Permission Management | √ | - | - |
Edit/Edit attribute
The user can edit the information of the Worker. Please refer to the section "Modifying the Unattended Worker" for details.
Real-time Monitoring
The user can remotely view the real-time picture of the device where the Worker is located by clicking the "Real-time Monitoring" button. You can also remotely operate the environment of the robot on the [Real-time Monitoring] page. Please refer to the [Real-time Monitoring] section for specific operations.
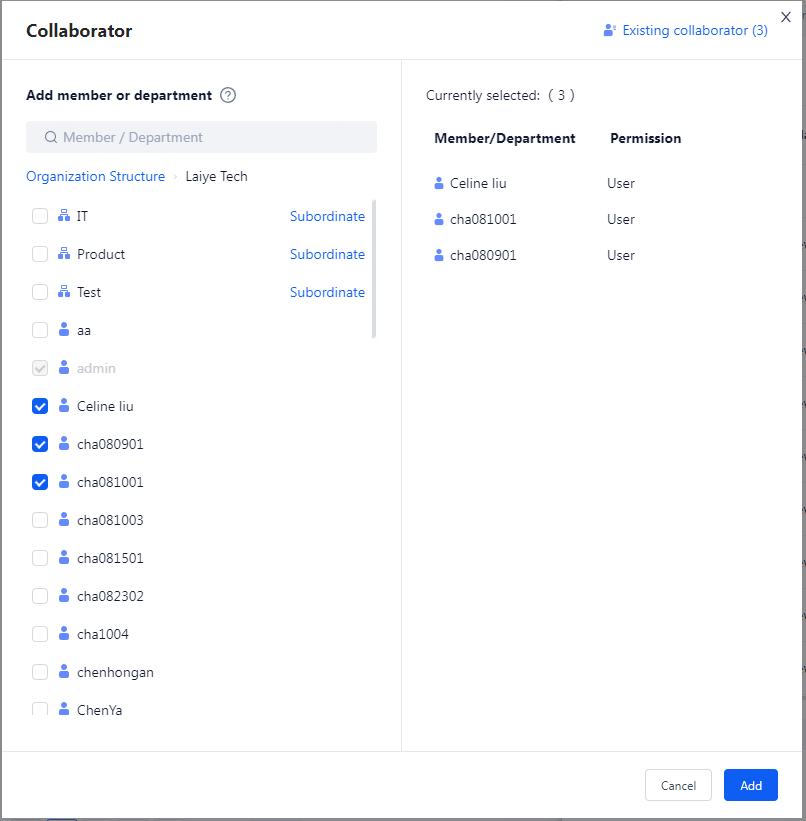
Add collaborator
Collaborator management is used to control the view and operation permissions of members or departments on robot (groups). Select the Unattended Worker in the list and click the "Add collaborator" button to add the corresponding collaborator.

Collaborator permissions support adding specific users or department nodes. When selecting a department, all members within the department have corresponding permissions, and newly added members will also automatically receive permissions.
| role name | Character Description |
|---|---|
| owner | It can issue task to the unattended Worker, edit and edit attribute, delete worker/worker groups, view monitoring, Add collaborator, and accept task status operationally |
| manager | It can issue task to the unattended Worker, edit and edit attribute, view monitoring, Add collaborator, and accept task status operationally |
| editor | Task can be issued to the unattended Worker, and Worker can be edited, attribute can be edited, monitoring can be viewed, and task status can be accepted operationally |
| User | Task can be issued to unattended Worker |
To remove a collaborator, you can click on an existing collaborator, check the members that need to be removed, and perform the removal operation.
Delete
The Worker can be deleted only after the "Stop accepting task" switch is turned on. In addition, the robot must not be associated with any task or trigger to be run before it can be deleted successfully.