Trigger
Trigger management is used to create and manage Task running plans. You can set daily, weekly, monthly and other running frequencies and their execution rules, and customize the execution rules of a Task.
Newly build
There are three steps to create a new Trigger
Step 1 - set basic information
You can set "Trigger name, select Process, select department, select Laiye Automation Worker, set the number of Task created, Task priority, Maximum Run Time, whether to record screen, and description".
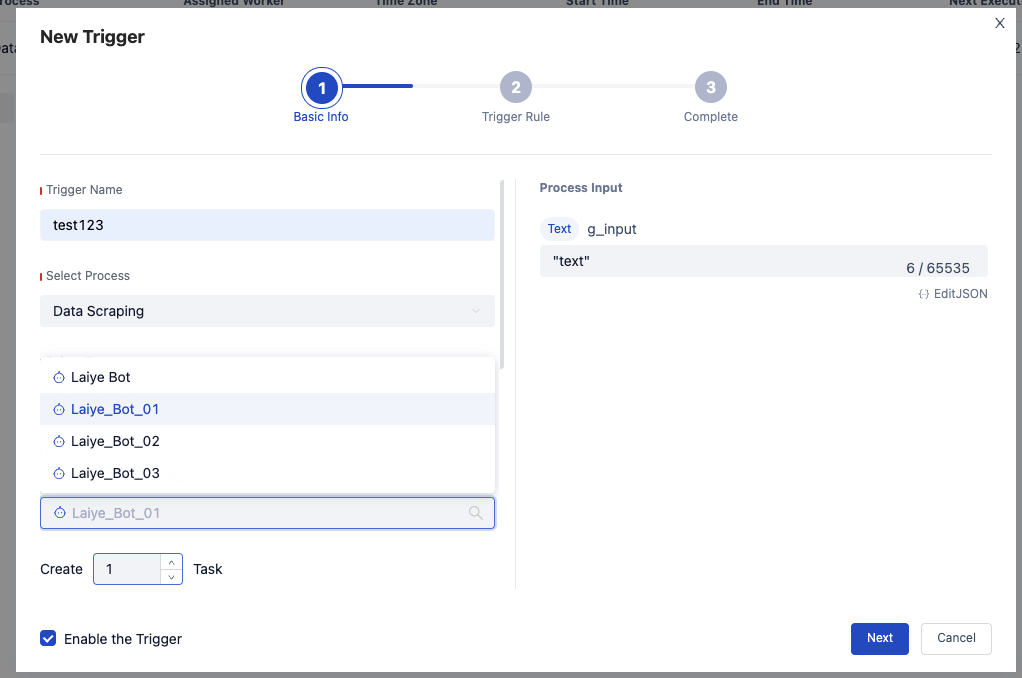
Of which:
Trigger Name: globally unique and cannot be duplicate
Select Process: select a Process in the Process list, and the subsequent Trigger will run with the Version list enabled under the Process
Select Department: the Department to which the Task generated by the Trigger belongs
Select Laiye Automation Worker: specify which Laiye Automation Worker execute the Task generated by the Trigger
Set the number of Task created: the number of Task created each time. For example, if it is set to 2, two Task will be created when triggered.
Priority: the priority of the created Task
Maximum Run Time: the Maximum Run Time of a Task. After it is enabled, when the operation duration of a Task exceeds the set value, the Laiye RPA Commander will issue a Task stop command
Screen recording: whether the generated Task will Record the screen of the Laiye Automation Worker
Description: description of the Trigger
Step 2 - Trigger rules
You can set "Trigger cycle, start time, end time, Trigger rule, running frequency and running rule", where:
Trigger cycle: the time zone triggered by the Trigger needs to be set. After setting, the Trigger will trigger in the corresponding time zone. The Trigger can open the work calendar. After it is opened, it will be triggered on the working day based on the work calendar.
Start time: the start time when the Trigger starts executing.
End time: the end time when the Trigger starts to execute. You can set it to never end or end at a specified time.
Trigger rules: Trigger supports basic rules and user-defined rules. When it is set as a user-defined rule, cron is used to set it.
Basic rules
Basic rules can set running frequency and running rules
Running frequency: when set as basic rule, the running frequency can be set. Minimum granularity is supported to minutes.
Running rules: you can set the specified time point for execution, or set the number of times after repeated execution.
Custom rules
Custom rules can be set freely through cron expression
- About cron expressions
In the uibot Laiye RPA Commander, the structure of the cron expression is "time sharing day month week", and spaces are used to separate different information fields. For example, "5 * 1 * *" means "the fifth minute, the first day of every hour, the first day of every month and every week", that is, "the fifth minute of the first day of every month and every week".
The allowed values and special symbols of cron expression are as follows:
| field | Required | Allowable value | Allowed special characters |
|---|---|---|---|
| Second | yes | Integer from 0 to 59 | , - * / |
| Minutes | yes | Integer from 0 to 59 | , - * / |
| Hours | yes | Integer from 0 to 23 | , - * / |
| Date (dayofmonth) | yes | Integer from 1 to 31 (the number of days corresponding to the month shall be considered) | , - * ? / L W |
| Month | √ | Integer from 1 to 12 | , - * / |
| DayOfWeek | no | Integer from 0 to 6 | , - * ? / L # |
| Symbol | explain |
|---|---|
| , | Indicates that any value in this field is matched. For example, if it is defined as 6,17,33 in the "minute" field, it means that the timed Task is executed at the 6th, 17th and 33rd points respectively |
| - | Indicates the continuous range of the field. For example, if 2-9 is defined in the "hour" field, it means that it is triggered every hour between 2 and 9 o'clock |
| * | Represents any value that matches the field. If * is used in the minutes field, it means that an event will be triggered every minute |
| ? | ? andSimilar use of? replaceIs supported but not mandatory, so 005 *? It's the same expression as 005 * * |
| / | Indicates that the trigger starts at the start time, and then triggers every fixed time. For example, if 5 / 20 is used in the minutes field, it means that it will be triggered from the 5th minute. If it is triggered every 20 minutes, it will be triggered at 5, 25, 45 and other time points |
| W | It indicates the working day (Monday to Friday) closest to the specified date. It can only be used in the date field and after a specific number. If "15W" is entered in "day", it means that it is triggered on the working day closest to the 15th of each month. If the 15th happens to be Saturday, find the nearest Friday (14th) to trigger. If the 15th is Sunday, find the nearest next Monday (16th) to trigger If the 15th happens to be a working day (Monday to Friday), it will be triggered on that day. In addition, w's recent search will not cross the month |
| # | Indicates the week ordinal of a month, which can only be used on "week". For example, "5#3" means on the third Friday of each month |
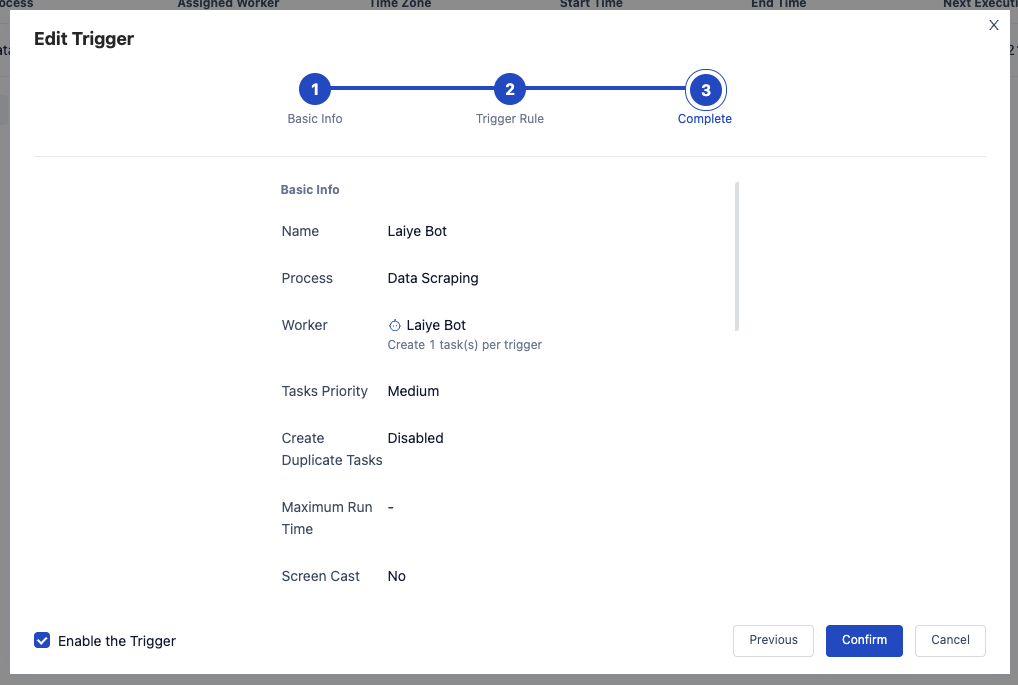
Step 3 - Trigger confirmation
You can view the basic information of Trigger, Trigger rules and expected execution information. After confirmation, click OK to save successfully.

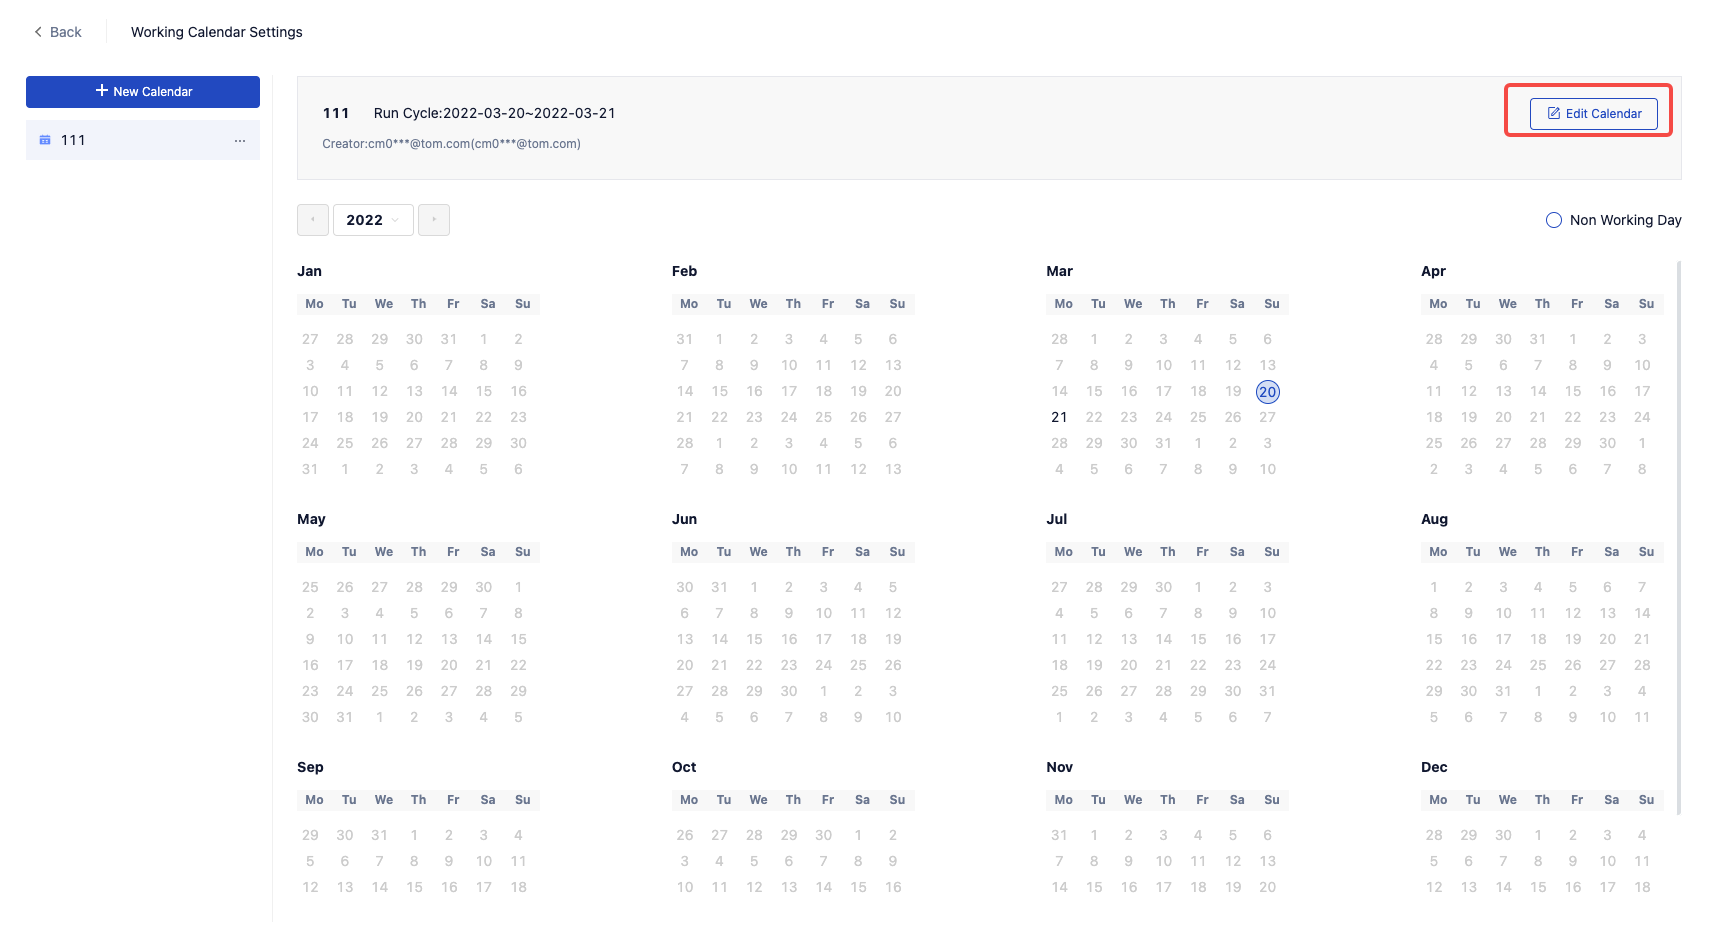
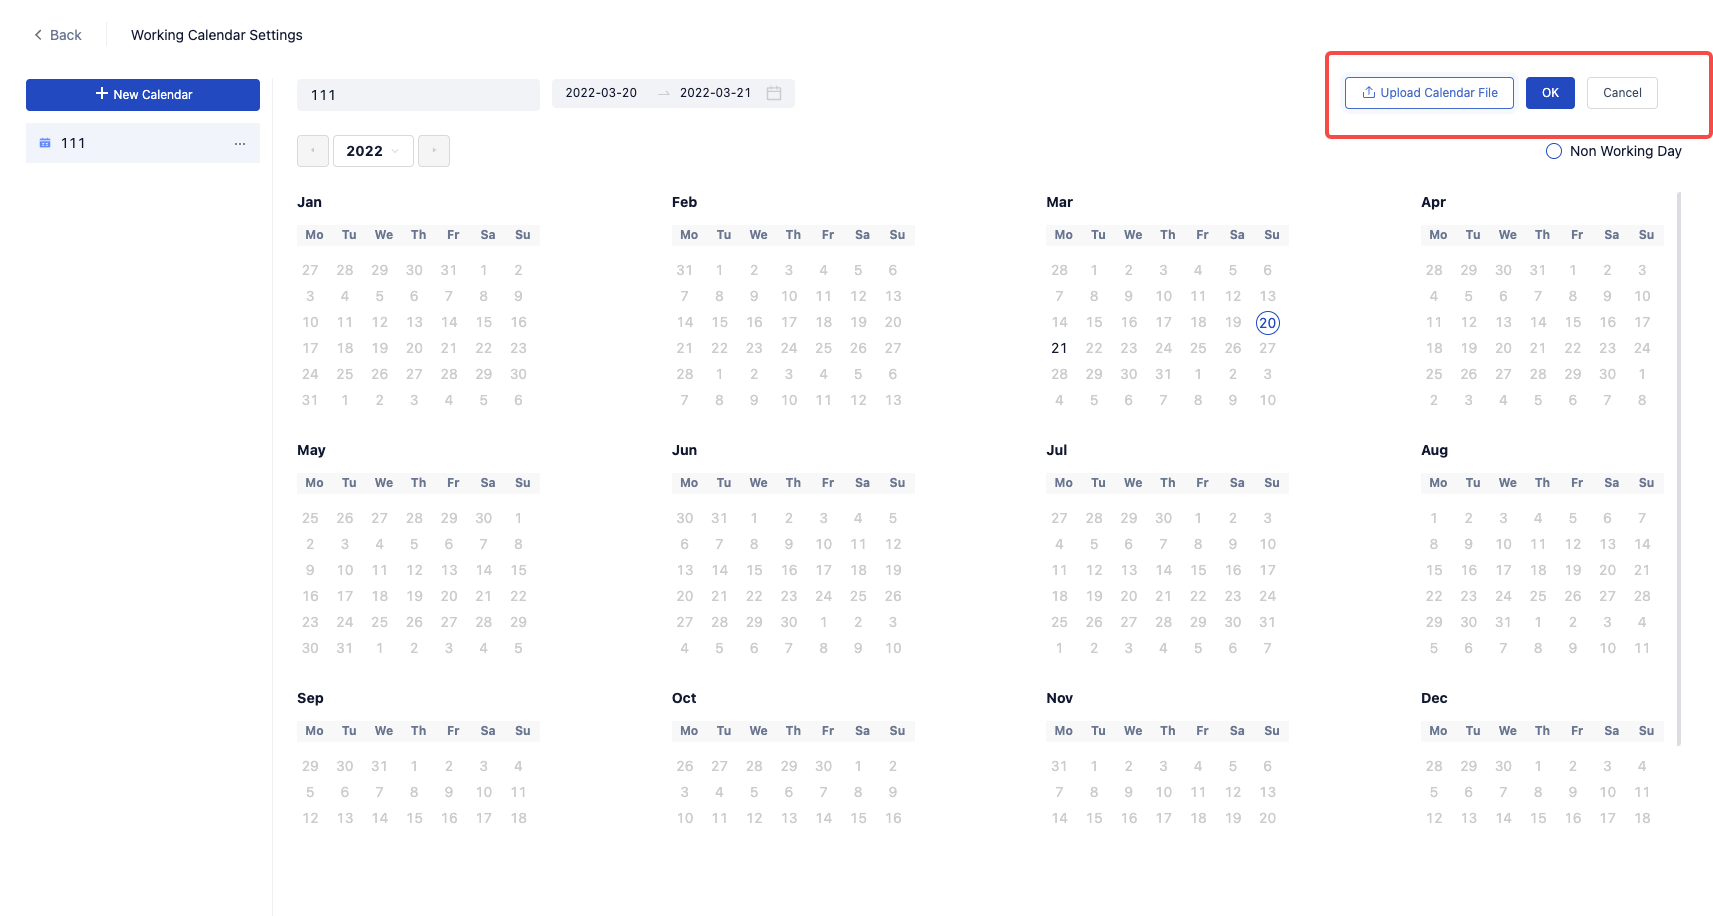
Customize work calendar
New work calendar
To create a new Process, click the "new calendar" button, fill in the name, template and time range, and then save it.
The template provides three types: Weekend two-day off calendar (Saturday and Sunday are defaulted as non working days), Sunday single off calendar (Sunday is defaulted as non working days), and blank calendar (all dates are defaulted as working days)

After creation, if you need to modify on the basis of the template, click Edit and click on the calendar to set the corresponding time as non working time. After checking, click OK to complete the editing.
You can also upload the calendar file to set the calendar.
Add Collaborator
Click the Trigger that needs permission control in the list, and click Add Collaborator to set the corresponding collaborator.
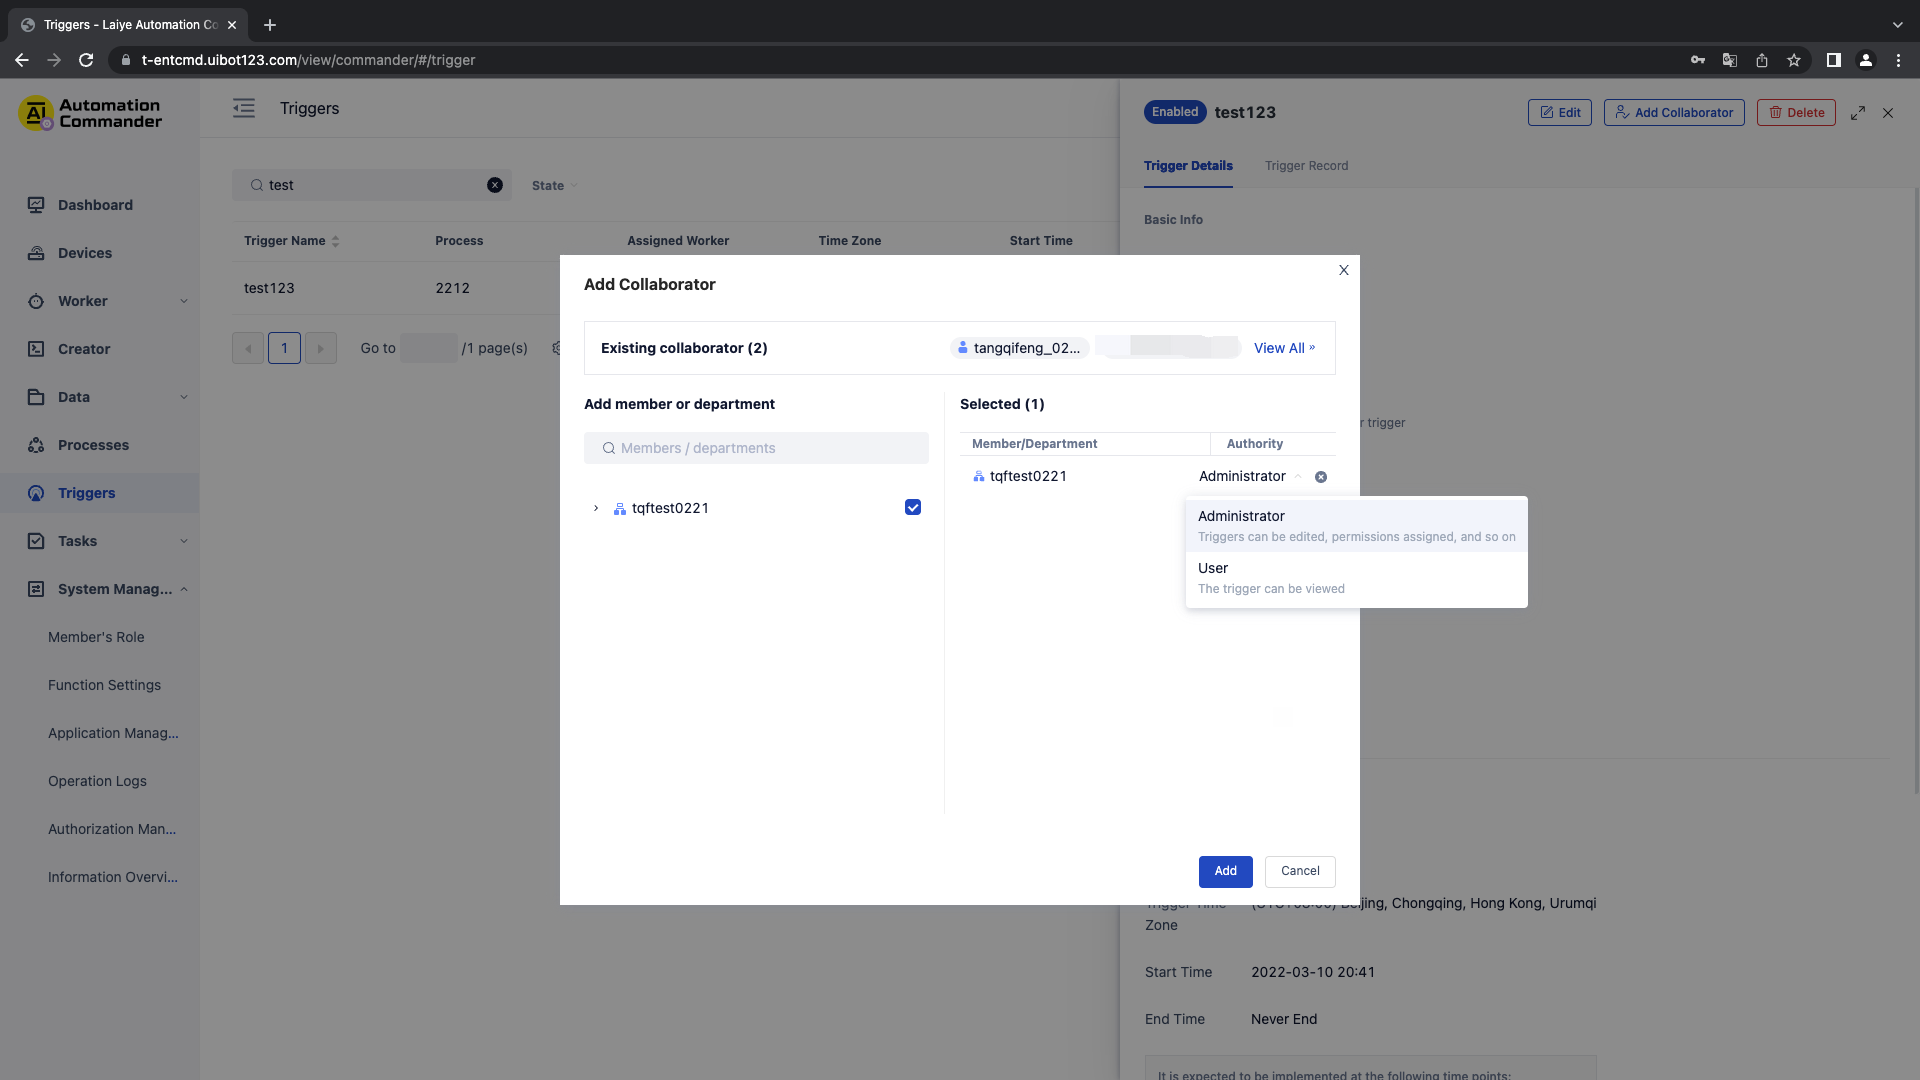
| Role name | explain |
|---|---|
| controller | The Trigger can be edited / deleted. Add Collaborator and other operations |
| User | Can view |
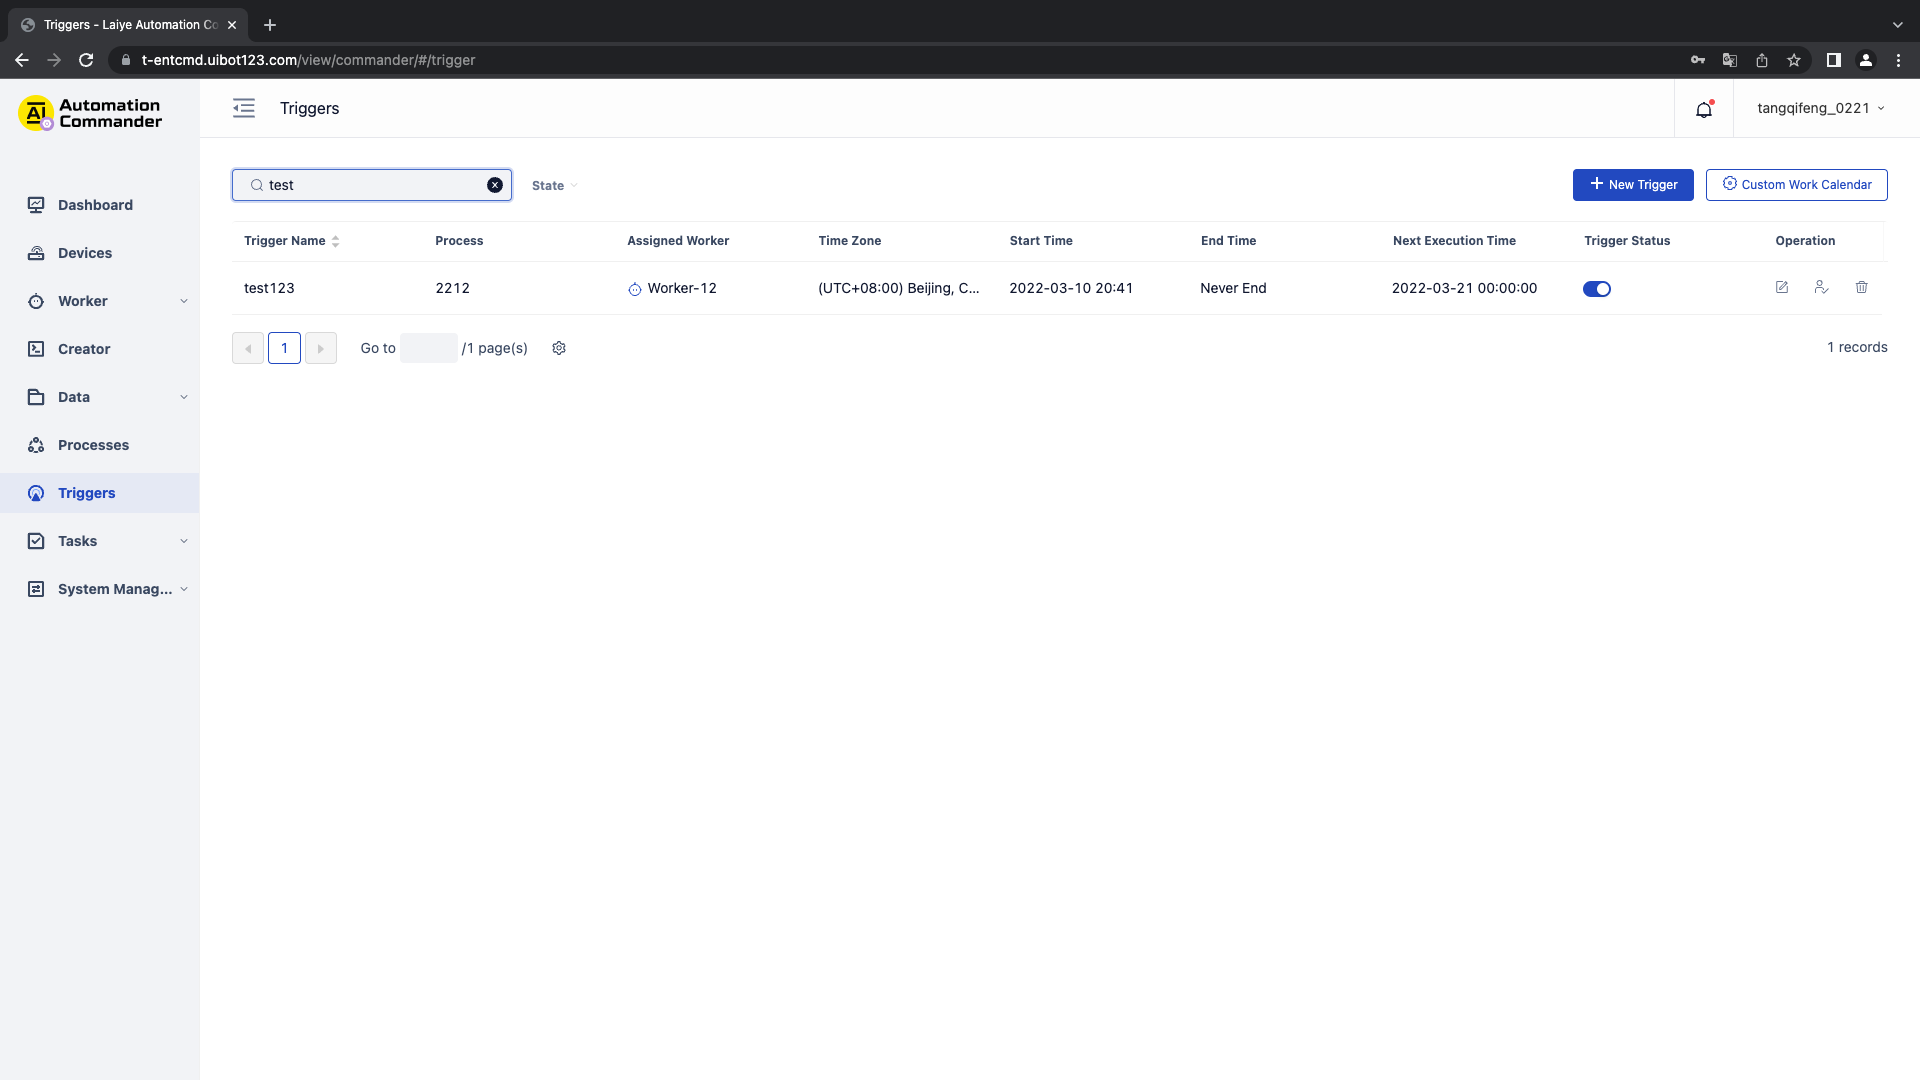
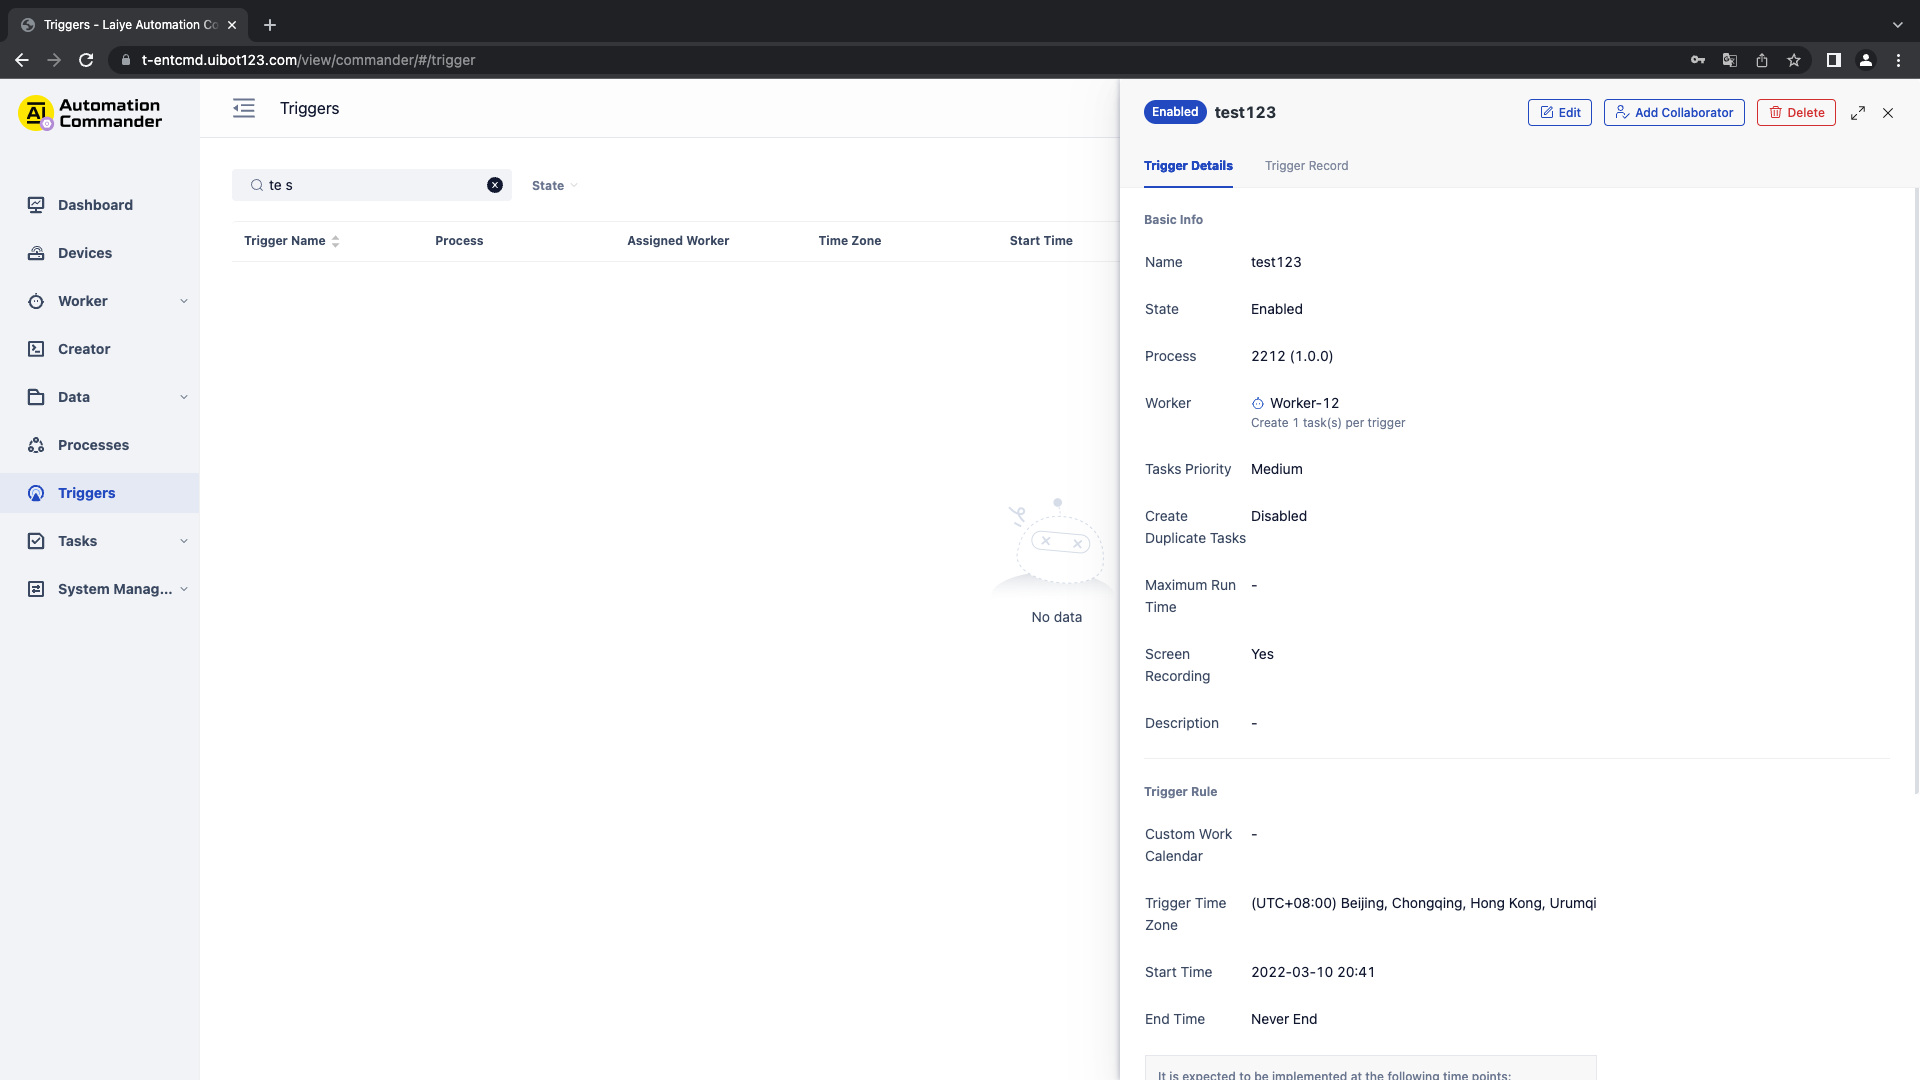
Trigger details
- Trigger details include details and trigger records:
Trigger details - display fields included in basic information:
Trigger Name: displays the name of the Trigger
Trigger status: displays the enabling and closing status of Trigger
Select Process: displays the name of the Process selected by the Trigger
Select Laiye Automation Worker: display the Laiye Automation Worker selected by the user
Task Parameter: displays the Parameter and Parameter values used by Task
New duplicate Task: displays whether the Trigger creates a new duplicate Task
Maximum Run Time: the maximum run time to trigger a new Task
Screen recording: trigger whether to record the new Task
Owner: the owning member of the Trigger, which has the maximum permission control over the Trigger
Created by: the member who created this Trigger
Creation time: the time when the Trigger was created
Trigger details - display fields included in the trigger rule:
User defined working day: displays whether to enable it. If enabled, the selected working calendar name will be displayed
Start time: displays the start time set by the Trigger
End time: displays the end time set by the Trigger
Running logic: shows the running logic of the Trigger configuration
Next start time: displays the next trigger time of the Trigger
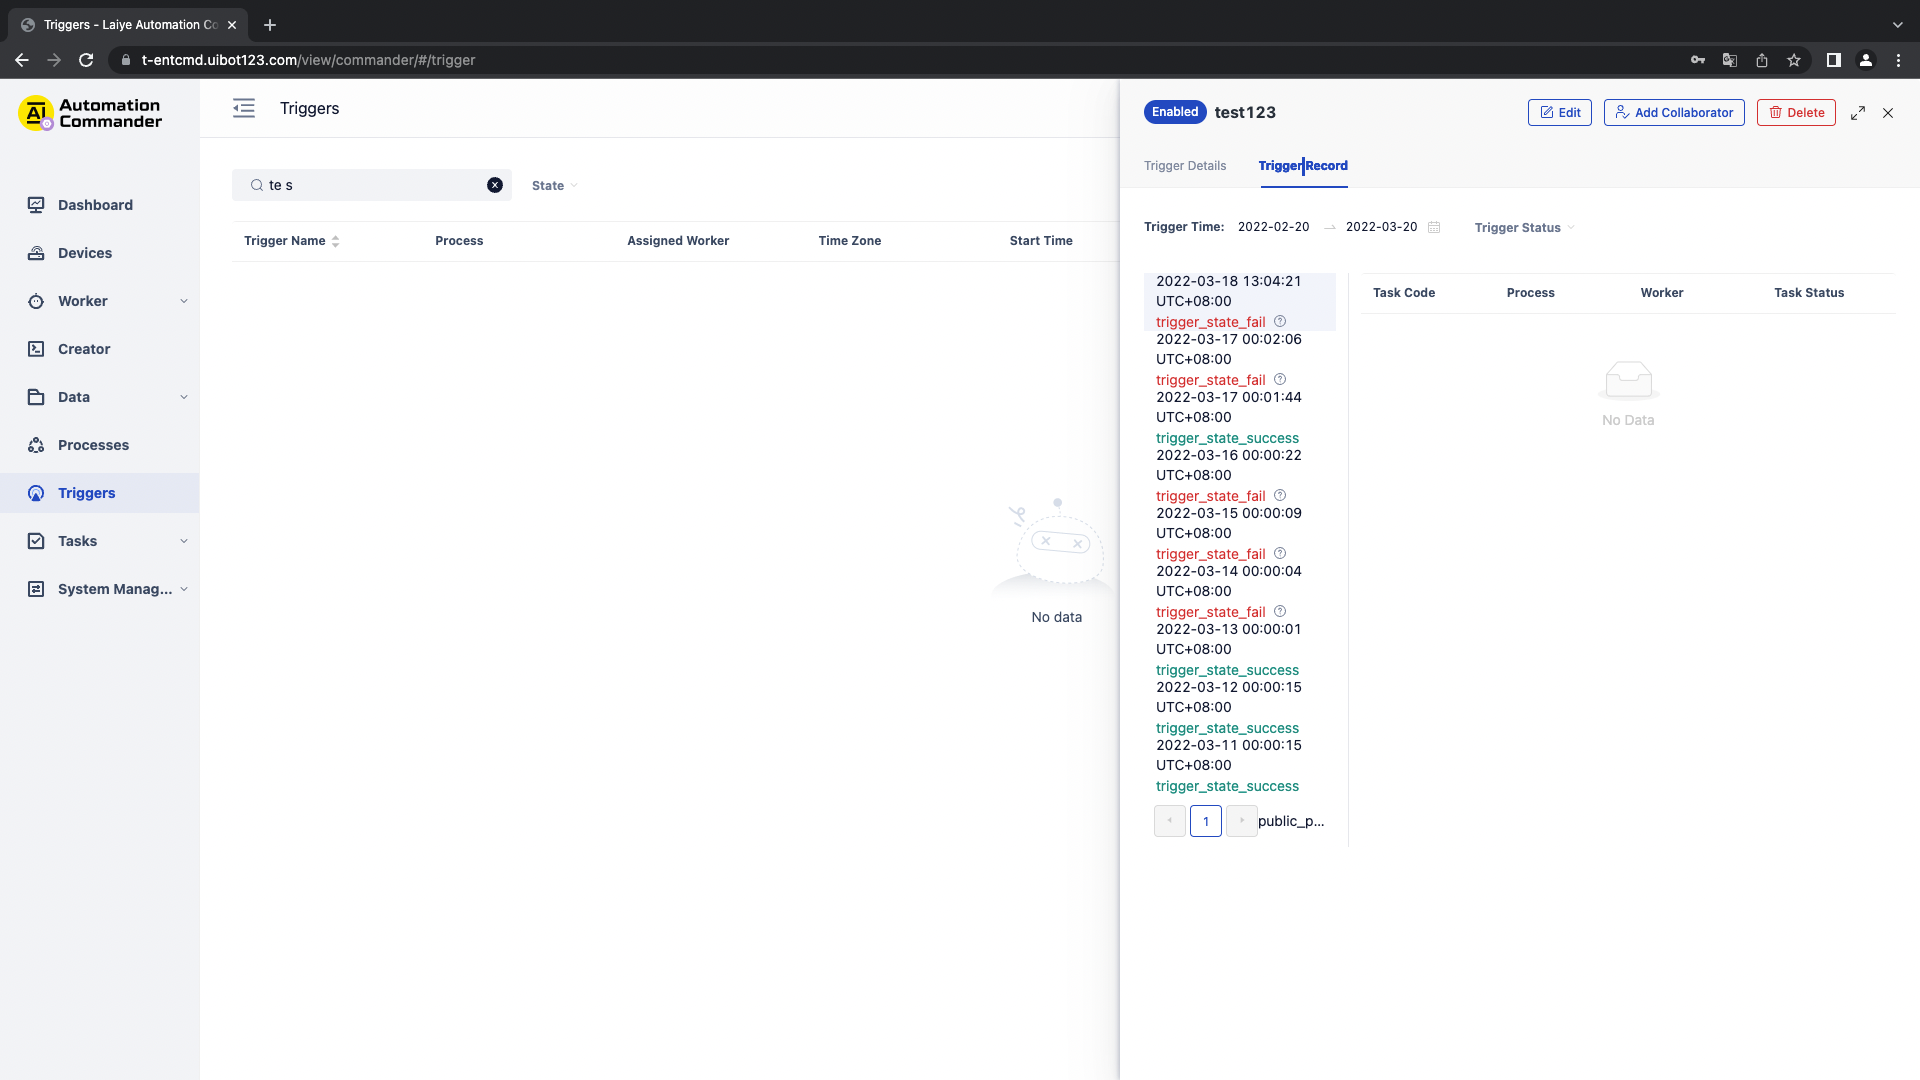
The trigger record list displays the trigger information of each Trigger, including the status record of each trigger and the running status record of the Task generated by each trigger:
Trigger status indicates whether the new Task is triggered successfully each time. When the new Task is completed, it will succeed. When the new Task fails, it will fail. The failure needs to show the reason for the failure.
Edit
To modify the current Trigger information, click the "Edit" button. The editing function is the same as that of new. Only the Trigger time zone cannot be modified.
Delete
To delete a Trigger, you can click the "delete" button in the list, and then confirm again to delete the corresponding Trigger.