Login and Logout
Enterprise users need to obtain commercial authorization before they can log in and use the application. Authorization methods support "Node-locked License" and "Floating License."
After selecting the "Simplified English" version to install the Automation Creator client program, double-click the shortcut icon "Automation Creator Enterprise Edition" on the desktop to access the authorization login window.
Choose the authorization method under the authorization login window to proceed with login.
- When the authorization method is "Node-locked License," you need to obtain an activation code through the official CDKEY provided. Enter the correct activation code to complete the login.
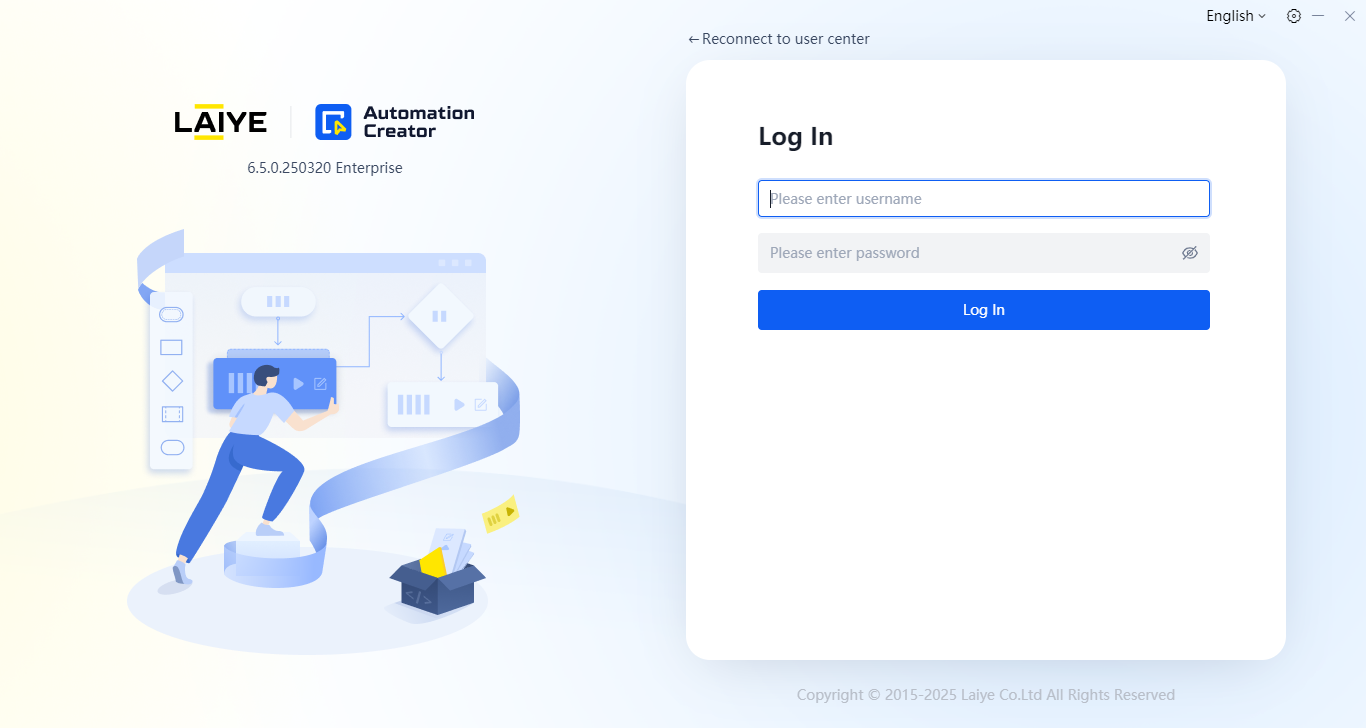
- When the authorization method is "Floating License," you can authenticate using the "User Center address, username, and password."
Details are as follows.
Node-locked License
- First, purchase the Automation Creator CDKEY through business channels, which supports combination use with Automation Commander.
- When the authorization type is "Node-locked License," the Automation Creator program runs offline, supporting independent login or logout from Automation Commander.
Immediate Activation
When choosing the Node-locked License authorization method to use Automation Creator, you need to input the enterprise name and activation code to activate the application.

Redeeming Activation Code
You can use the official CDKEY to redeem or query the authorized enterprise name and activation code on the redemption page. In an intranet environment, you can scan the QR code via mobile to proceed with redemption, as shown below:
When directly connected to the internet, click "Redeem Activation Code" to jump to the redemption page. Enter the CDKEY to obtain the authorized enterprise name and activation code, as shown below:
Verification Code Validation
If the last authorization login was over three months ago and the authorization expiration time is over one year, to ensure activation code security, after entering the authorized enterprise name and activation code, click "Activate Now" and input a verification code for secondary validation activation.
(1) In an intranet environment, scan the QR code via mobile to open the verification code page. Enter the activation code and click the "Get Verification Code" button to view the code. Note that verification codes are only valid for the current day.
(2) When directly connected to the internet, click "Redeem Activation Code" to access the verification code page. Enter the activation code and click the "Get Verification Code" button to view the code. Note that verification codes are only valid for the current day.
Exit Authorization
You can exit the current authorization through two methods:
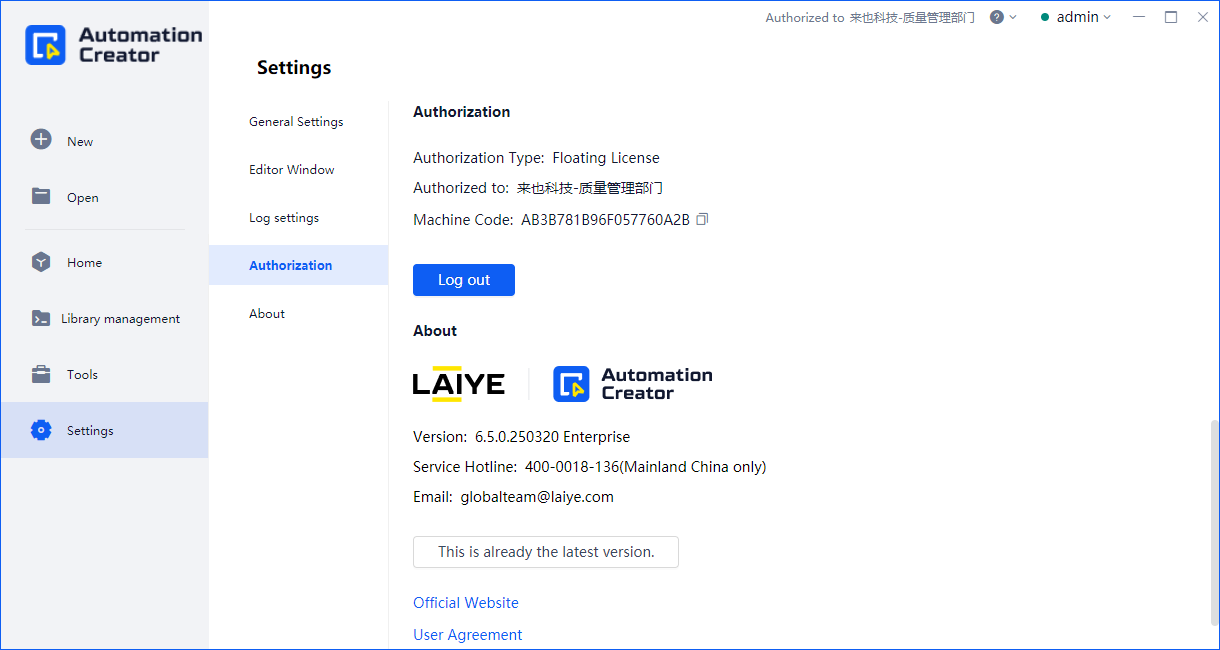
- First method: Click the "Not Logged In" label in the upper-right corner of the homepage window. In the activation information panel, click the "Exit Authorization" button to complete the logout.
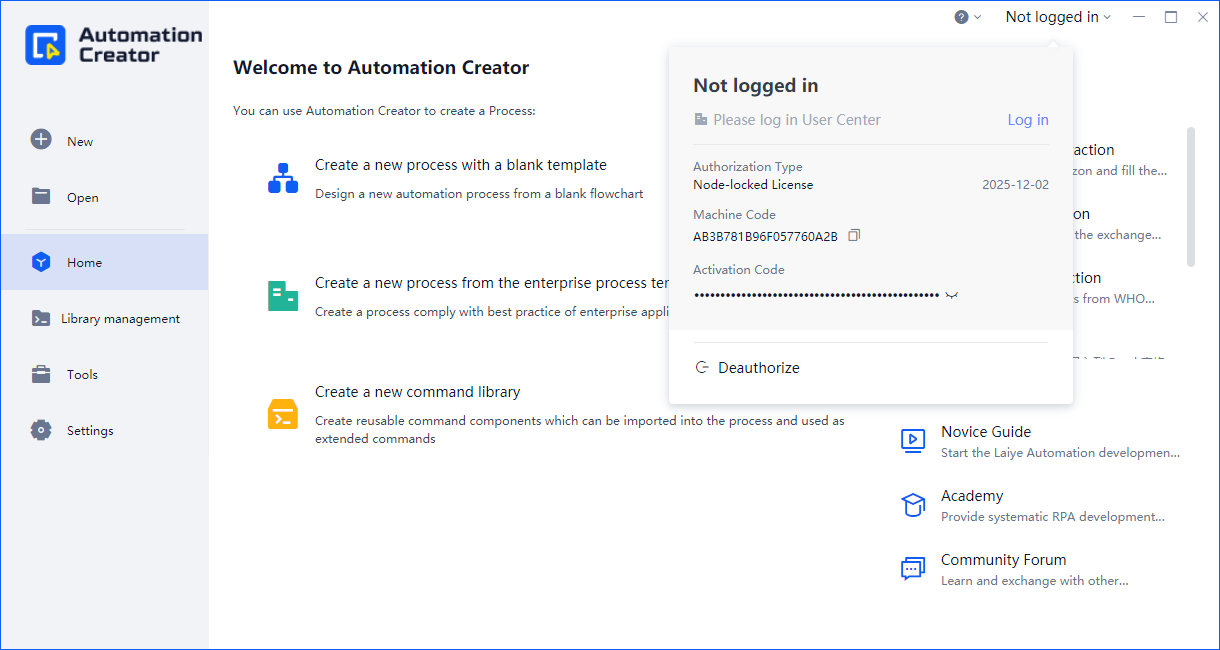
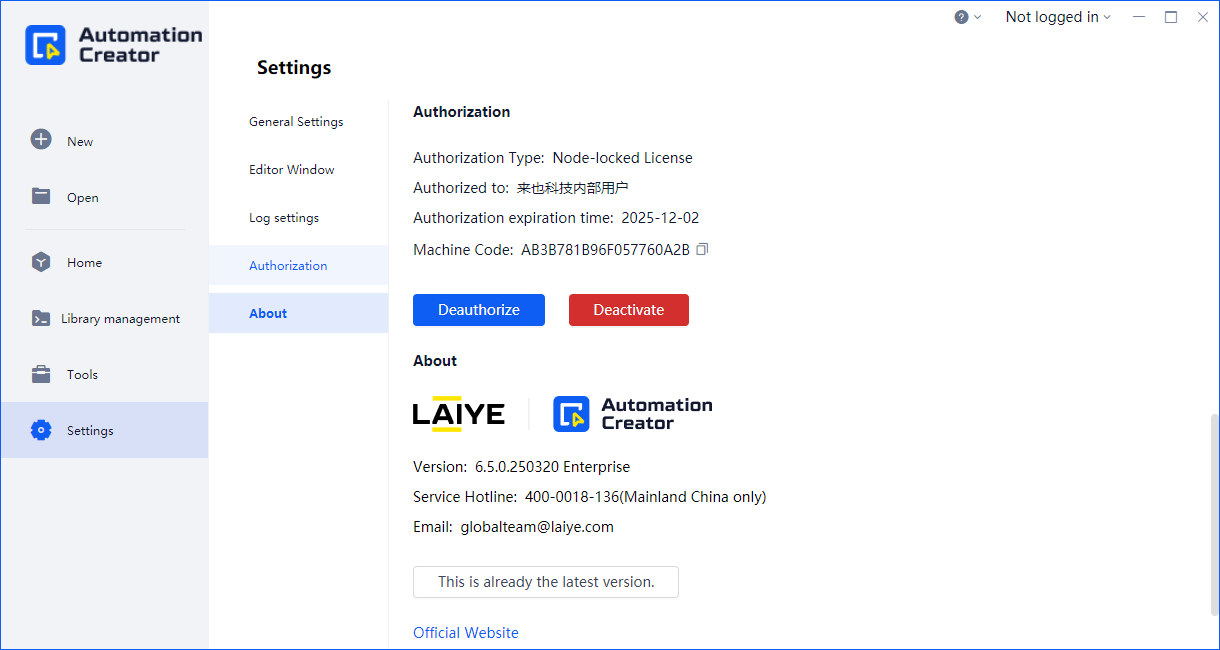
Second method: In the "Settings - Authorization Information" section, click the "Exit Authorization" button to complete the logout.
Note: During the next activation, the verification code validation mechanism may be triggered if the last authorization login was over three months ago and the authorization expiration time is over one year.
Floating License
The Automation Creator under this authorization method is strongly paired with Automation Commander, suitable for process developers using the same username/password to create and debug automation processes across multiple machines.
Prerequisites:
- First, obtain the User Center address provided during Automation Commander deployment, typically: http://[IP address during deployment].
- Second, acquire an authorized "username" and "password," or directly use the super administrator (admin).
- Finally, ensure the current user’s tenant has a reasonable allocation of "Automation Creator-Floating License" capacity (greater than or equal to 1).
Notes:
- Prerequisite: Grant the "Login to Automation Creator" permission to the user role through "Unified Management Console > Member Management > Add Member." Otherwise, authentication via "Floating License" will not be possible.
- After authentication, Automation Creator automatically returns the current version number, machine code, recent connection time, and IP address of the Automation Creator client to Automation Commander.
- If the user edits the password, role, or department of the current Floating License user via Automation Commander, Automation Creator will automatically revert to the "Authorization Login" page, requiring re-login.
- If the User Center address uses "HTTP" or "HTTPS," include the prefix "http://" or "https://" when entering the address.
- When entering the User Center address, input the content before the "/" in the address.
Immediate Connection
- Enter the correct User Center address and click the "Connect Now" button. If the address is invalid, further operations will not be possible.
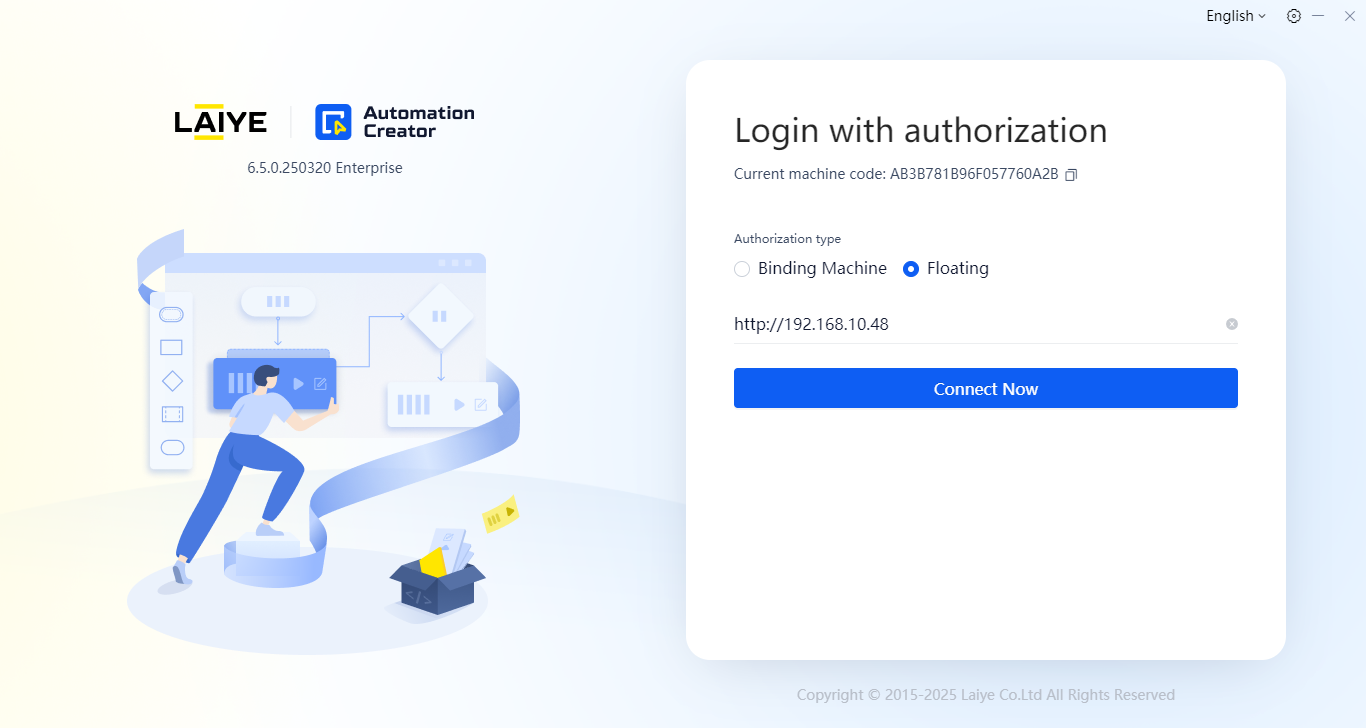
- After successfully connecting to the User Center, continue to input the username and password for login.
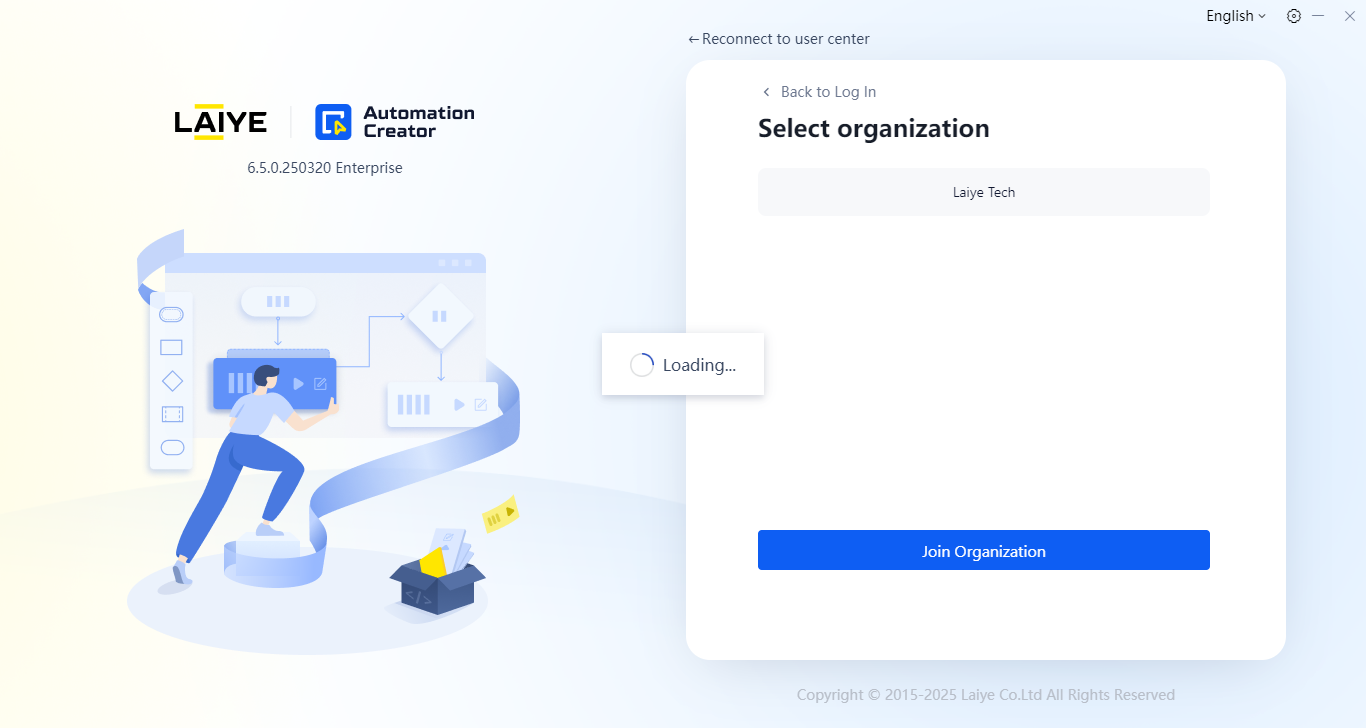
- If only one tenant exists, you can directly access the homepage window; if multiple tenants exist, select one and click "Enter Organization" to proceed to the homepage window.
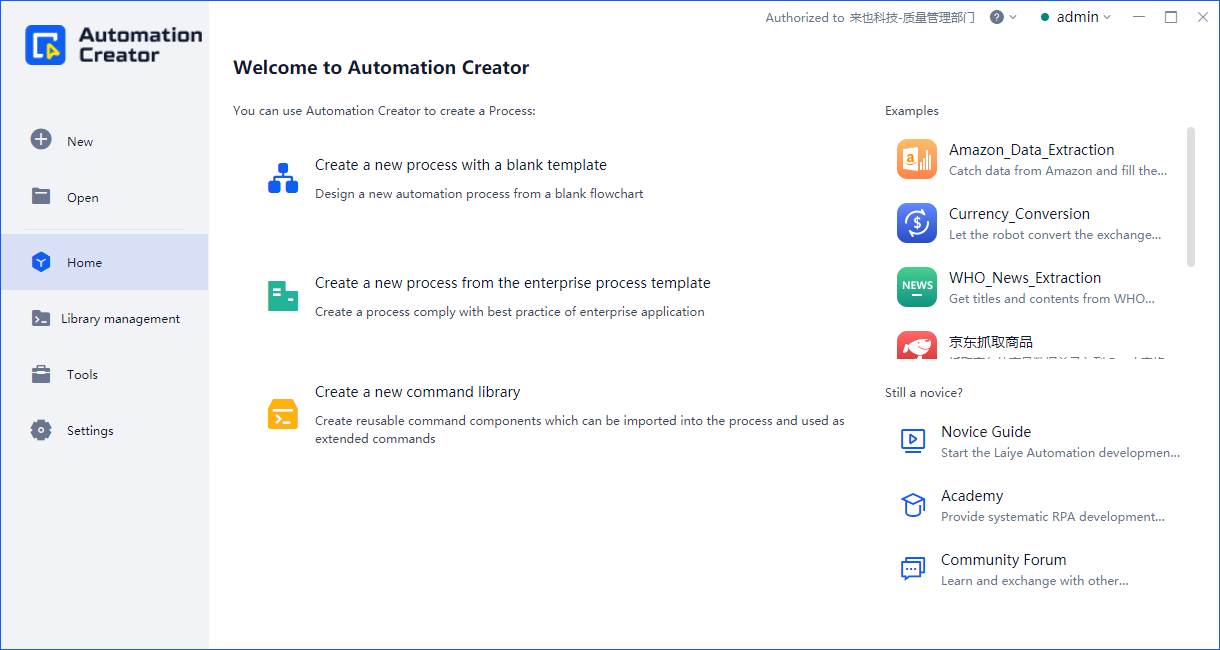
The homepage window contains the left-side menu area, list area, details area, and top status bar. By default, the "Process" menu and "Automation Commander Process" list are displayed.
The infinite retry connection mechanism is enabled by default, allowing reconnection to Automation Commander (Commander) after network or server anomalies are resolved, reducing auto-logout behavior and enhancing user experience.
Notes:
- During retry connection, clicking "Run" or "Debug" buttons will be invalid, prompting "Network Connection Error." If a process/library is running/debugging during network or server anomalies, it will not be affected.
- By default, enabling the infinite retry connection mechanism may result in the following scenarios:
- When the same user logs in on different machines, the later logged-in machine operates normally, while the earlier logged-in machine remains on the main interface in an infinite retry state. The user can manually logout.
- If the product authorization expires or the administrator reduces the tenant's authorization capacity, it will continuously attempt to reconnect and compete for authorization. Successful authorization will resume login, while unsuccessful attempts remain in an infinite retry state. The user can manually logout.
- If the administrator modifies user info, disables the user, resets the user password, dissolves the tenant, unbinds the tenant, deletes the member, disables the member status, or removes "Floating License Creator," it will remain in an infinite retry state without switching to the login window. The user can manually logout.
- The infinite retry connection mechanism can be disabled by manually modifying the configuration. For example, in the default installation directory, open the file
C:\Program Files\Laiye Automation Enterprise\6.5.0.250320\config\creator\config.json, locate the "authorizer" hierarchy, and change the "wsAlwaysRetry" configuration value toFalse. Restart the program for the changes to take effect.
Logout
In the login information panel or the "Settings - Authorization" section, click the "Logout" button to complete the logout.
When the same username/password is used to log in on another machine via "Floating License," the Automation Creator on the current machine will be automatically logged out.
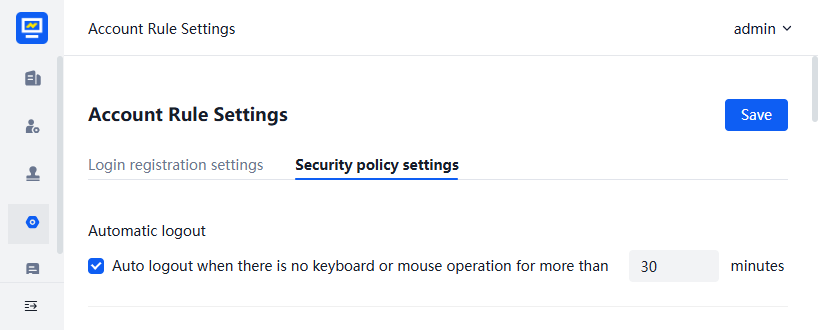
If the Automation Commander connected to Automation Creator is version 6.1.0 or above, and the "Auto Logout" security policy is enabled in the [Multi-tenant Management Backend], Automation Creator will automatically log out after a certain period of inactivity. The user will need to re-login to continue using the application.
💡 Auto logout due to inactivity is a feature available starting from version 6.2.0.
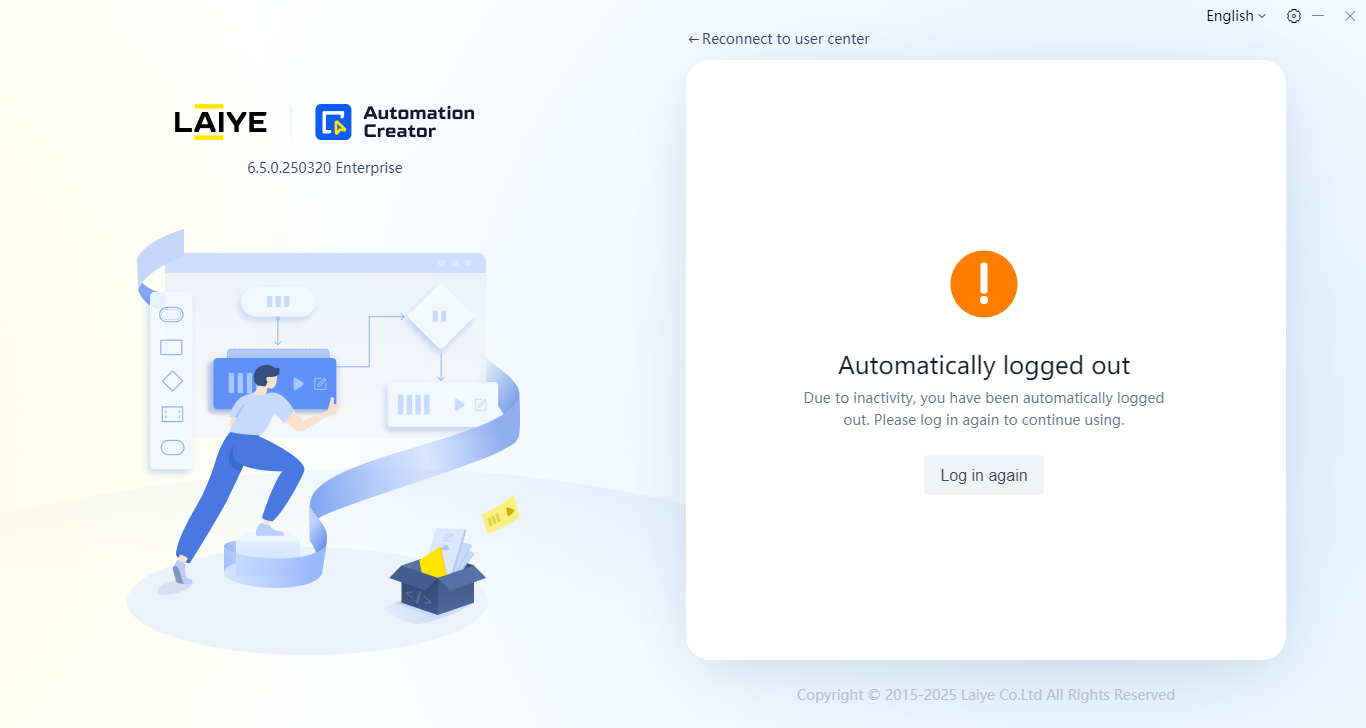
Administrators can disable this feature or modify the time threshold in the Multi-tenant Management Backend.
Network Proxy
The network proxy feature is available starting from version 6.2.0.
Automation Creator allows login via network proxy.
Click the "Network Settings" button in the upper-right corner of the login window.
Check "Use Proxy Server" to start editing proxy settings. Select the correct proxy type (HTTP or TCP), input the correct proxy address and port, then click "Test Connection." After successful testing, restart the client to complete the network proxy setup.
You can also configure a whitelist for refined control over visitors. The whitelist defaults to *, meaning the proxy setup is effective for all network requests. For partial network requests, input domain names or IP addresses (use semicolons to separate multiple entries), and wildcard rules are supported, e.g., *, laiye.com; 192.168.
Note: Once configured, all clients under the current device will adopt the same proxy settings, including Automation Creator, Attended Worker, and Unattended Worker. There's no need to set it again on other clients. If there are already online clients, close them before configuring.

Version Updates
After logging in as an enterprise user, the program will automatically check for new versions. If a new version is released during use, a prompt will appear for upgrading. Click the prompt to manually upgrade to the latest version for an enhanced experience.
Note: Currently, updates are only supported on Windows desktop versions.