Document Classification
Business scenario description
In the business scenario of Intelligent Document Processing, a complex business process may involve processing several types of document, and need to call different models or modules to process the document.
For example, when a customer sends an email to a supplier to order products, the email attachment will contain the contract, purchase order and invoice. If a supplier wants to use RPA to process the received order e-mail, it first needs to classify each attachment of the e-mail, and then extract the key information in the next step. For example, the contract invokes the contract extraction model, and the invoice invokes the general multi bill model.
Using the Document Classification provided by LAIYE IDP, you can train a production ready Document Classification model to solve the problems encountered by suppliers in the above scenarios by annotating a small amount of data.
Characteristic
- Easy to use : provide data management -> annotation -> training -> evaluation -> publish -> optimize workflow guidance, hand in hand to teach you how to build a model for the production environment.
- Model lightweight : Take OCR recognition results as input, make full use of visual and semantic information modeling, and complete document classification task at low cost (fewer annotation data, less resource occupation).
Instruction
The following uses the English invoice, English purchase orders, and news as examples to create an Document Classification model.
- click here Download the test data and follow the instructions to give it a try!
Create model
1) After logging in to the platform, click Document Understand in the left navigation bar to enter Document Classification.
2) Click Create Model to create a new model.
- Language: because different languages need different preprocessing, such as Chinese word segmentation and English word segmentation; Please select the language of the model according to the main language on the document.
3) Click Start or Details to enter the model configuration
4) After entering the model configuration, you will see that the Work Progress boot has been opened in the upper right corner. Please complete the following steps according to the work progress.
Create category
1) Click step 1 in the work progress to create a new category, click go to create, enter the category page.
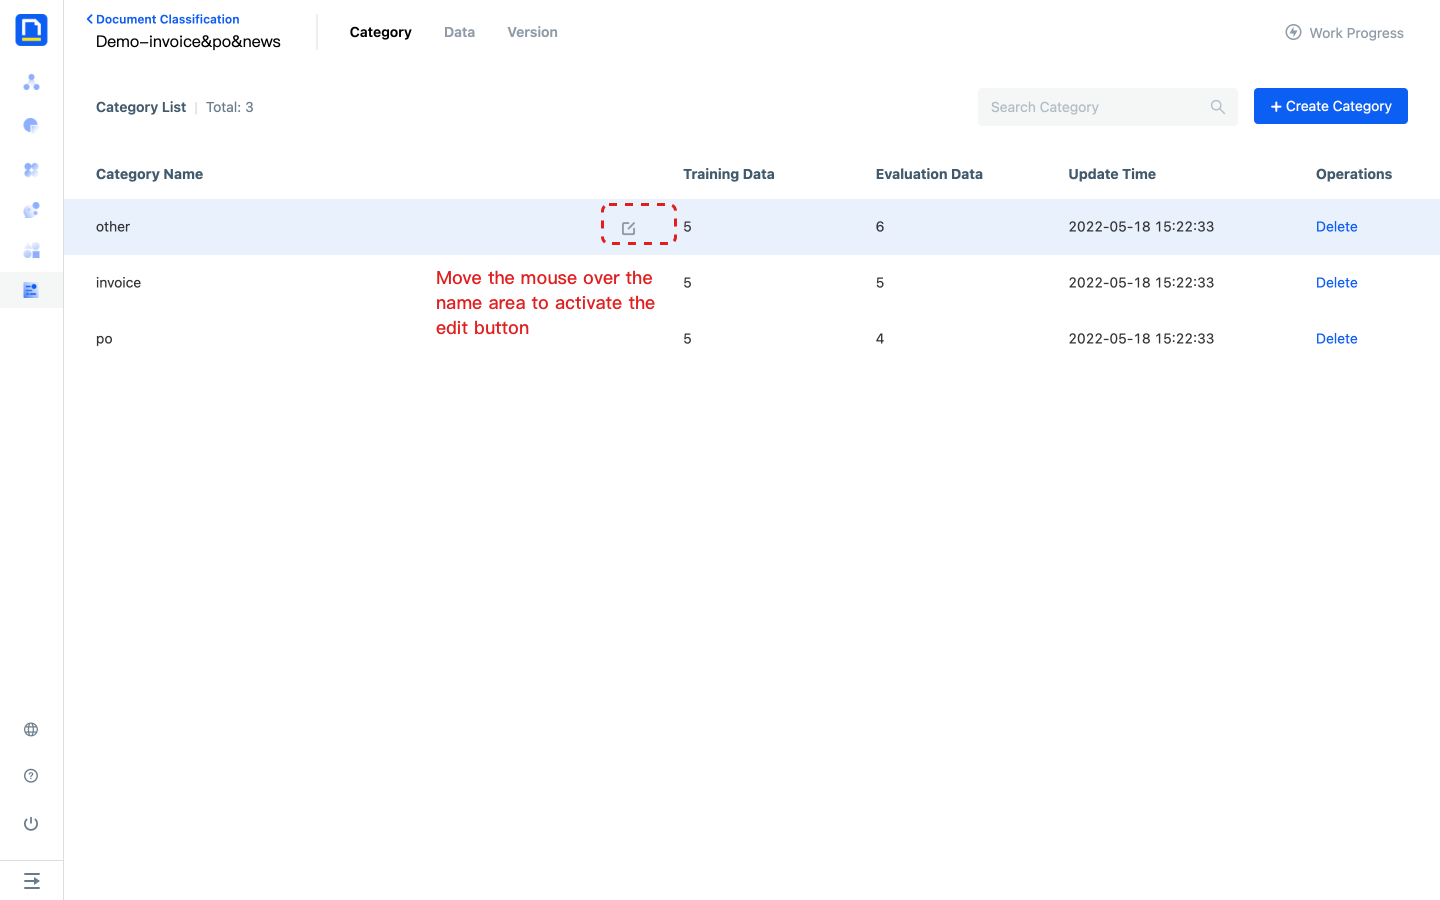
2) Create all categories that require model recommendations
- The category name contains a maximum of 100 characters
- If you need to modify the category name, please move the mouse to the name area and click the Edit button to activate the modification.
Upload data
1) Click step 2 in the work progress to upload data, and click go to upload to enter the data page.
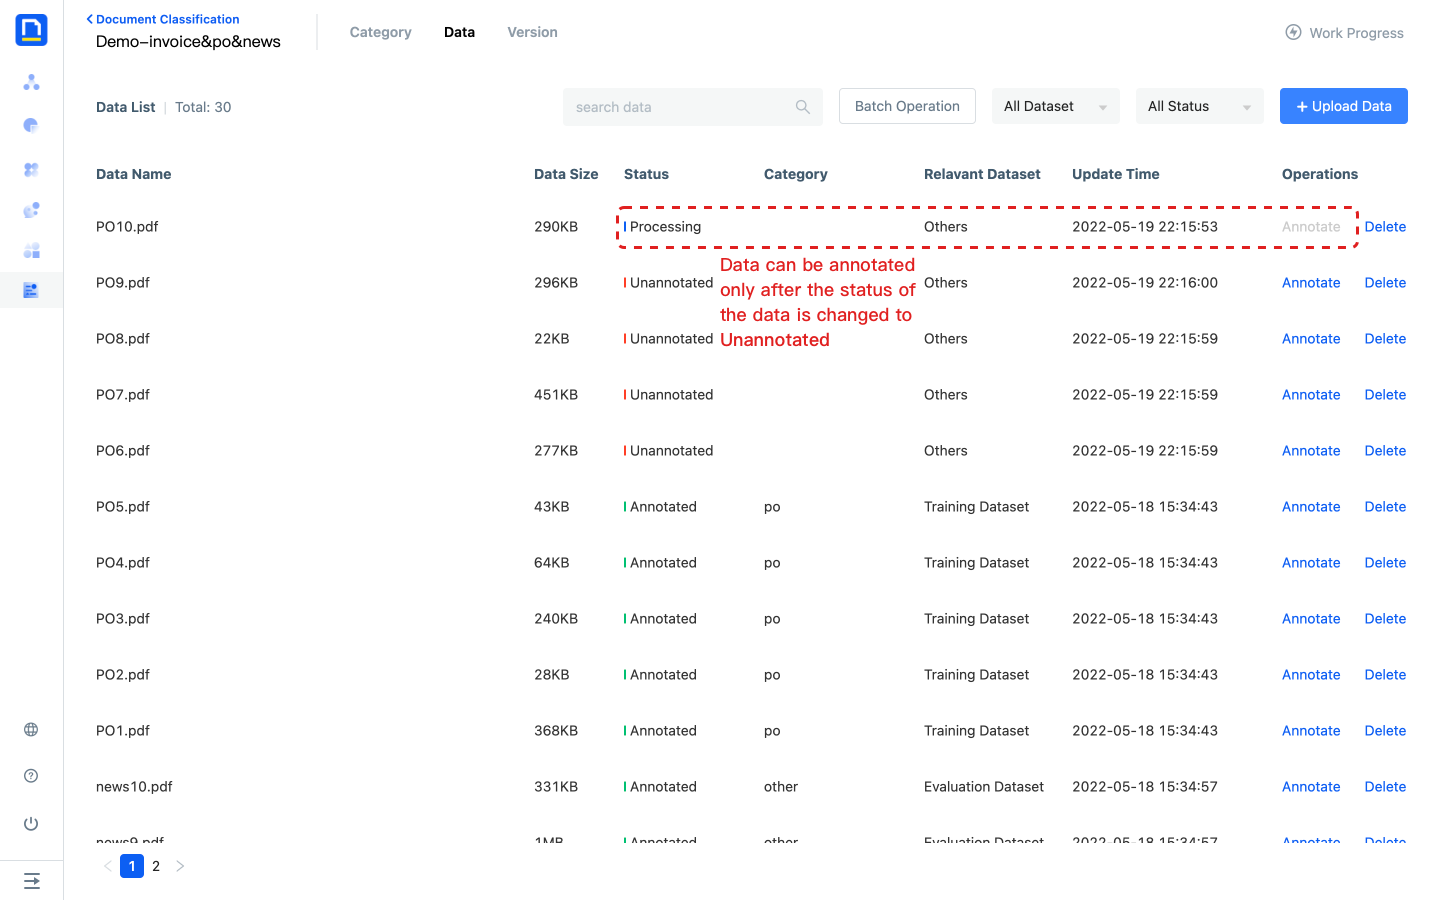
2) Upload representative business data to data management for model training and evaluation.
- After the data is uploaded, OCR recognition will be carried out automatically. After the recognition is completed, the data status will be changed to unmarked before labeling.
- Upload limit: the file size shall not exceed 10m, and the formats are JPEG, JPG, PNG, BMP, tiff and PDF
Annotate the data and build the dataset
1) Click step 3 in the work progress to annotate data, and click go to annotate to enter the data page.
2) Click the Annotate of any data to enter the annotation page.
- If the model has a published version, the model will automatically call the published version after data upload to provide pre-annotation for users
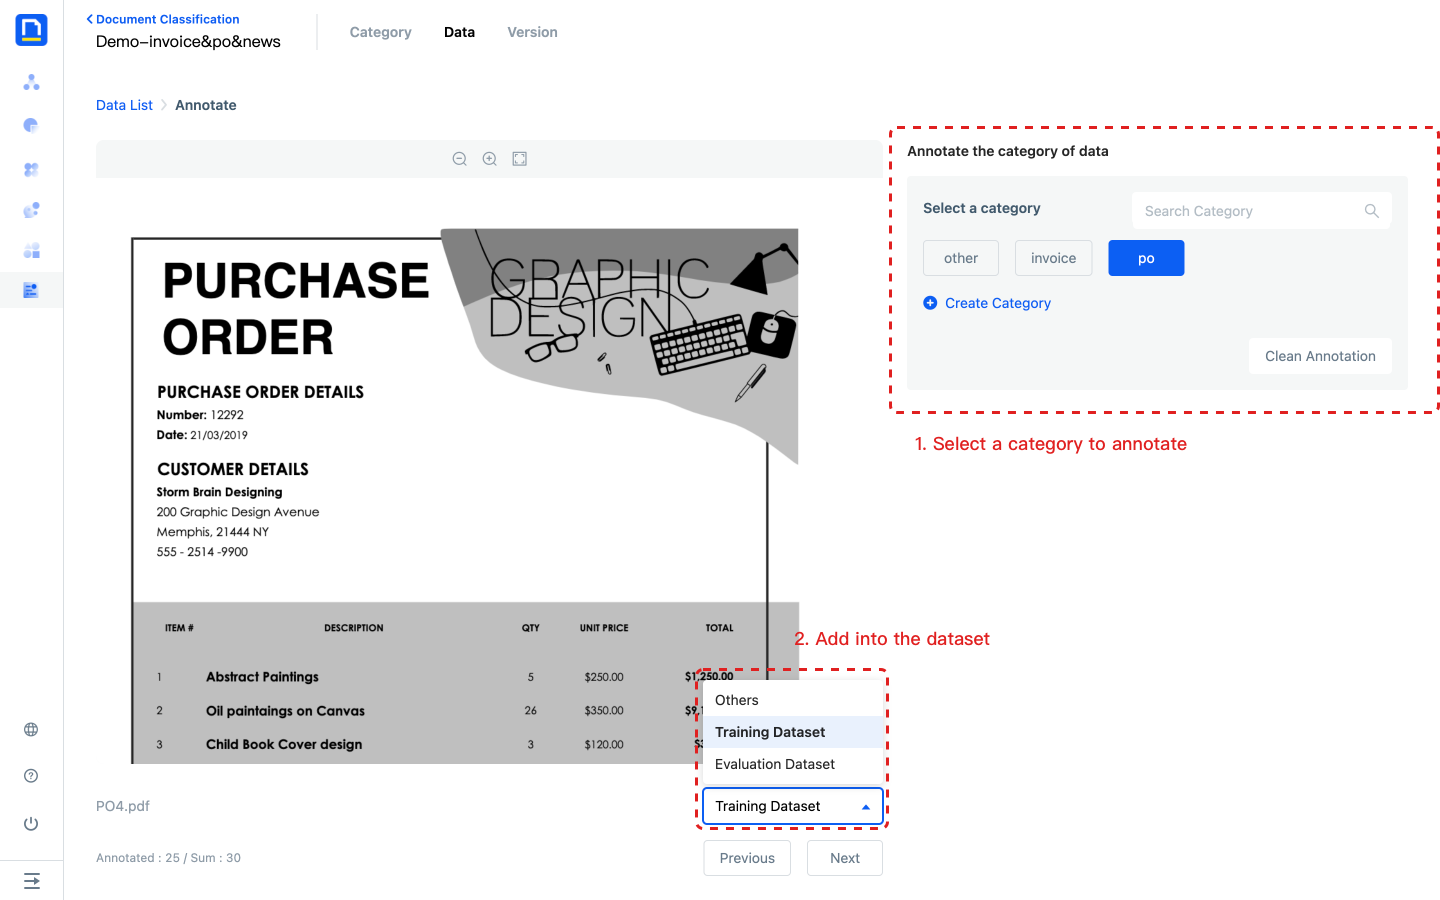
3) After entering the annotation page, all categories will be displayed on the right side of the page. After the data preview is loaded successfully, select category for current data to complete annotation, and you can directly add the current data to the training dataset or evaluation dataset.
- You can also batch add the marked data to the dataset through the data list page.
Create version
1) Click step 5 in the work progress to create a new version, and click go to create to enter the version page.
2) Click Create Version to create a version named v1.
Training
1) Click step 6 in the work schedule and click go to train to enter the version page.
2) Click V1 version Train to initiate model training.
- The system will use the data in the training dataset to train the model. The training dataset should contain the real and representative data in the business scenario. Training can be initiated only when there are at least 2 categories and at least 5 training samples under each category. In order to improve the prediction effect, the amount of training data for each category should be relatively balanced.
- Training may take some time. The more data in the training dataset, the longer the training time. You can view the remaining time of the training by moving the mouse over the status of the version.
3) After the training is completed, you can continue the next step.
- If the data of the evaluation dataset has been configured before training, the system will automatically initiate an evaluation.
- If you need to keep multiple versions of the model to compare the effect of the old and new versions, create a new version for training. Retraining the version directly overwrites the previous training results, making it impossible to retrieve the old model.
Evaluating
1) Click step 7 in the work progress, and click go to evaluate to enter the version page.
2) Click V1 version Evaluate to initiate a model evaluation.
- The system will use the data in the evaluation dataset to evaluate the model. Note that the evaluation dataset should contain data that is co distributed with the training dataset.
- The evaluation takes a period of time. The more data in the evaluation dataset, the longer the evaluation takes. You can view the remaining time of the evaluation by moving the mouse over the status of the version.
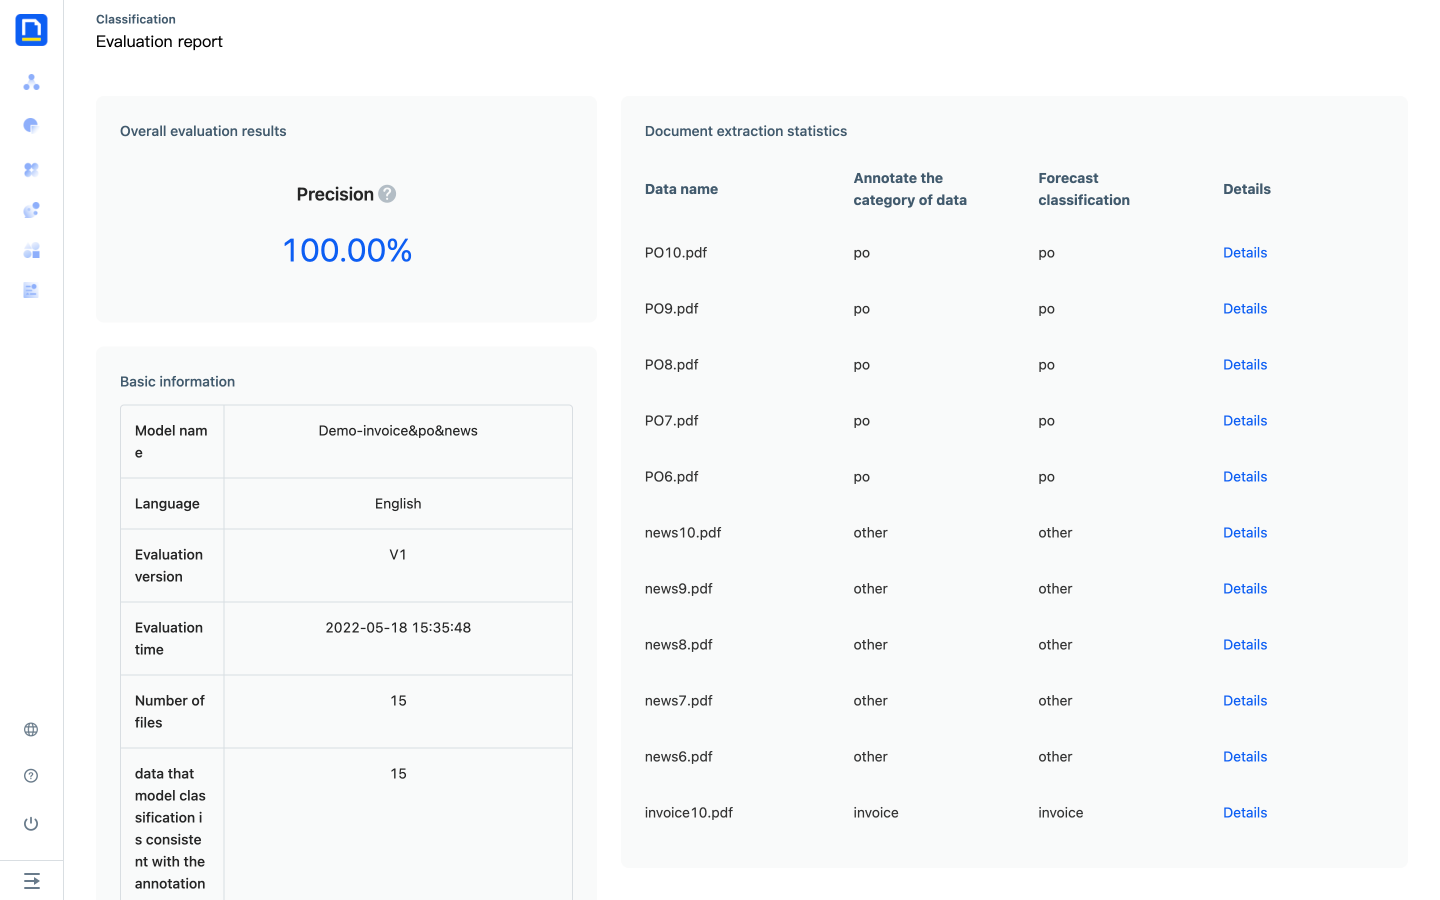
1) After the evaluation is completed, click the Precision of last evaluation of the version to view the evaluation report.
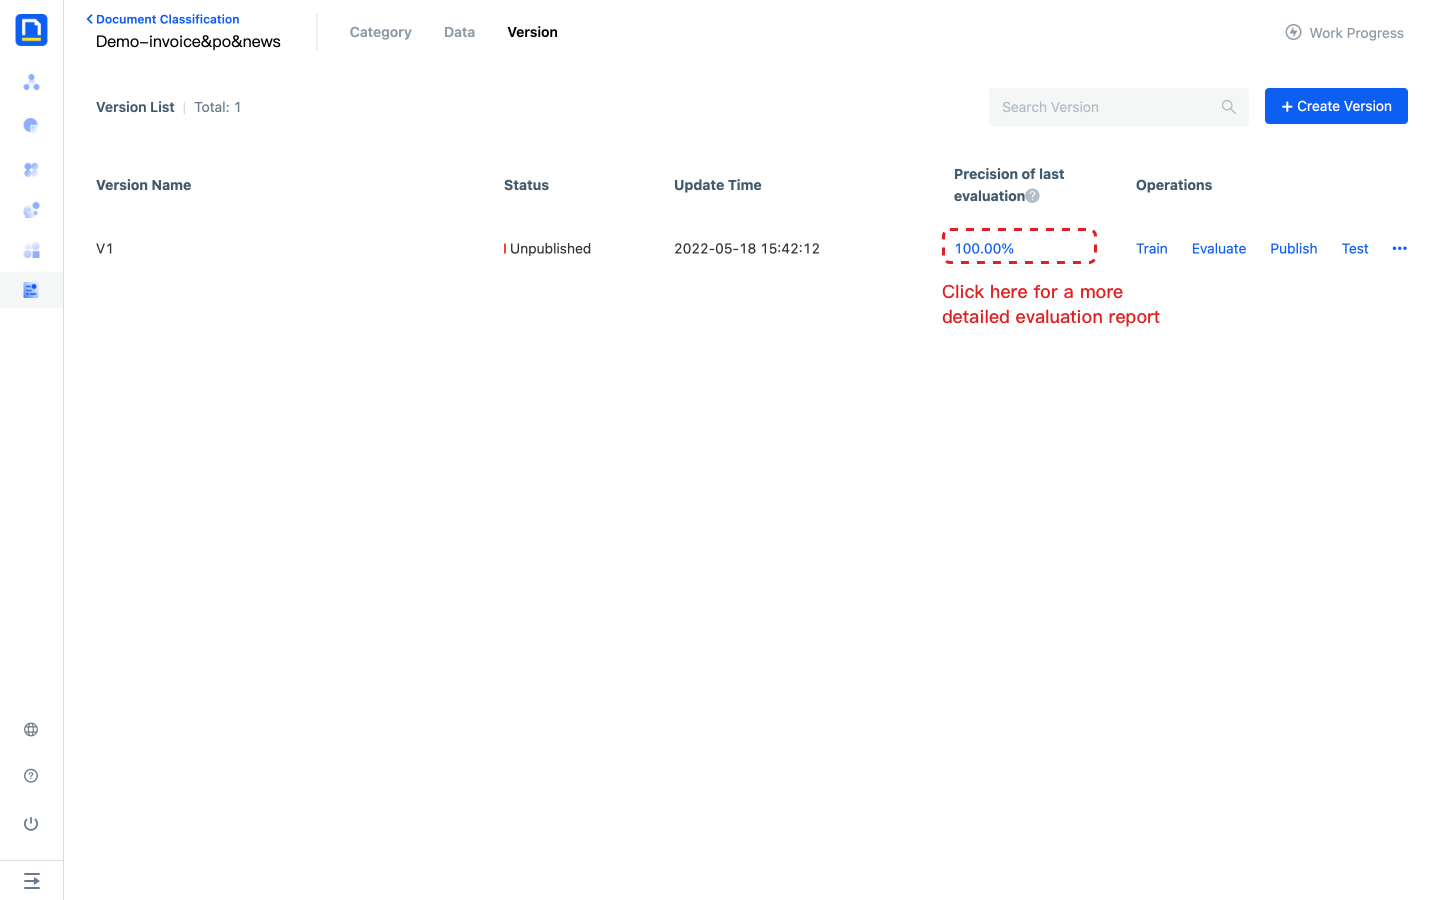
4) The evaluation report includes the overall evaluation results, basic information and the evaluation results of each document.
Release
1) Click step 8 to publish in the work schedule and click go to publish to enter the version page.
2) Click V1 version Publish to release the current version.
3) After the release, return to the page of model list and click Test of the model to test whether the effect meets the expectation.
- You can also directly test the model effect through the test in version operation before publishing
Model test
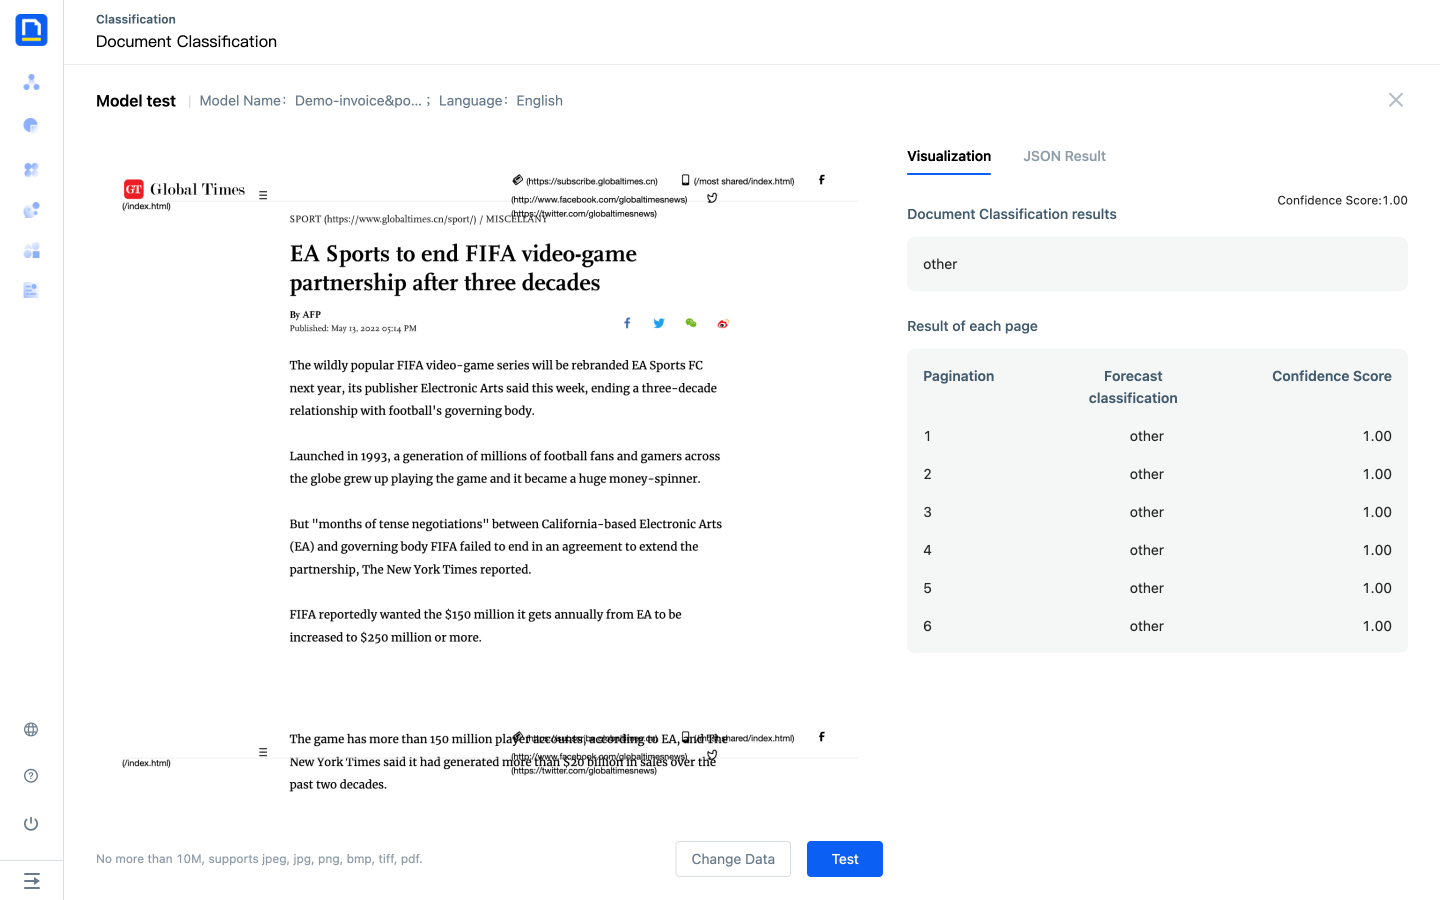
The model test results include visualization results and JSON results:
- Visualization results
- Document Classification result: the predicted category and corresponding confidence of this document
- category results per page: when the number of pages of a document is greater than 1, the model will also provide category results per page of a document, including the page number of each page, the predicted category and the corresponding confidence.
- JSON results
- You can view the format and results returned by API calls through JSON results, which also contain All details of the category model test.
FAQ
Difference between Document Classification and Text Classification
1) Input is different
The input of Text Classification is text. If you want to complete the category of a document, you need to use RPA to set up a category Process, call OCR recognition first, obtain the OCR recognition results, and call the Text Classification model. If you encounter a large number of document pages, it may exceed the 30000 word call limit of Text Classification, and there are many details to be considered.
As an end-to-end AI Capability of a document, Document Classification takes document as the minimum strength in training, evaluation and model invocation.
2) The characteristics of model learning are different
The intelligent model of Text Classification only learns the semantic features of text, while the Document Classification model learns the semantic features and location features of documents.
Number deduction logic
The platform will deduct the number of times based on the number of pages. Here are the actions that can occur:
- Data management: after uploading data, the system deducts the number of times according to the number of file pages
- Version test, model test and API call: after the call is successful, the number of times shall be deducted according to the number of file pages