Custom Template Recognition
Business scenario description
General Invoice & Receipt recognition and General Card Recognition can process fixed-format semi-structured data. These formats are defined as national unified standards in various policy documents. Invoice & Receipt Recognition and Card Recognition can process these data to complete the tasks of OCR recognition and field extraction. The purpose of the country-made format specification is for convenience of management. In the production and operation of enterprises/public institution services, there are similar management requirements. There are various templates with business characteristics within enterprise and institute. The custom template function can extract data from these templates through configuration rules. Let us learn more about usage scenarios through several success stories:
- The financial department of a power unit has made a series of financial document formats such as cost reimbursement approval form, project appropriation approval form, refund appropriation approval form, and travel expense reimbursement form. When employees apply for internal approval, they need to upload these documents.
- Before RPA+AI, the financial staff needs to manually check whether the documents are consistent with the amount on the approval system.
- With RPA+AI, the custom template automatically extracts key fields from the documents, RPA compares the extracted fields with the amount of the approval system, that achieves end-to-end intelligent automation.
- A manufacturer sells domestically produced electrical appliances to foreign countries after OEM. There will be invoices and other documents in the delivery process. The content of the invoice is basically the same as the domestic invoice, but because there is no invoice format for tax supervision abroad, the format of the invoice is usually different for each company. The custom template can be used to identify and extract information such as the order number, date, consignee, and product, and digitize the shipping information into the enterprise's ERP system.
- A vaccine manufacturer receives orders from institutions, medical institutions, and military units across the country. They need to review the qualifications of these units when annual audit or new customer coming. There are 6 different AI capabilities that need to be used in the process of reviewing the qualifications. Among them, for the legal person certificate of the business unit, Mage currently cannot provide out-of-the-box AI capability. With others, through custom template, Mage can extract information such as the unified social credit code, name, address, and validity period, and compare it with the information reported in the OA system.
Features
- Flexible: Able to deal with fixed-page invoice & receipt. Companies can customize AI capabilities according to their own business.
- Simple: There is guidance for every step, code-free to complete the whole process of data management->label->configuration->evaluation->online. Teach you how to build a production environment (that is, the accuracy rate meets expectations) robot.
Instructions
video version
text version
Follow this tutorial step by step and learn how to use custom template in 30 minutes
Build Template
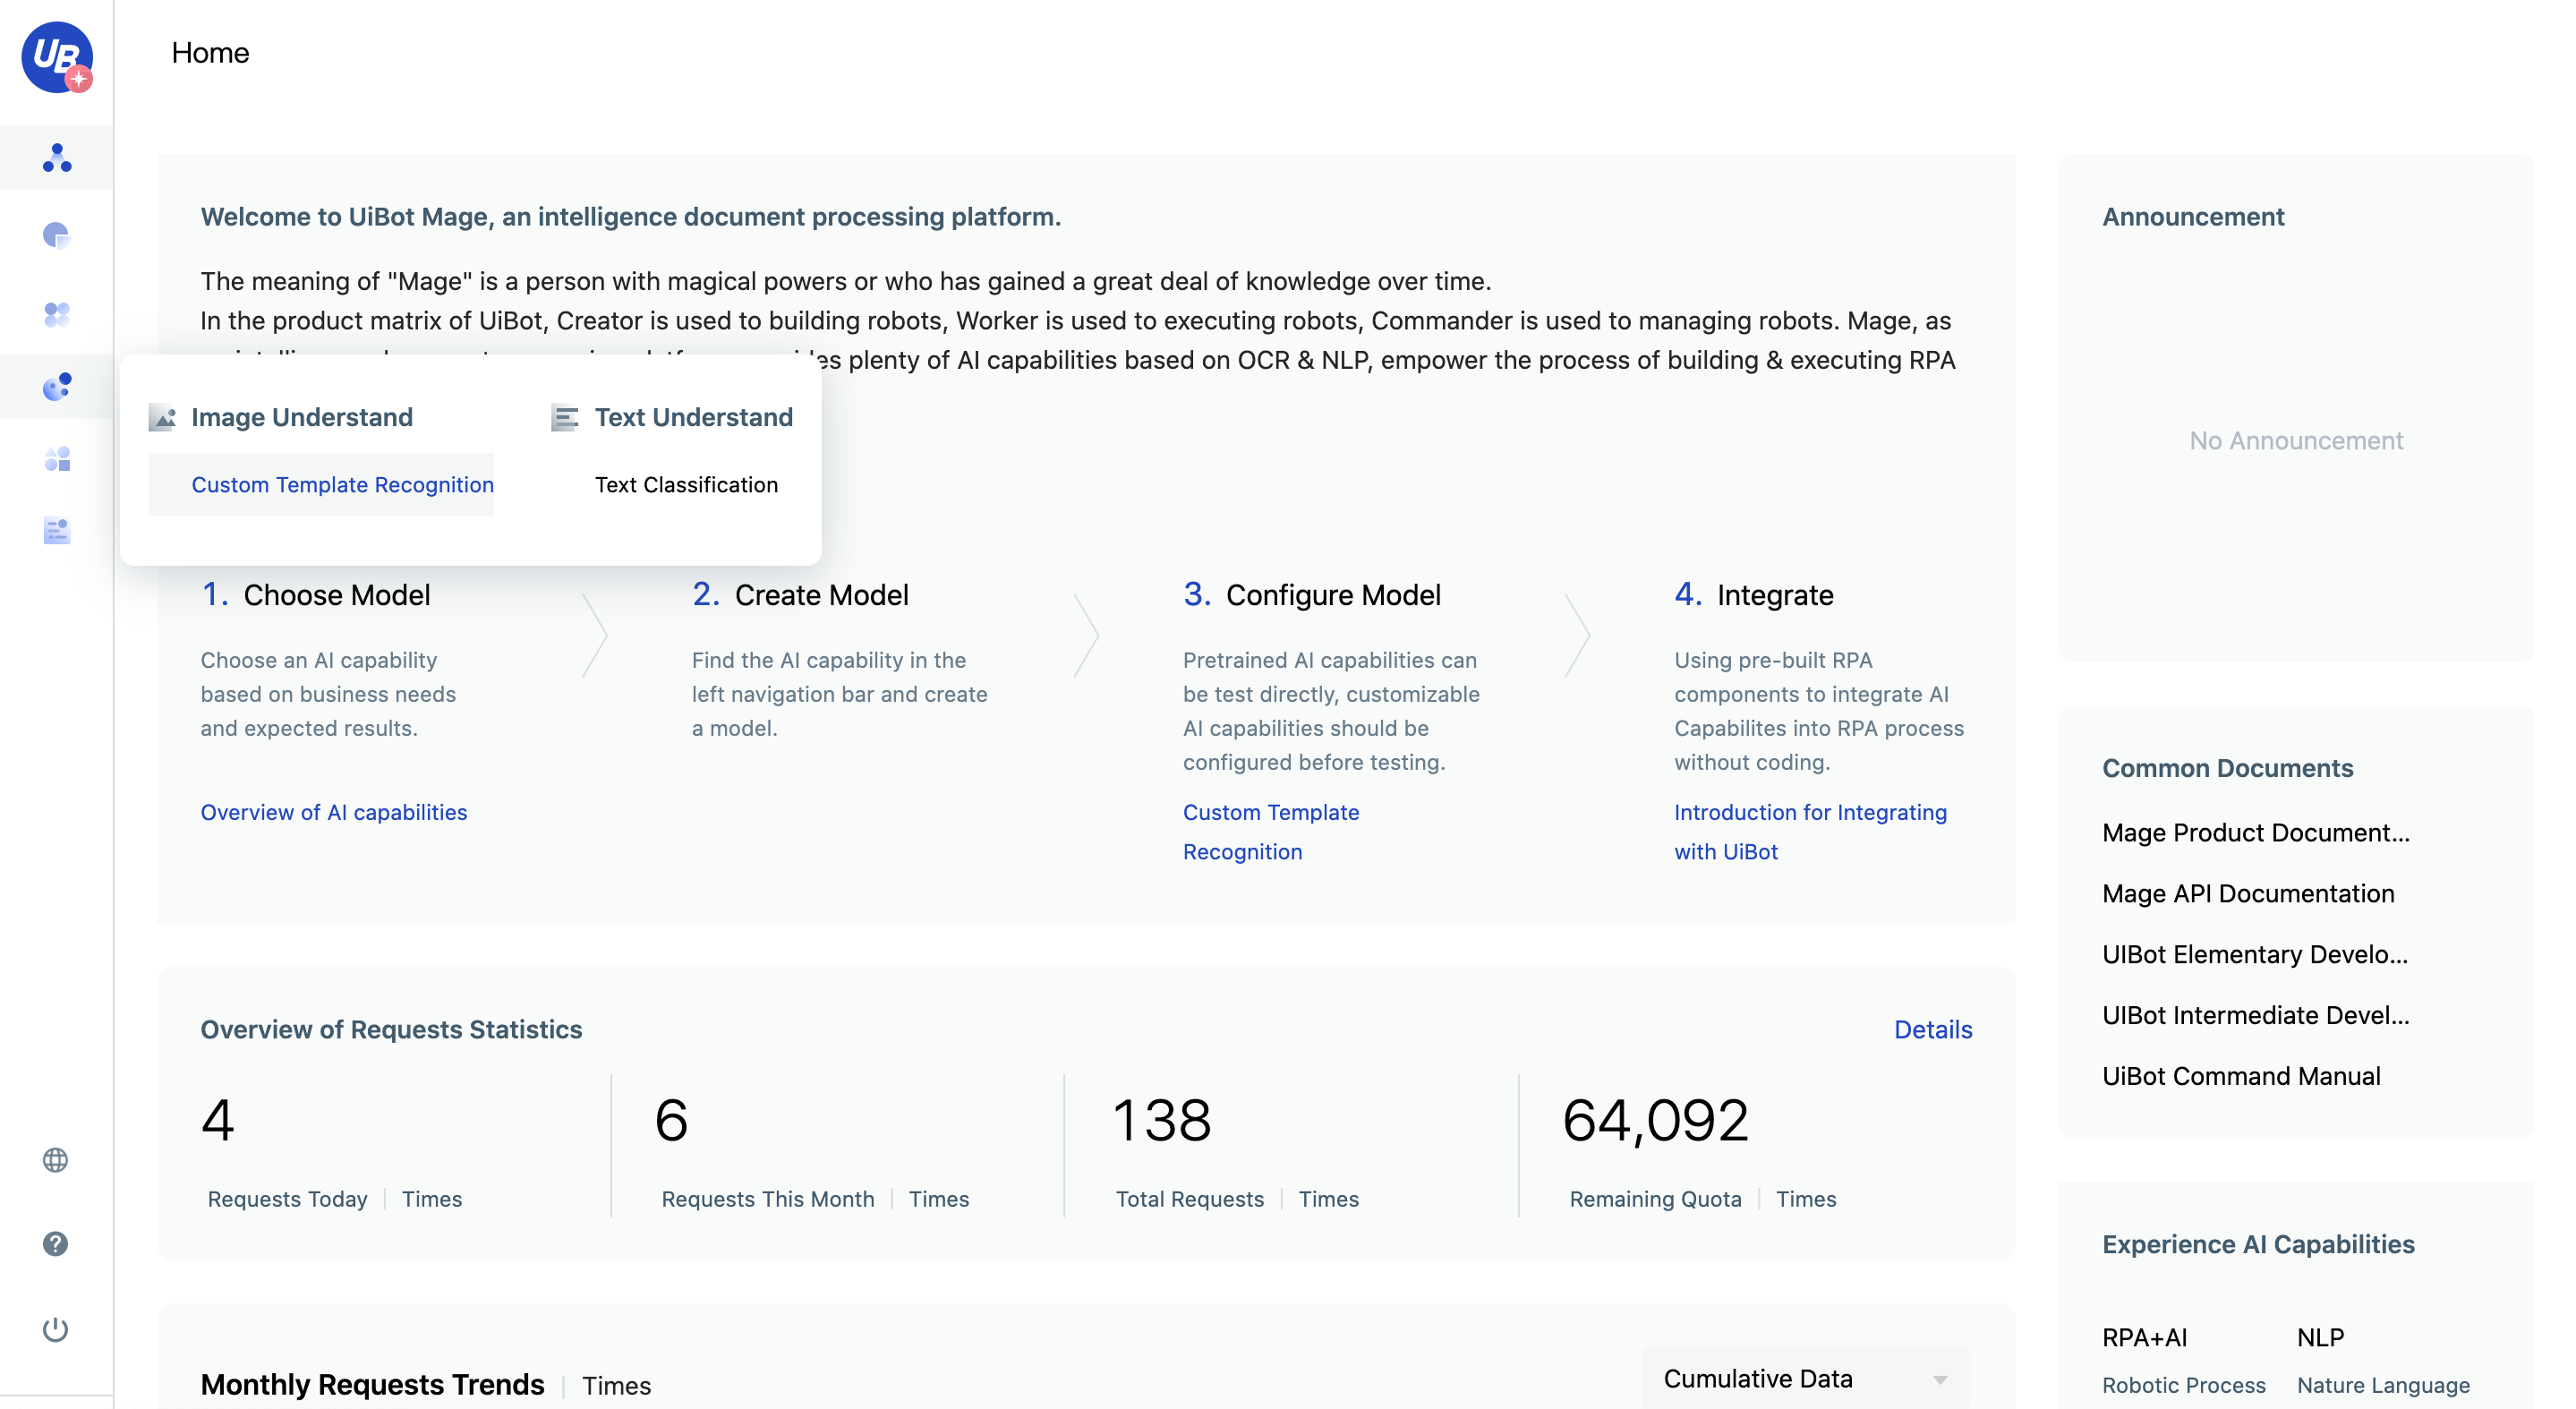
1)Log in IDP platform, click the menu of Custom Template Recognition.
2)Download sample file to local

3)Create a custom template recognition model
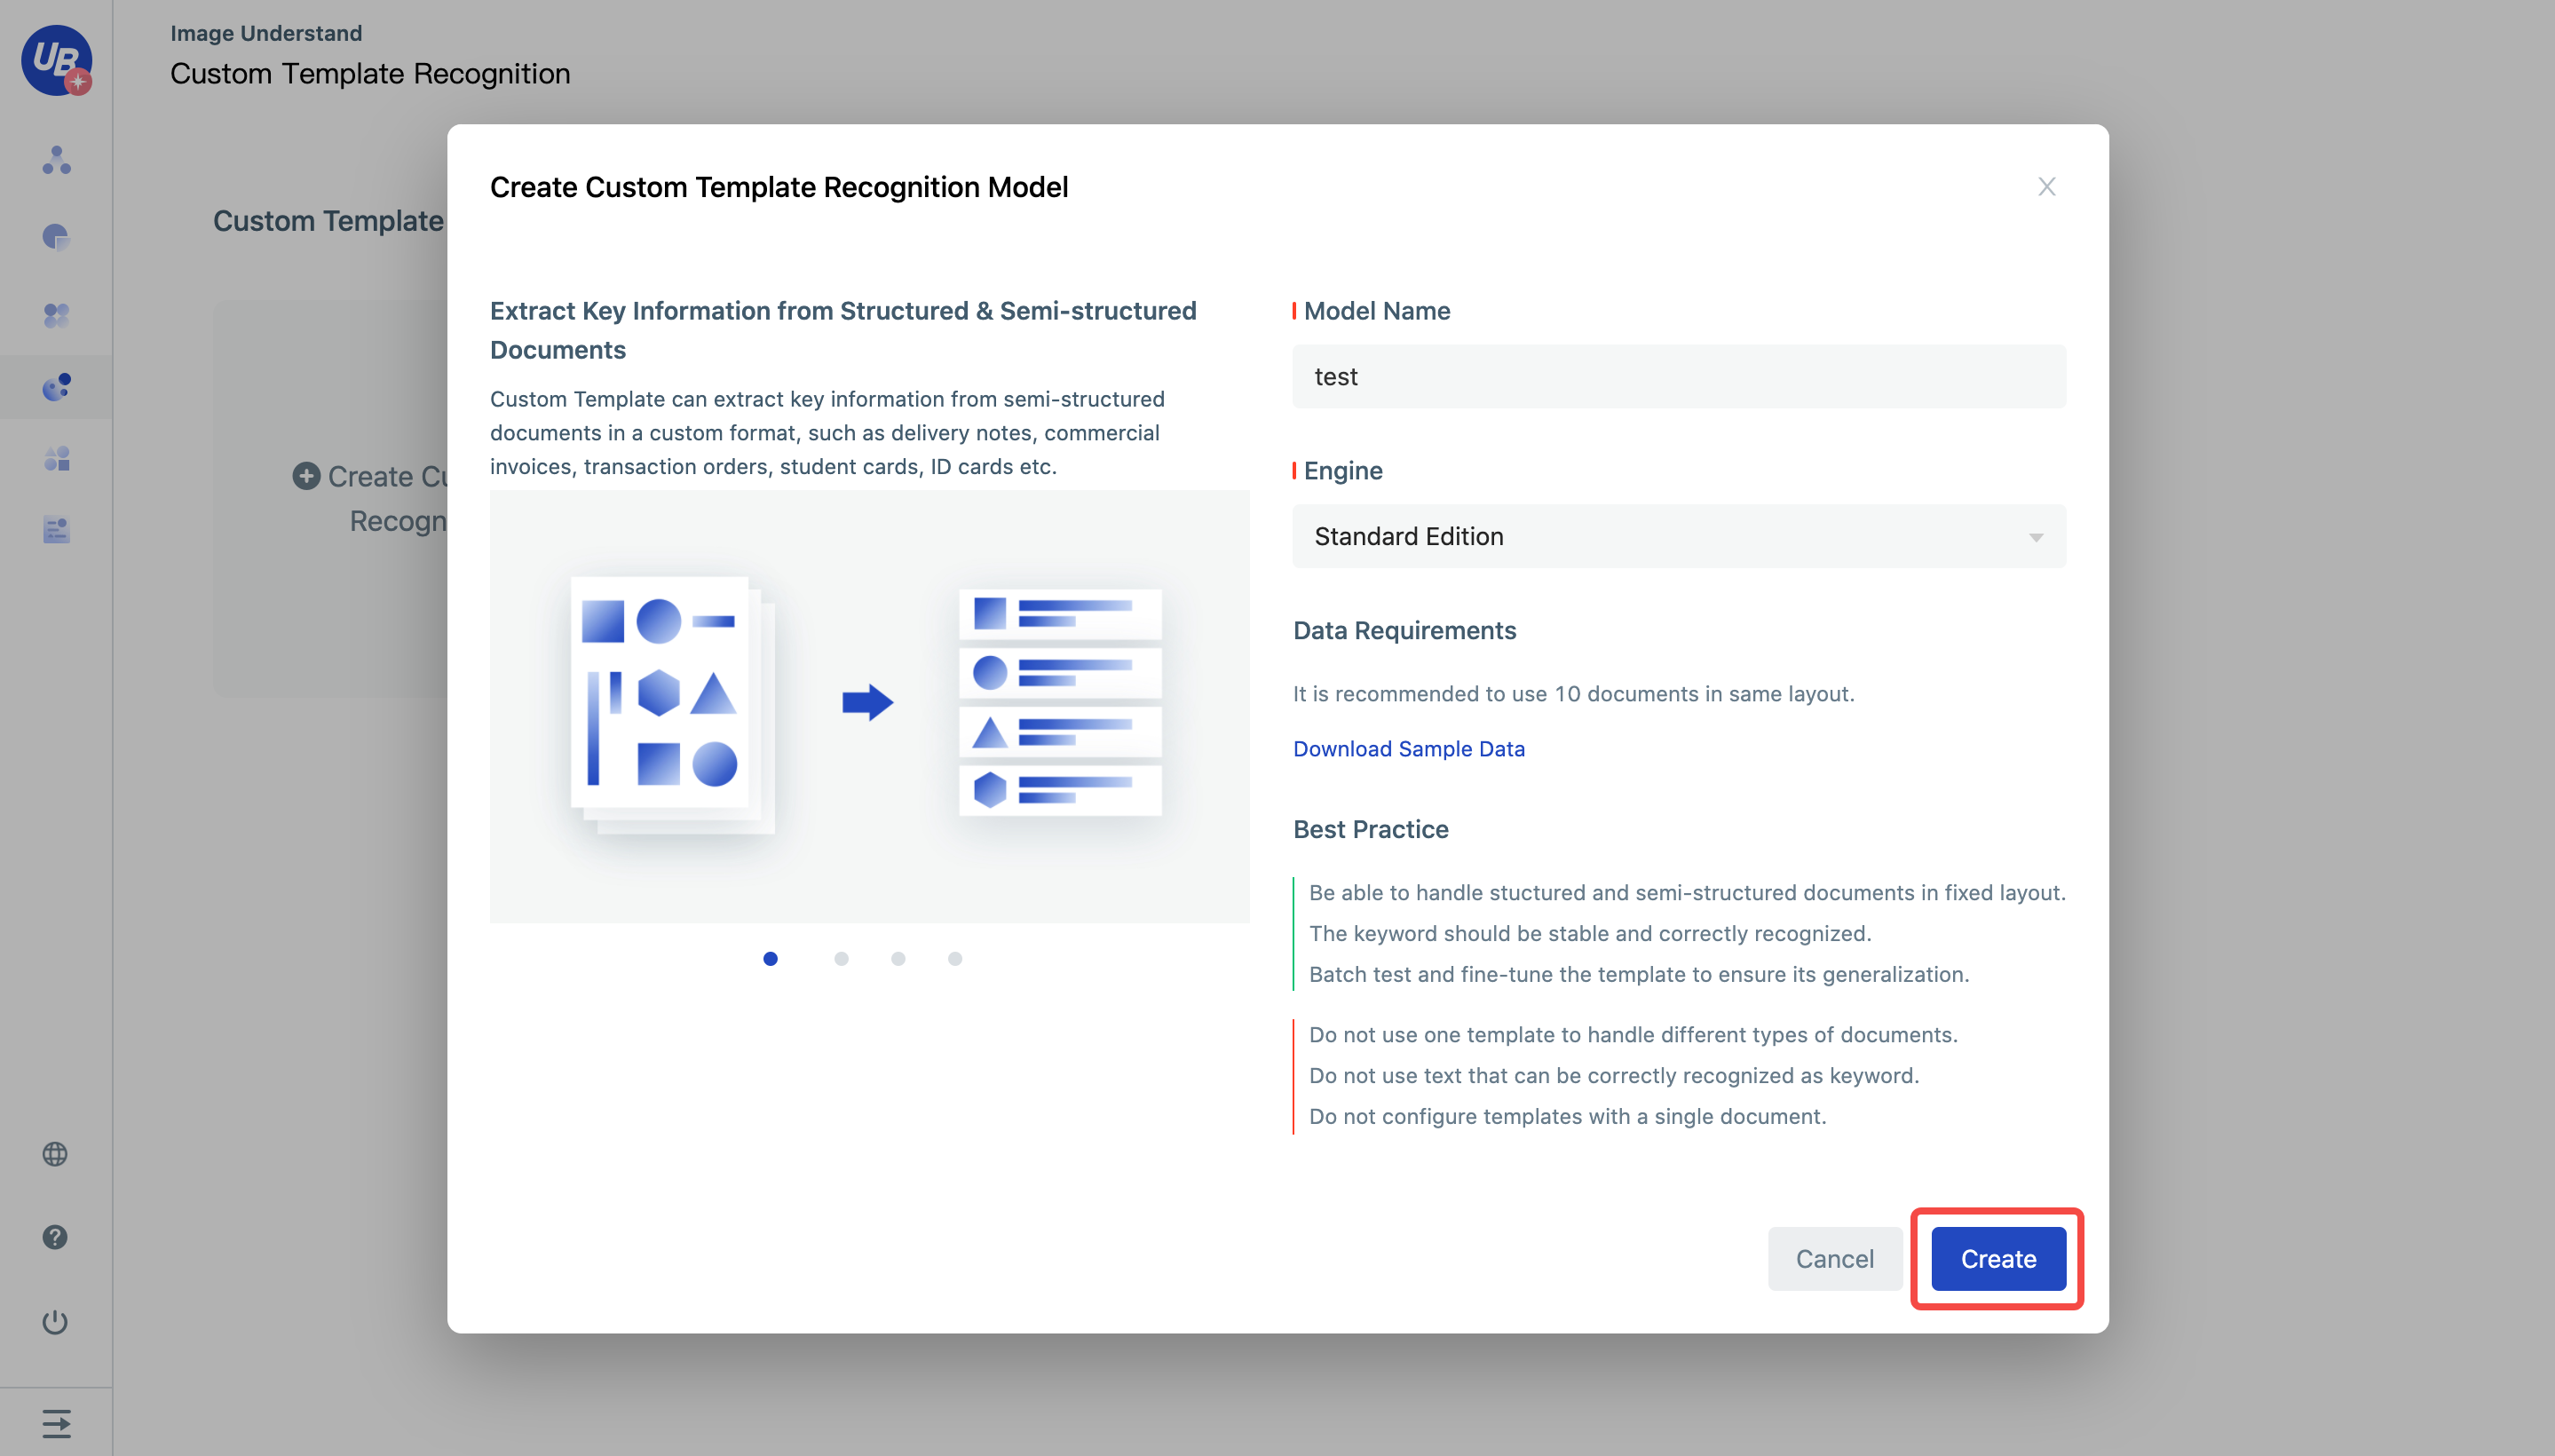
4)Create a model called "Expense Bill"

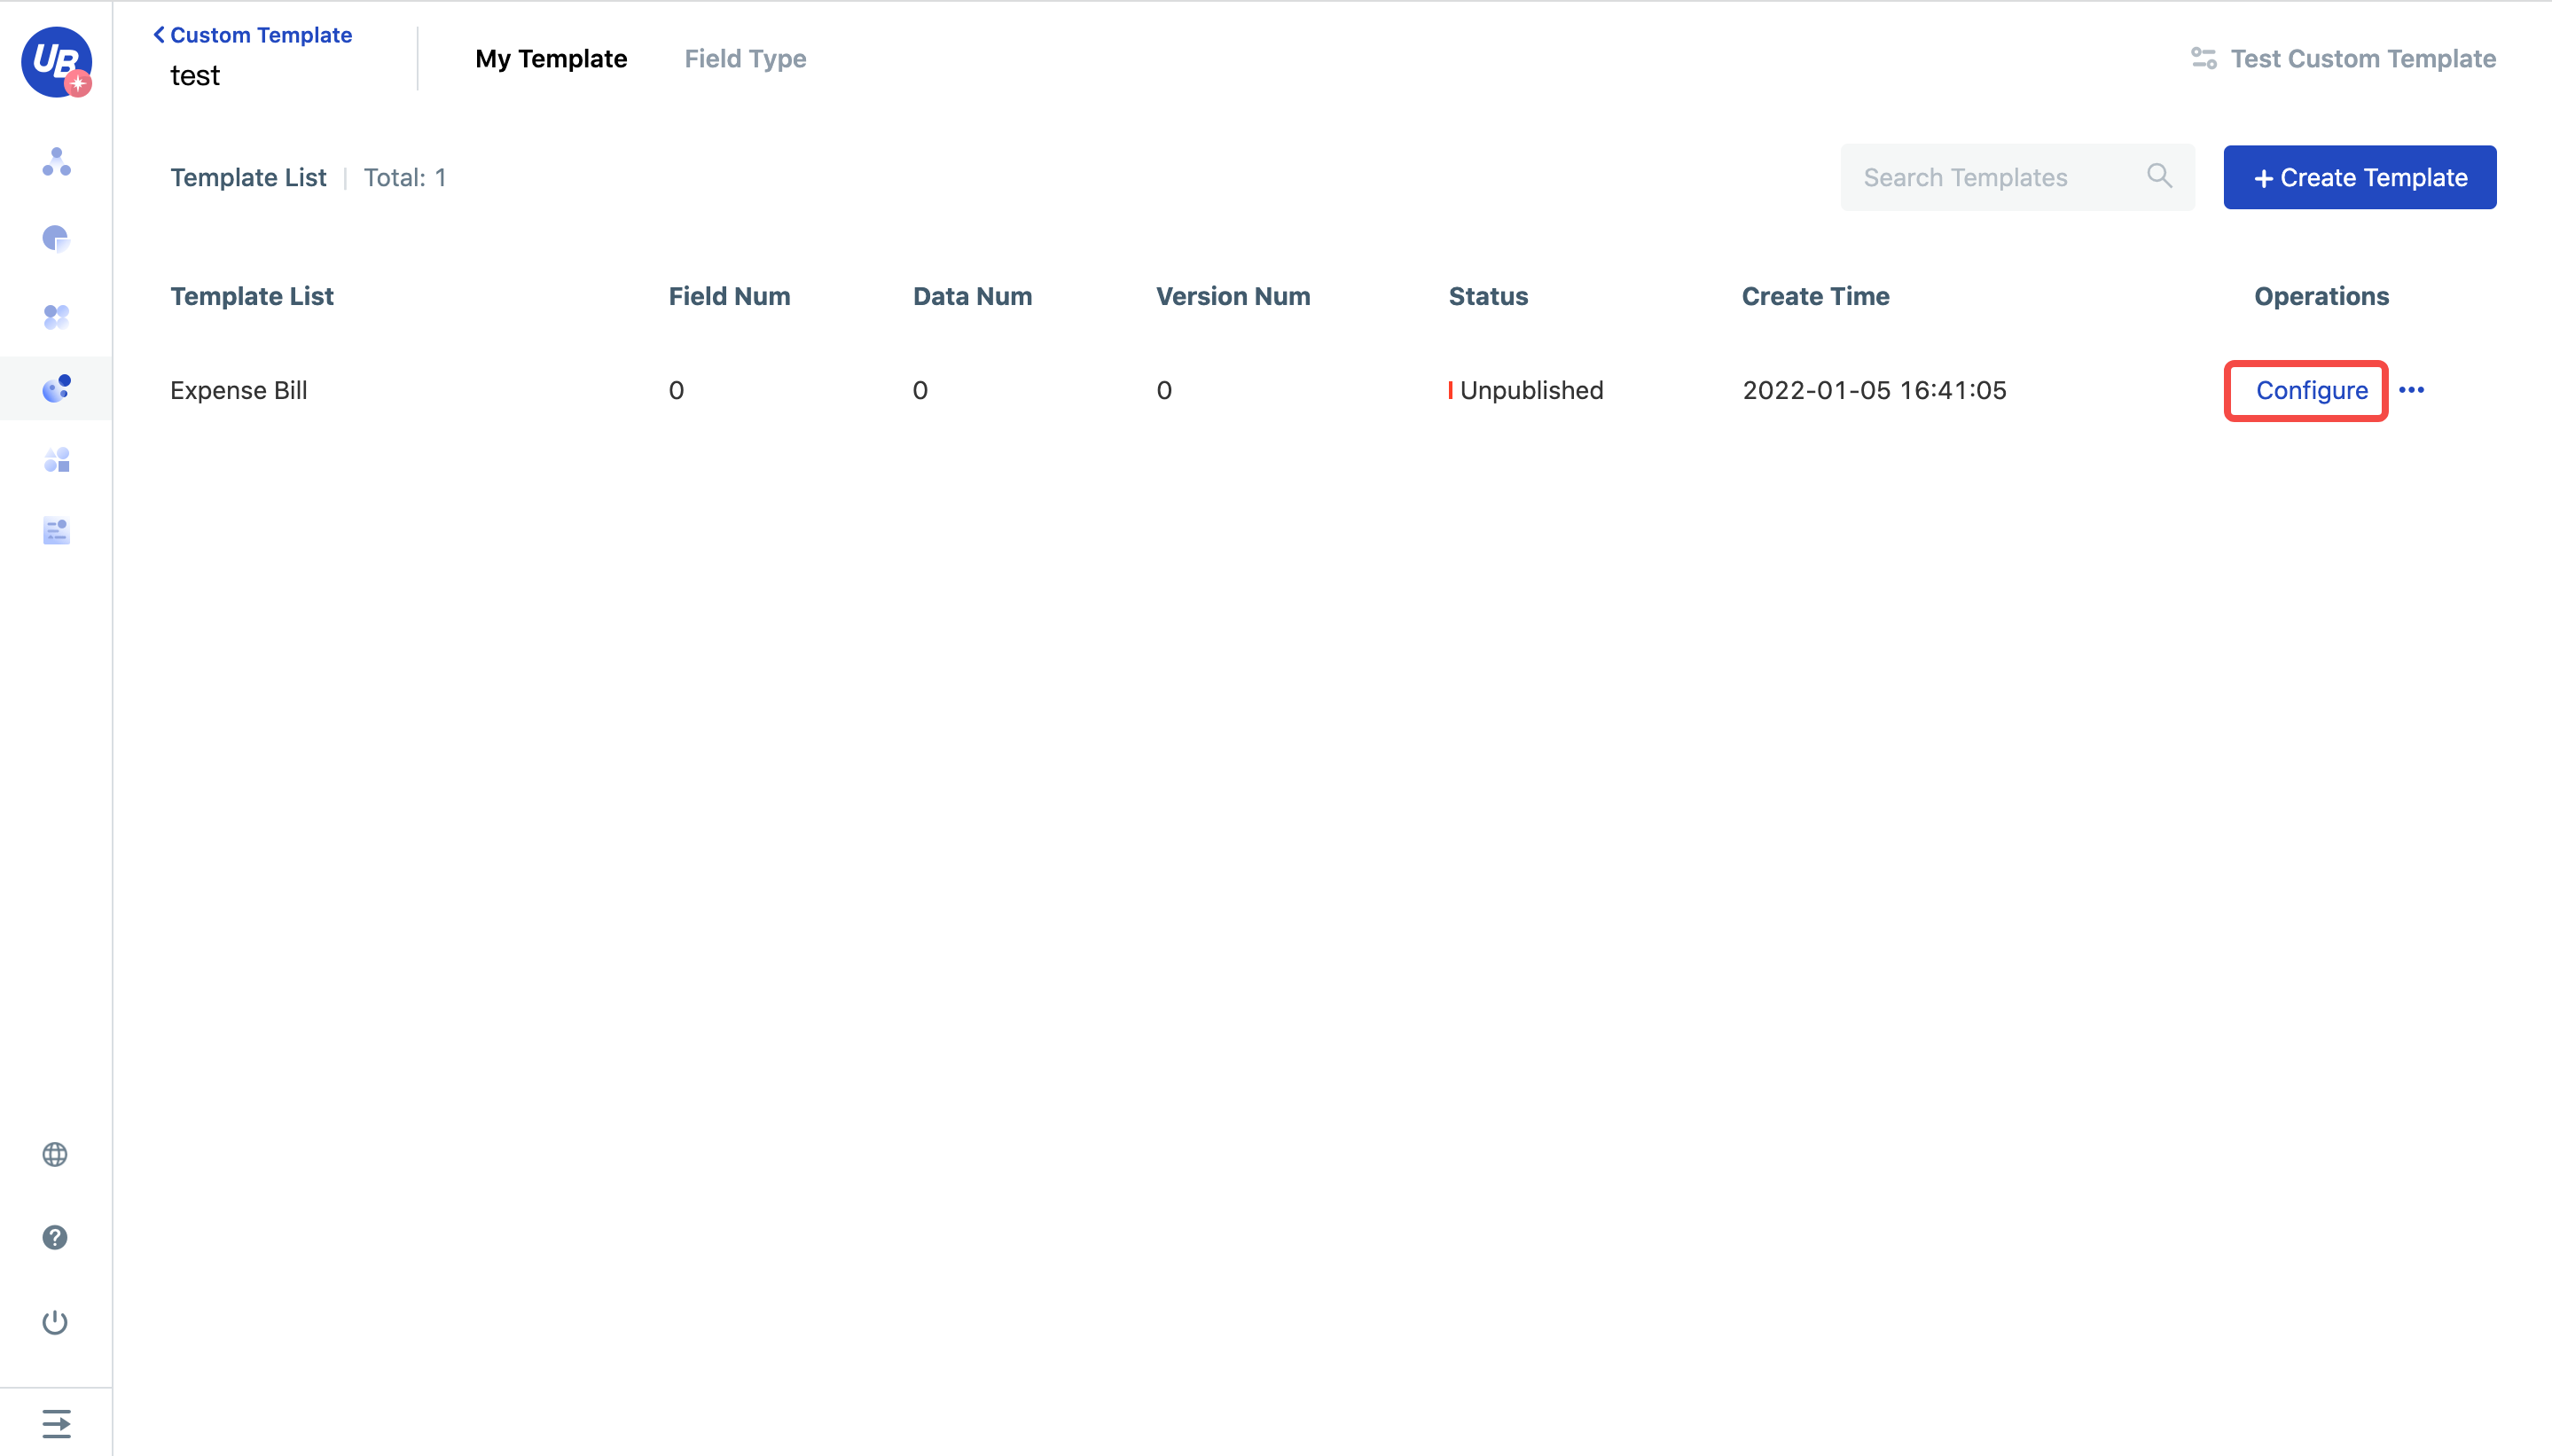
5)Click to start configuration
New field
6)After entering, you will see "Work Progress Guide", click on the first process to create a new field
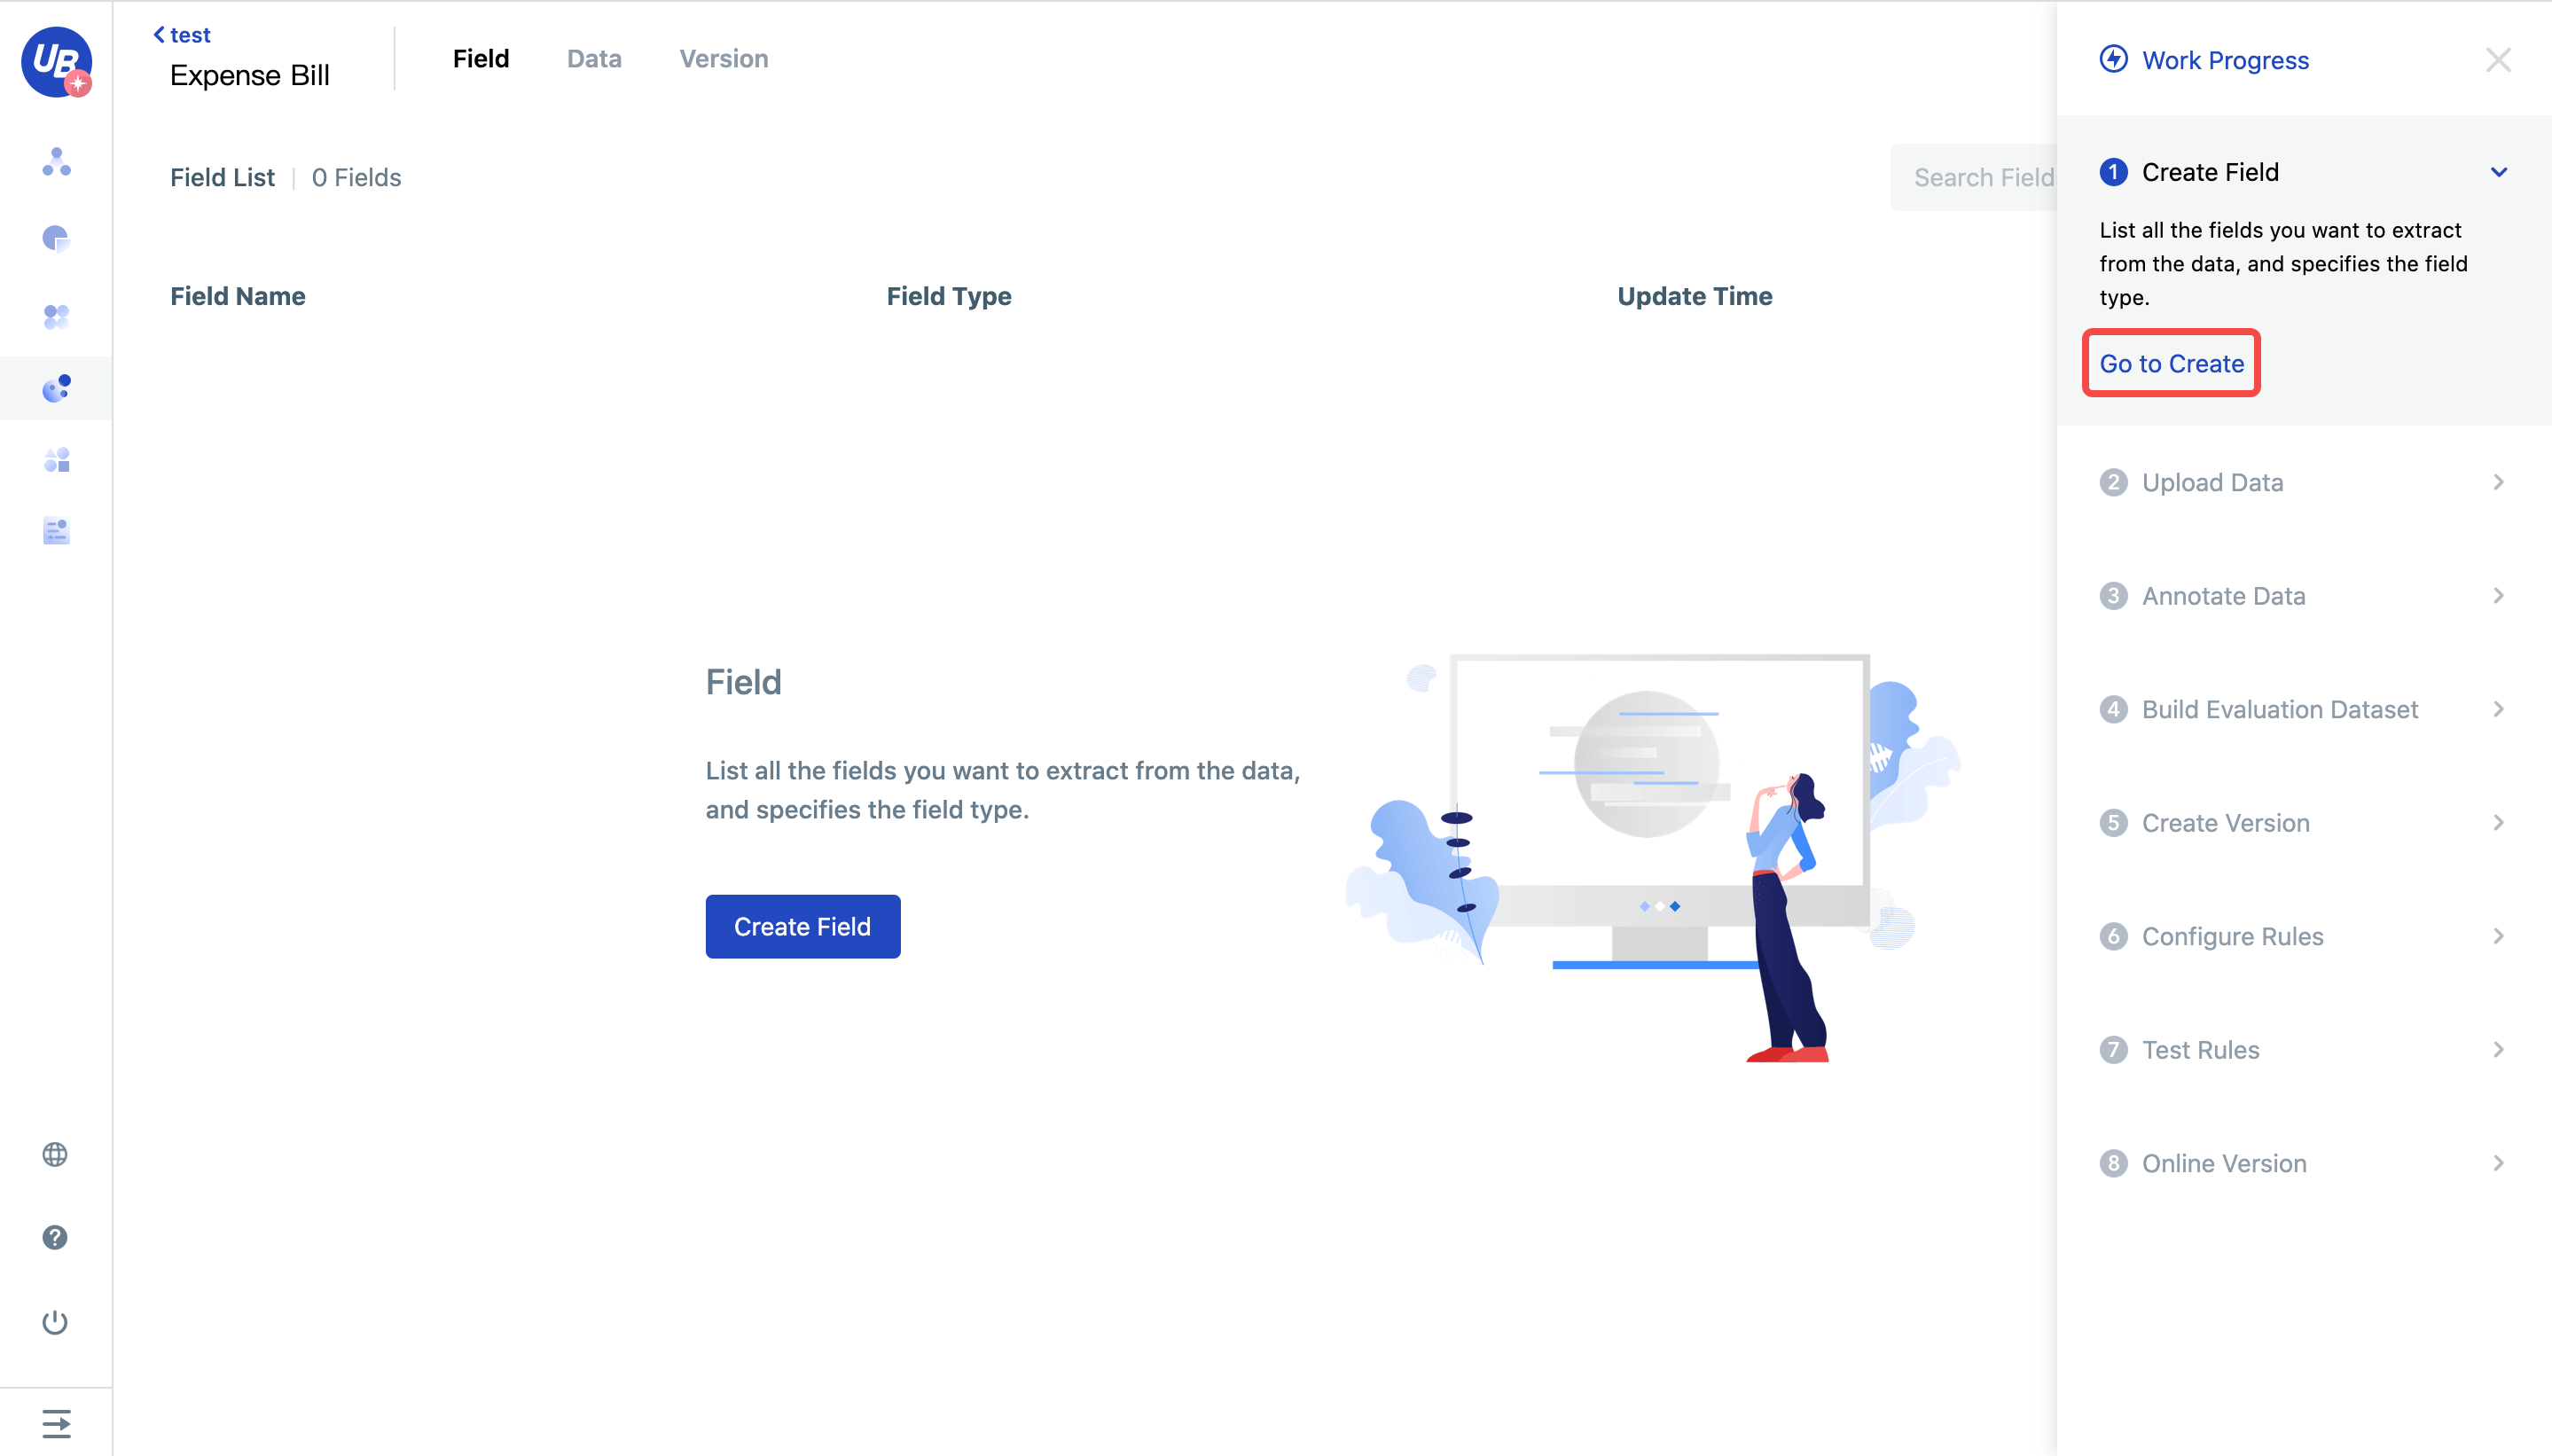
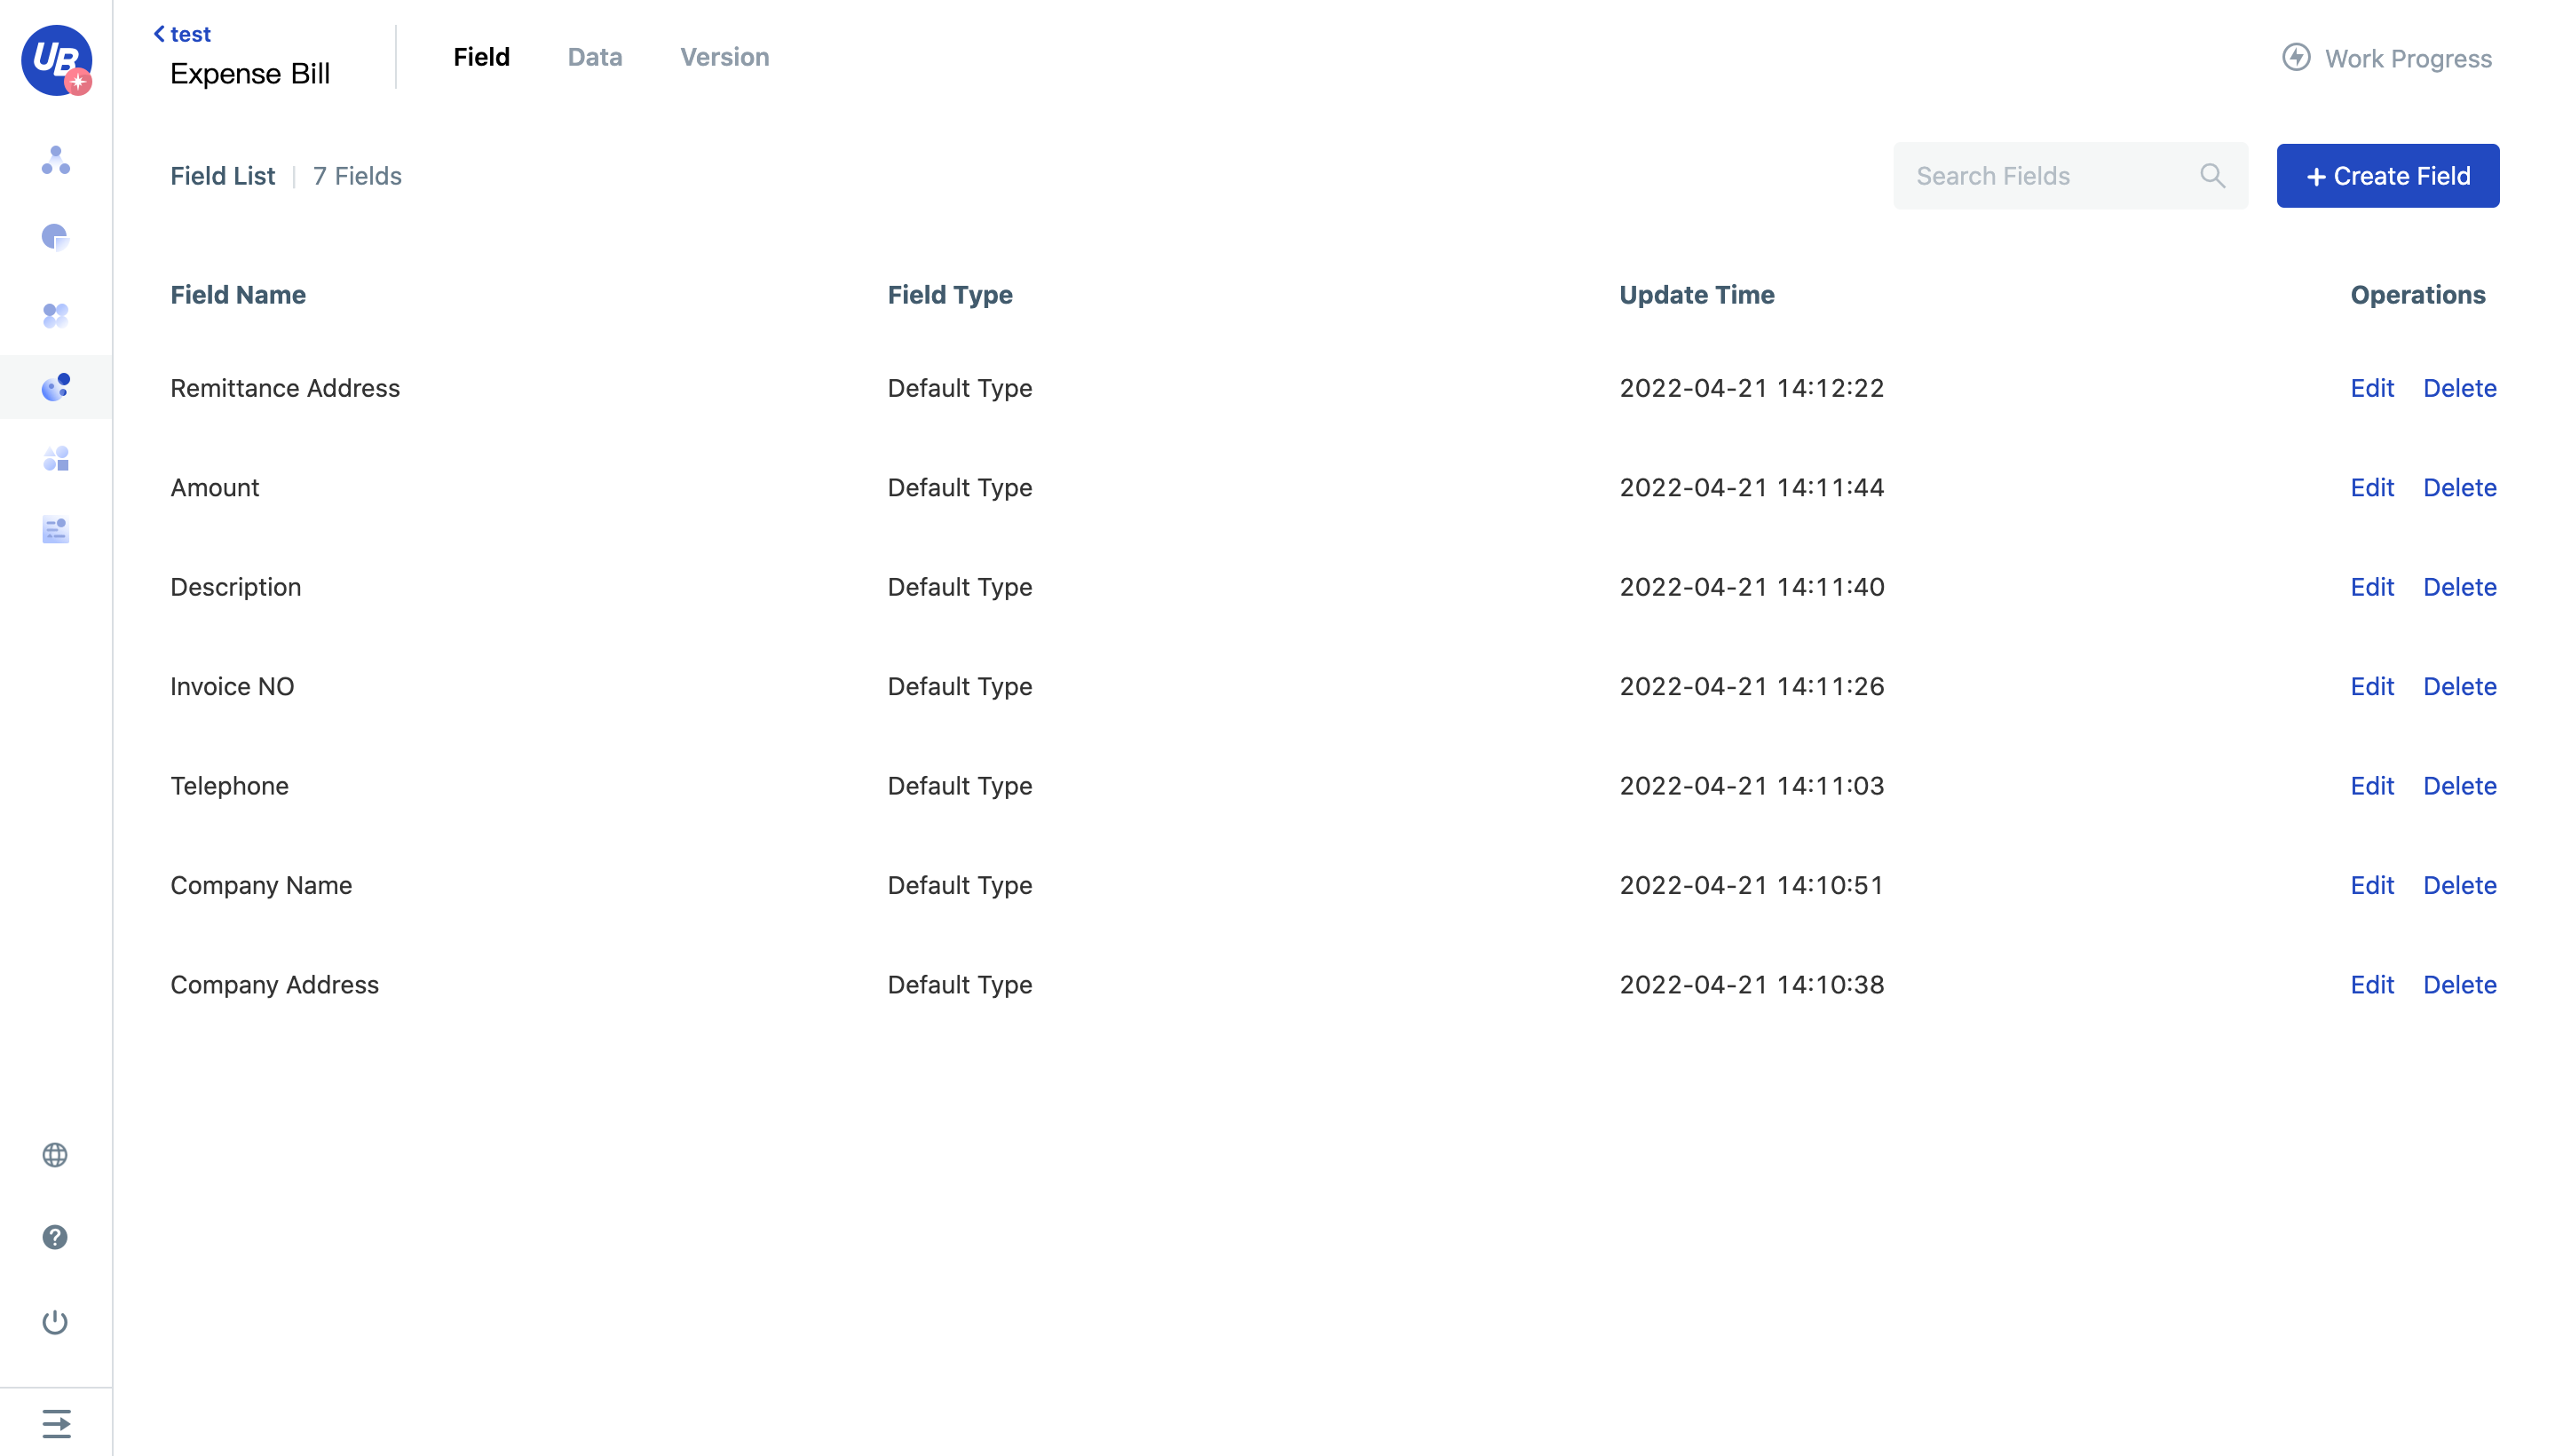
7)Check the sample file downloaded in step 2), and use the New Field button to list all the fields that you want the model to extract from the file
Upload data
8)At this time, the work progress list shows that the "New Field" process has been completed, now we go to the second process "Upload Data"
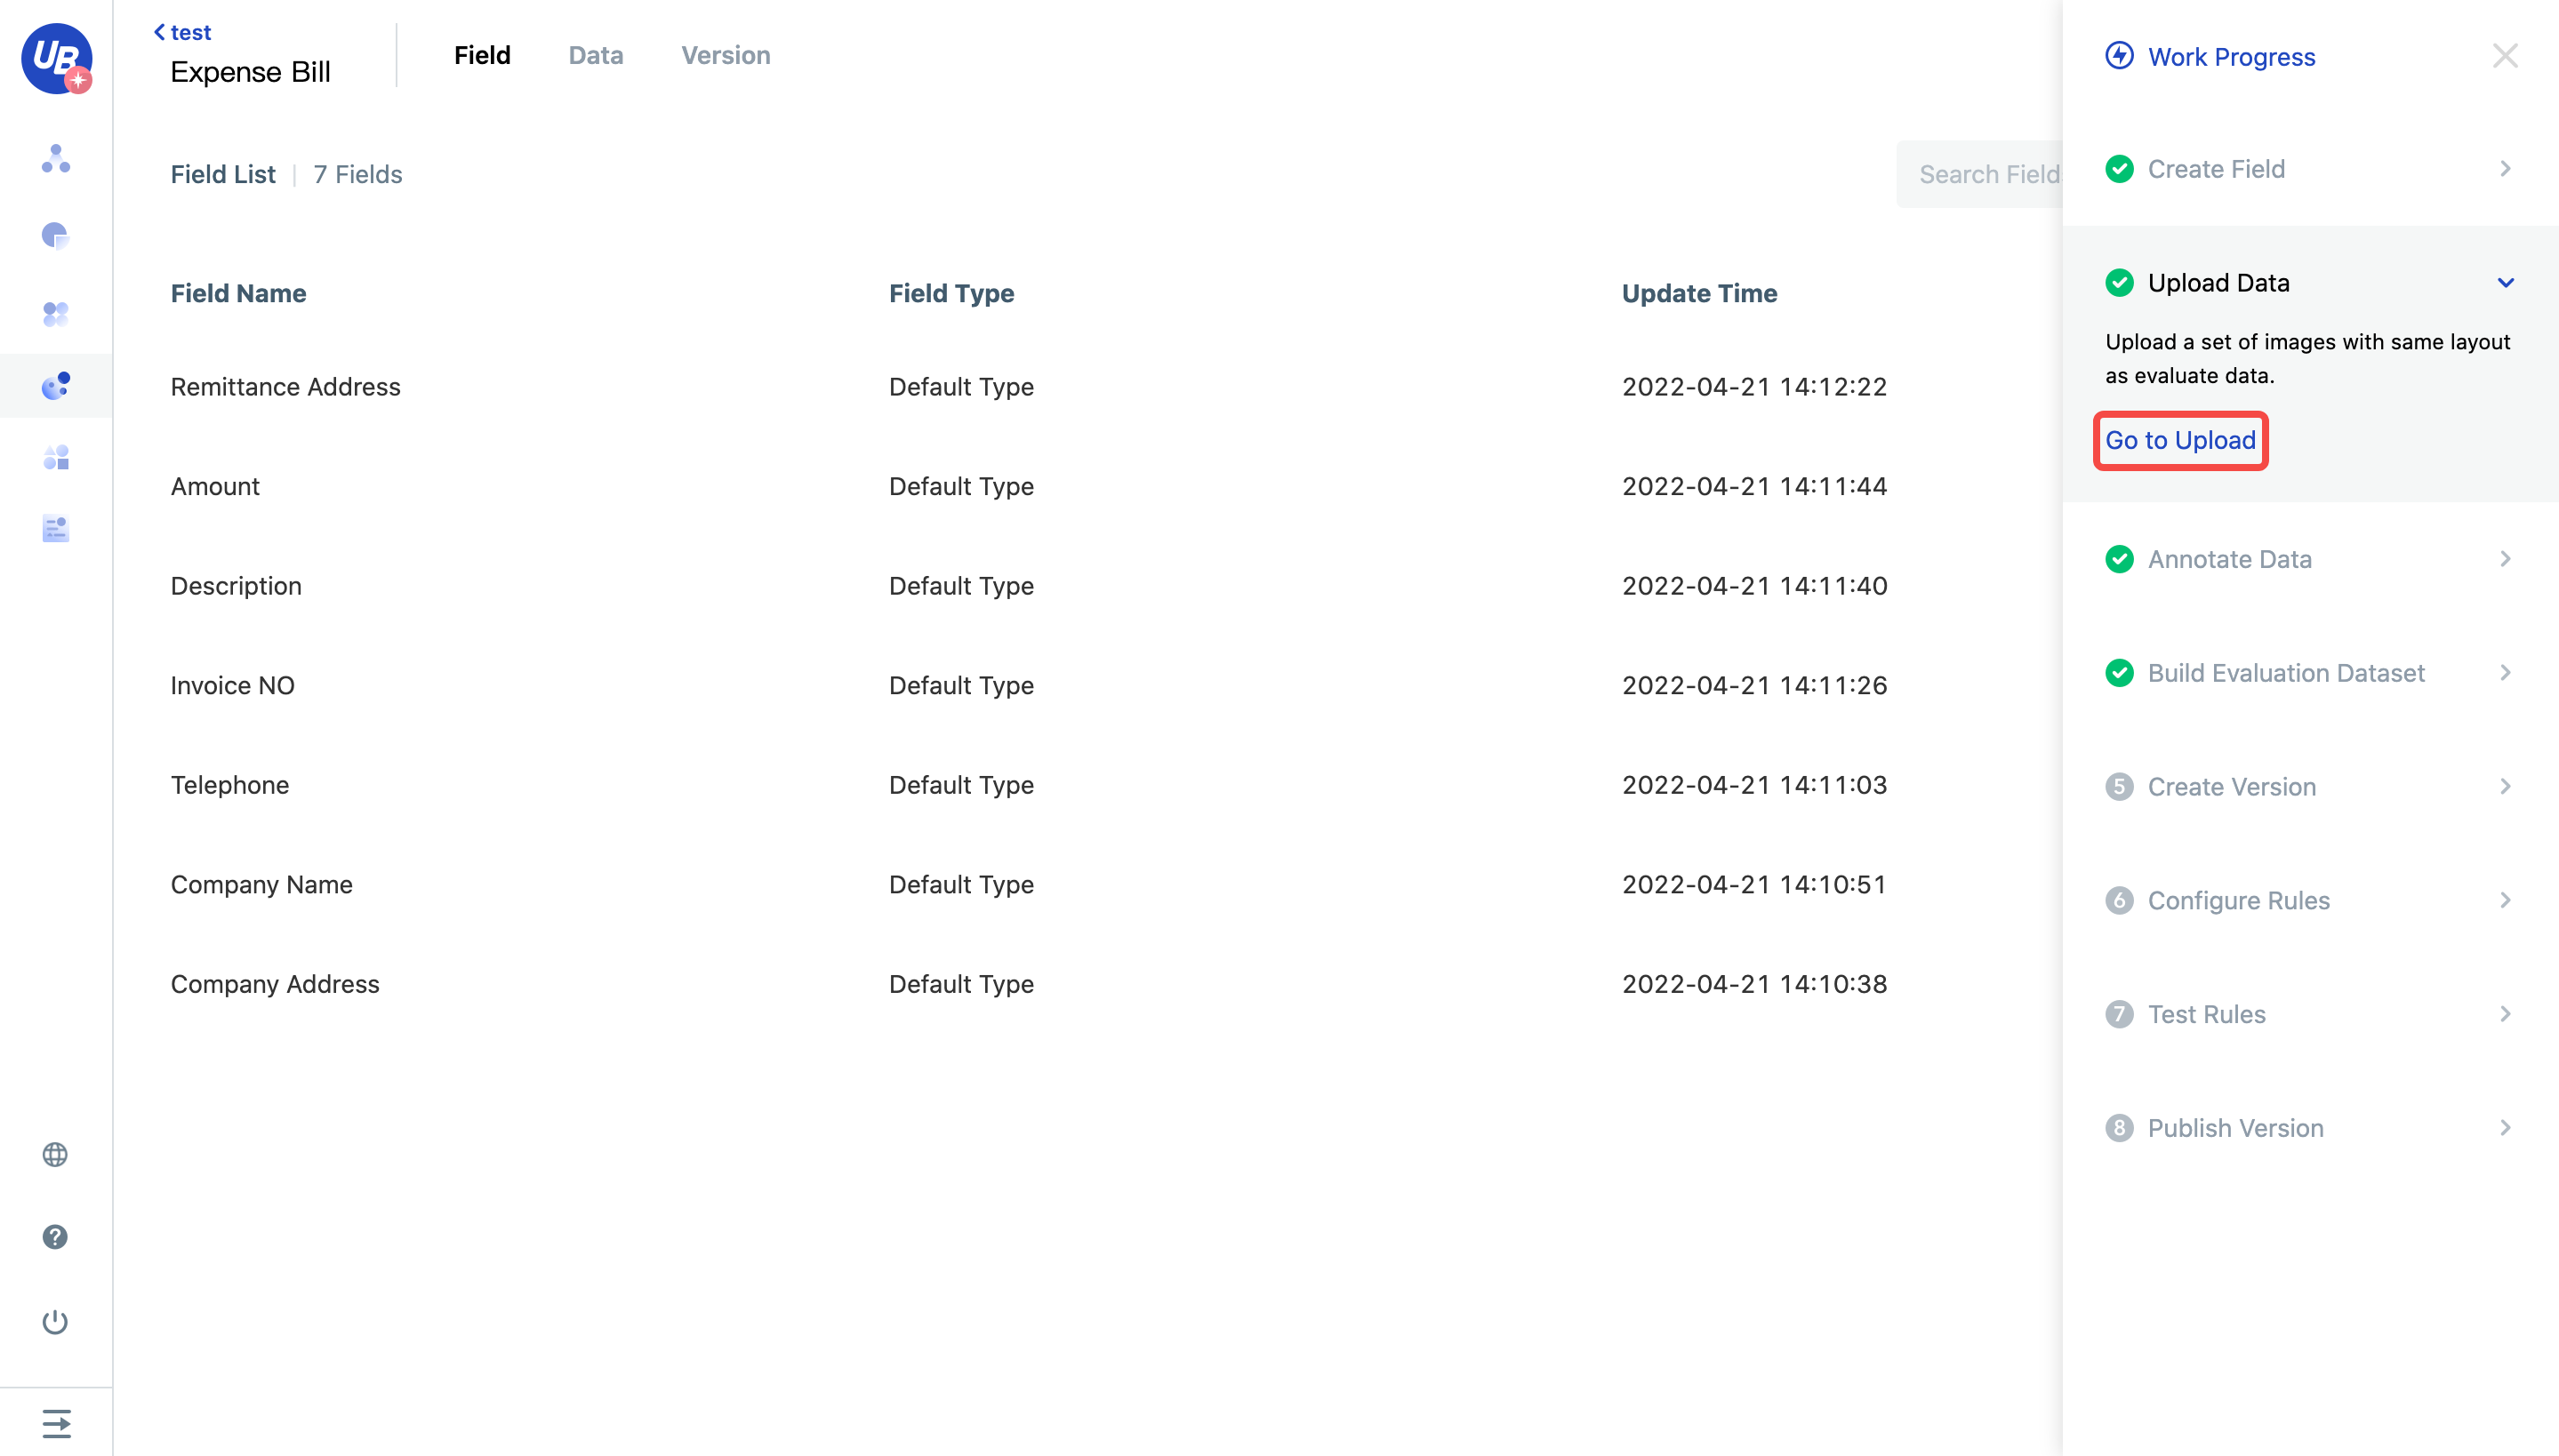
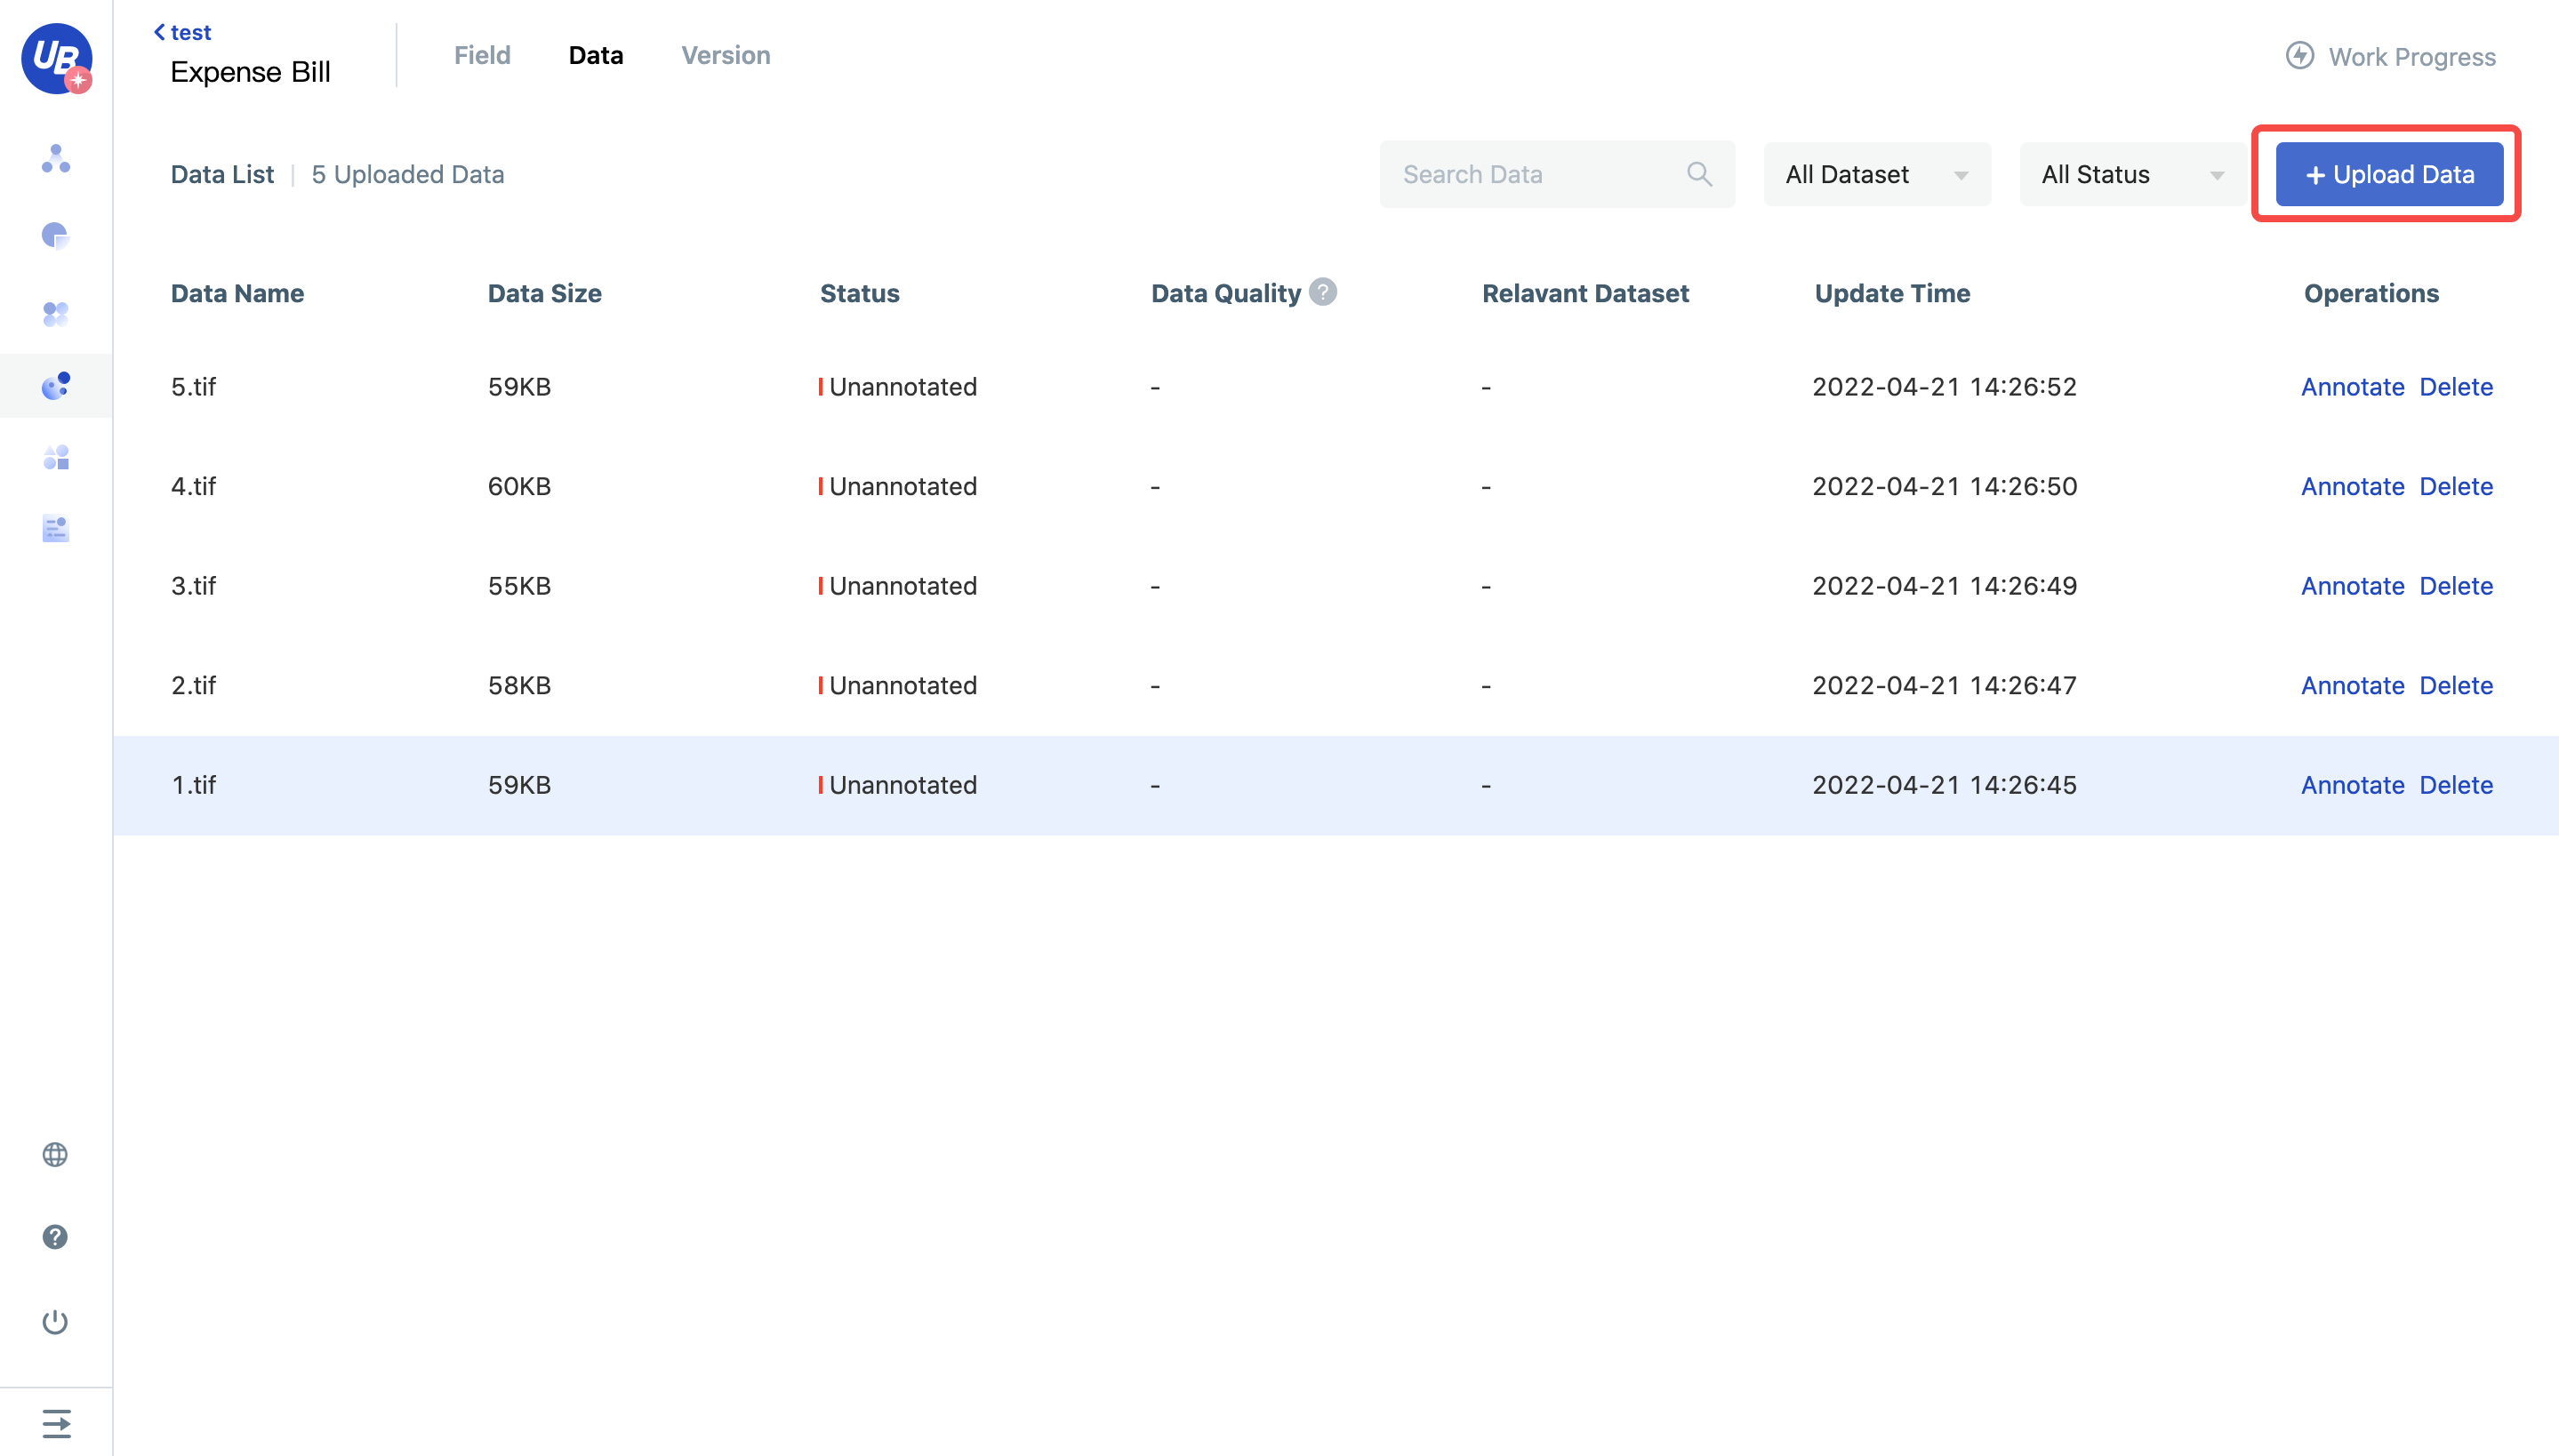
9)Upload the sample file downloaded in step 2) to the platform by adding data button
Annotate data & build evaluation set
10)At this time, the work progress list shows that the process of "uploading data" has been completed, now we go to the third process "labelling data"
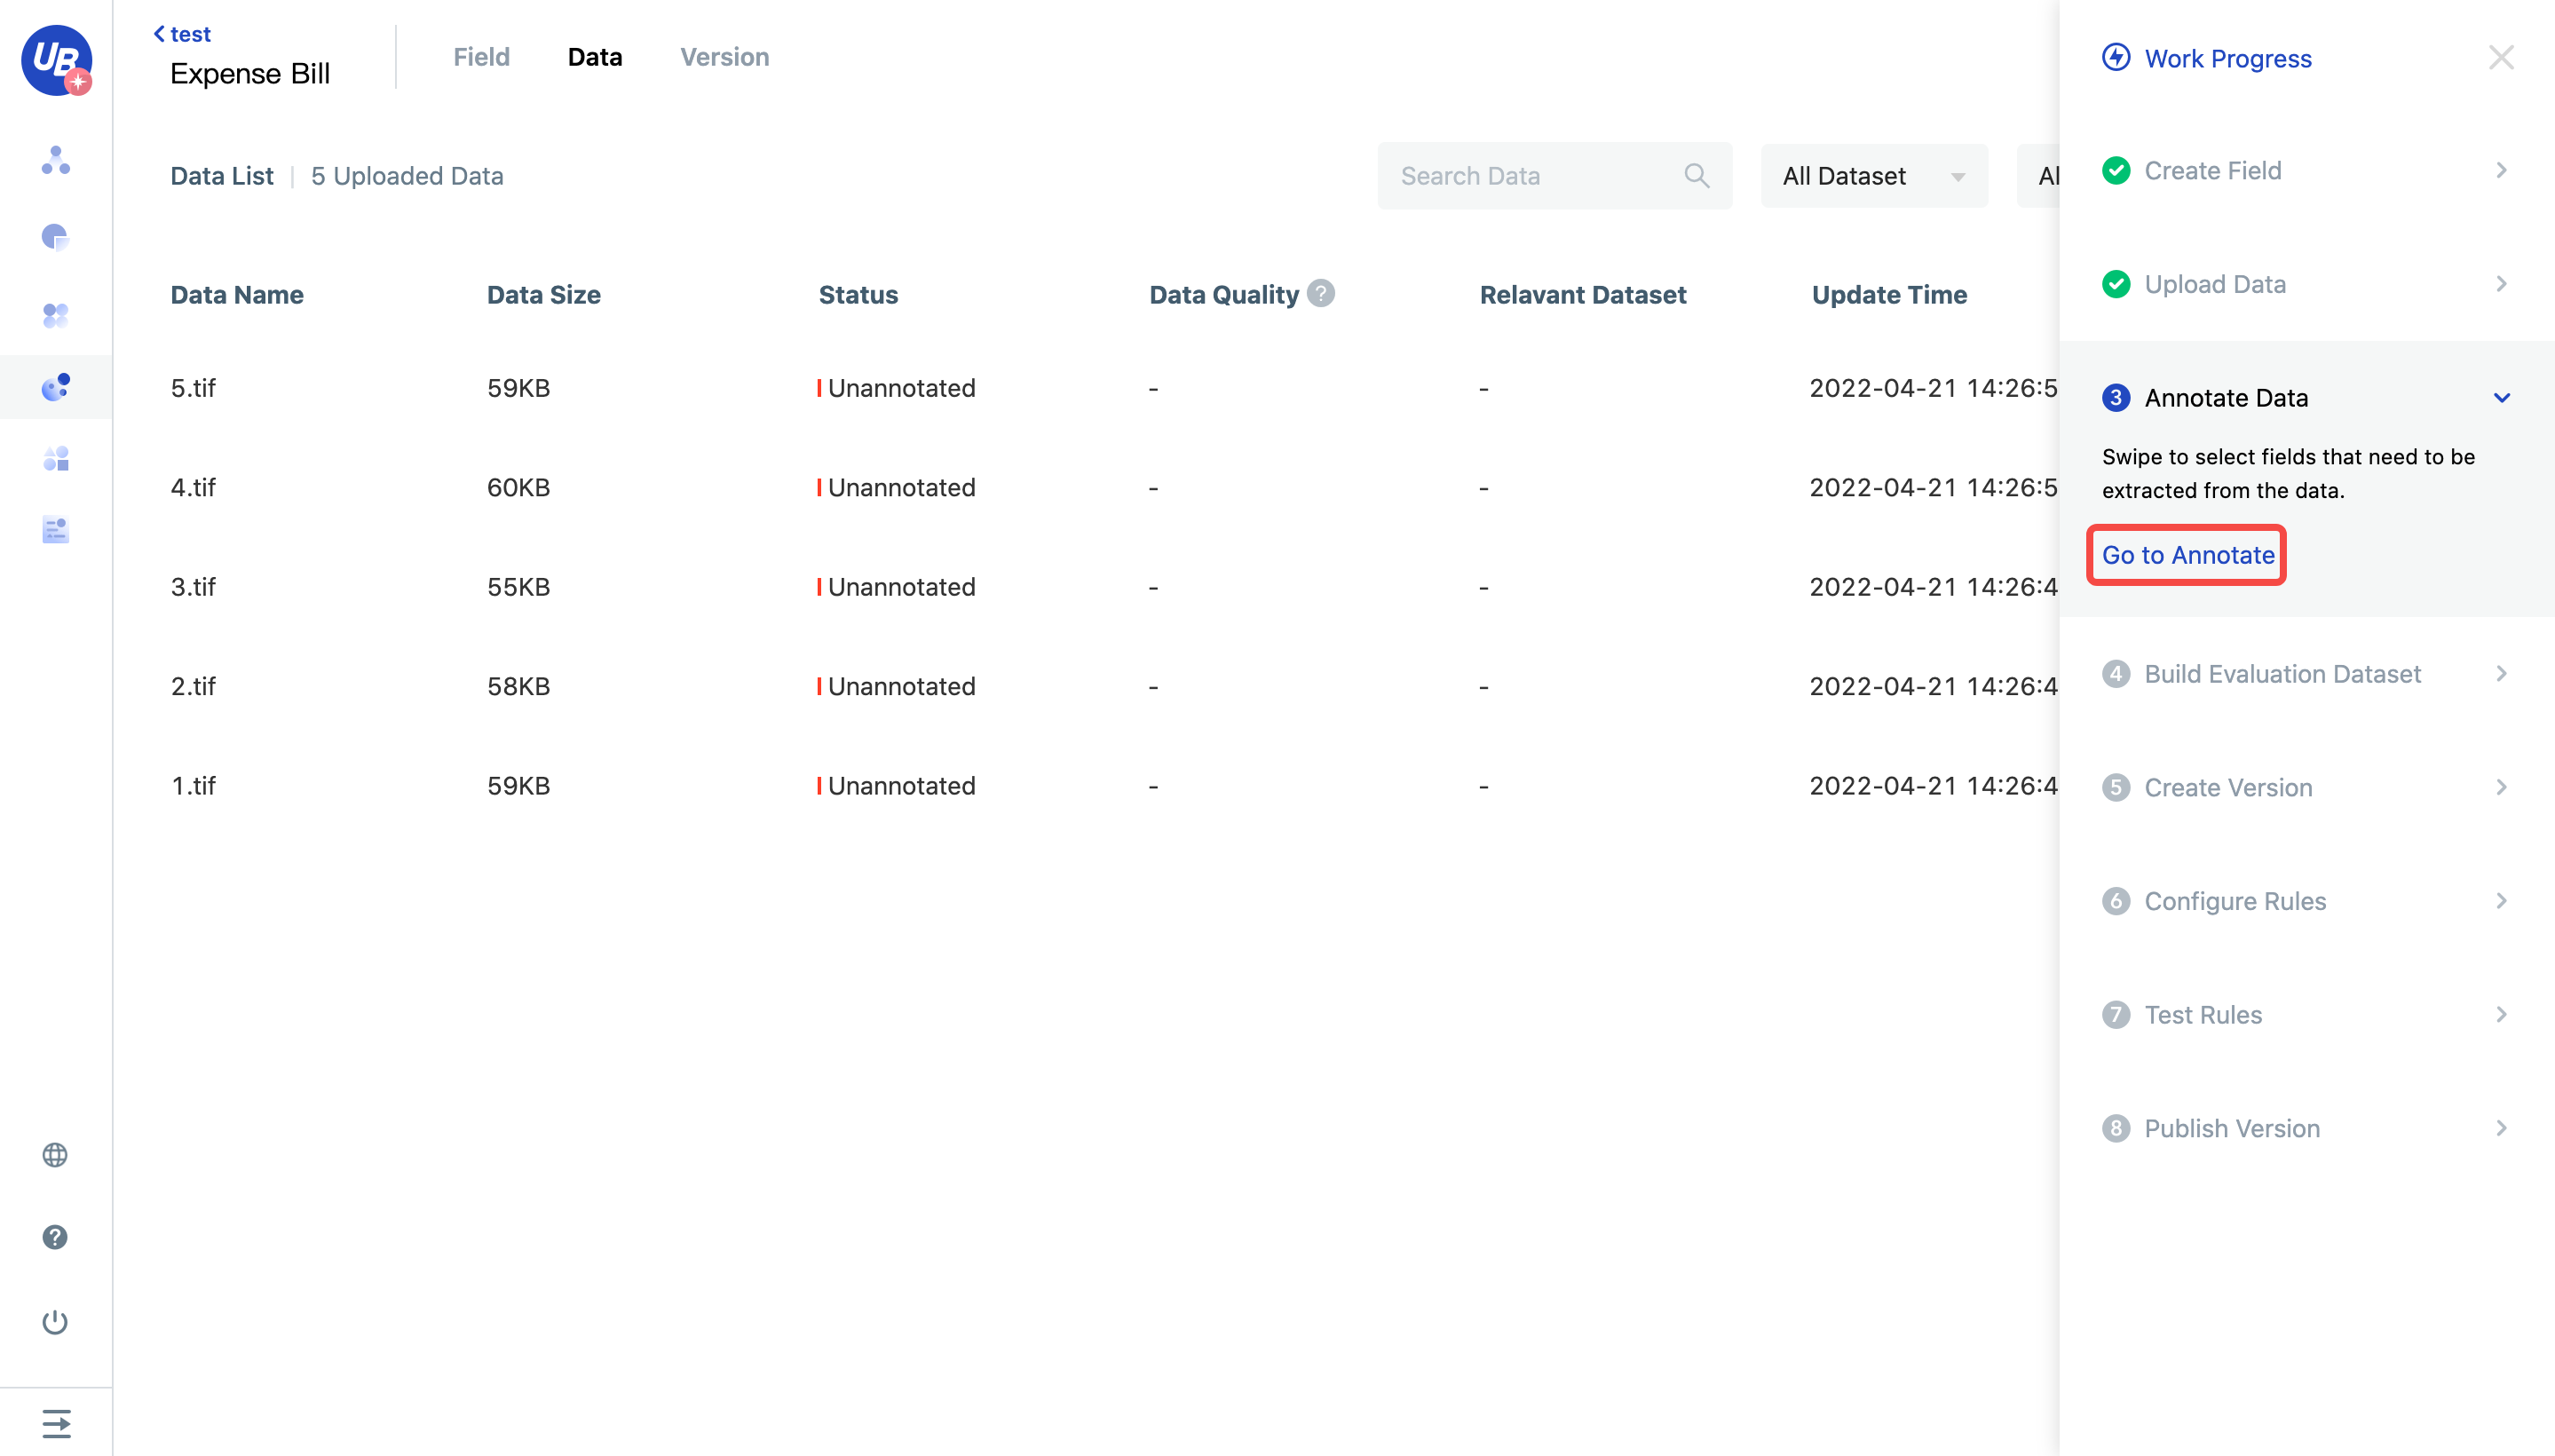
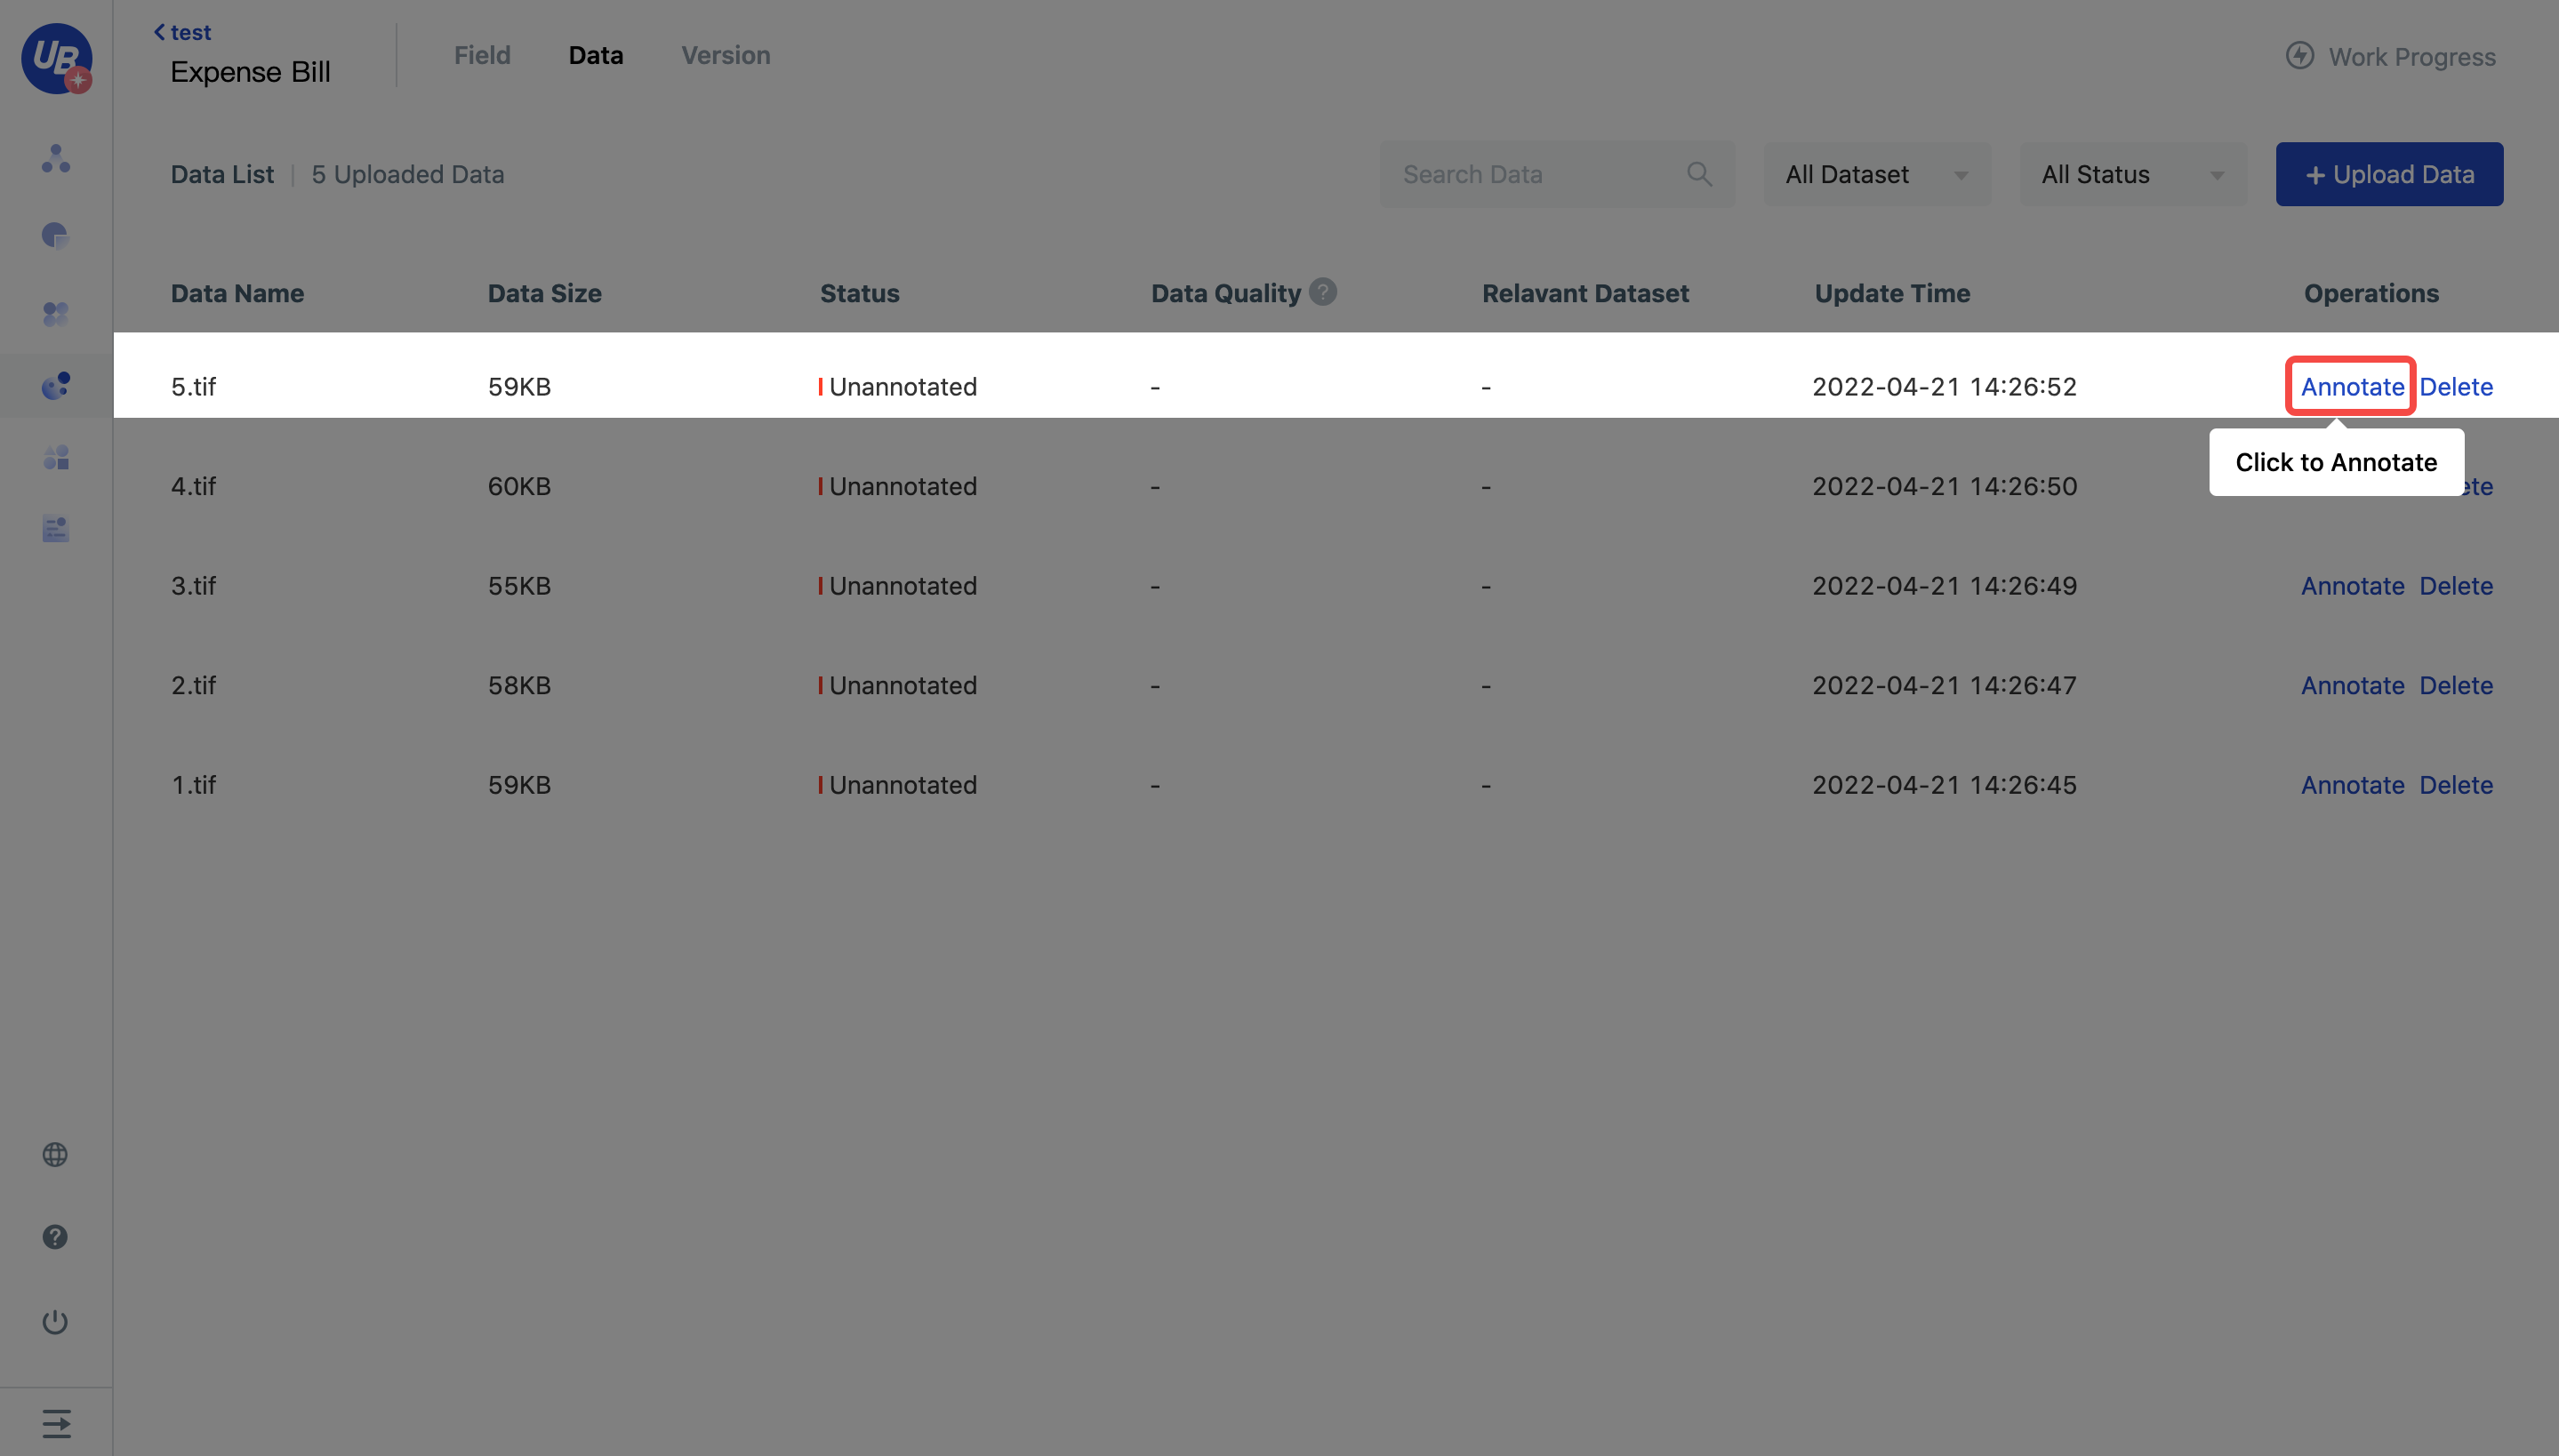
11)Click annotation button , start annotating
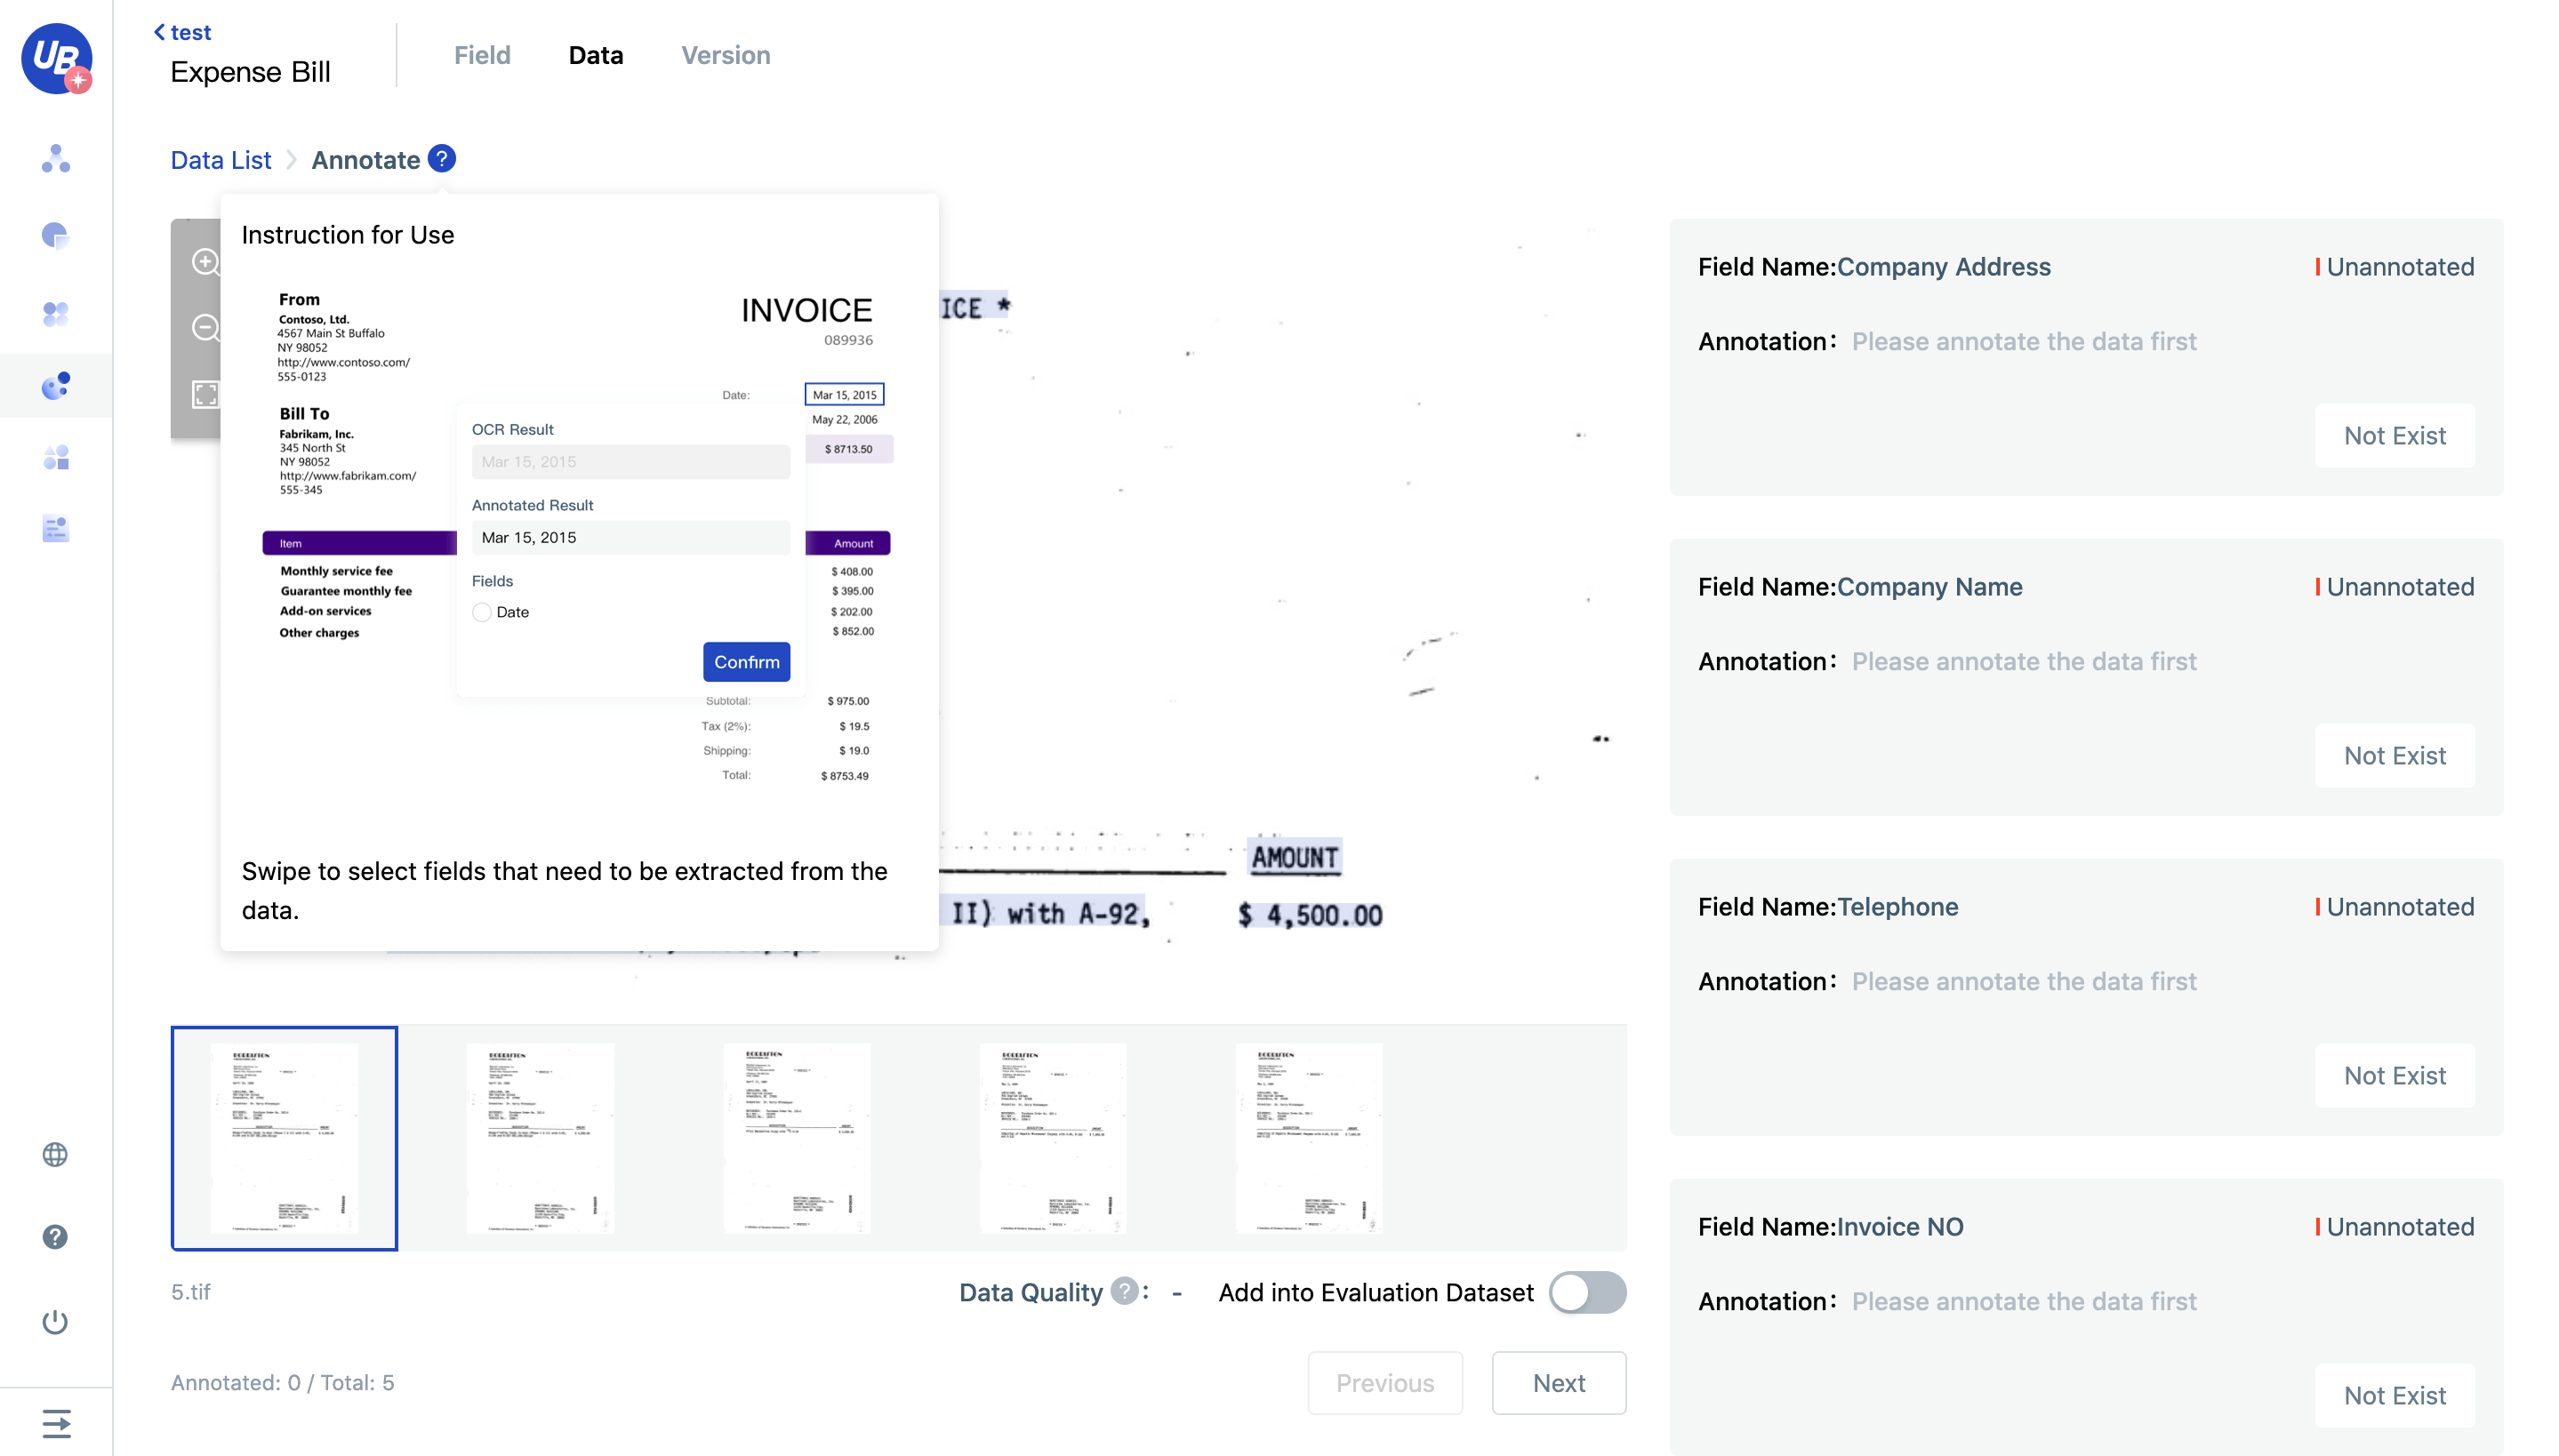
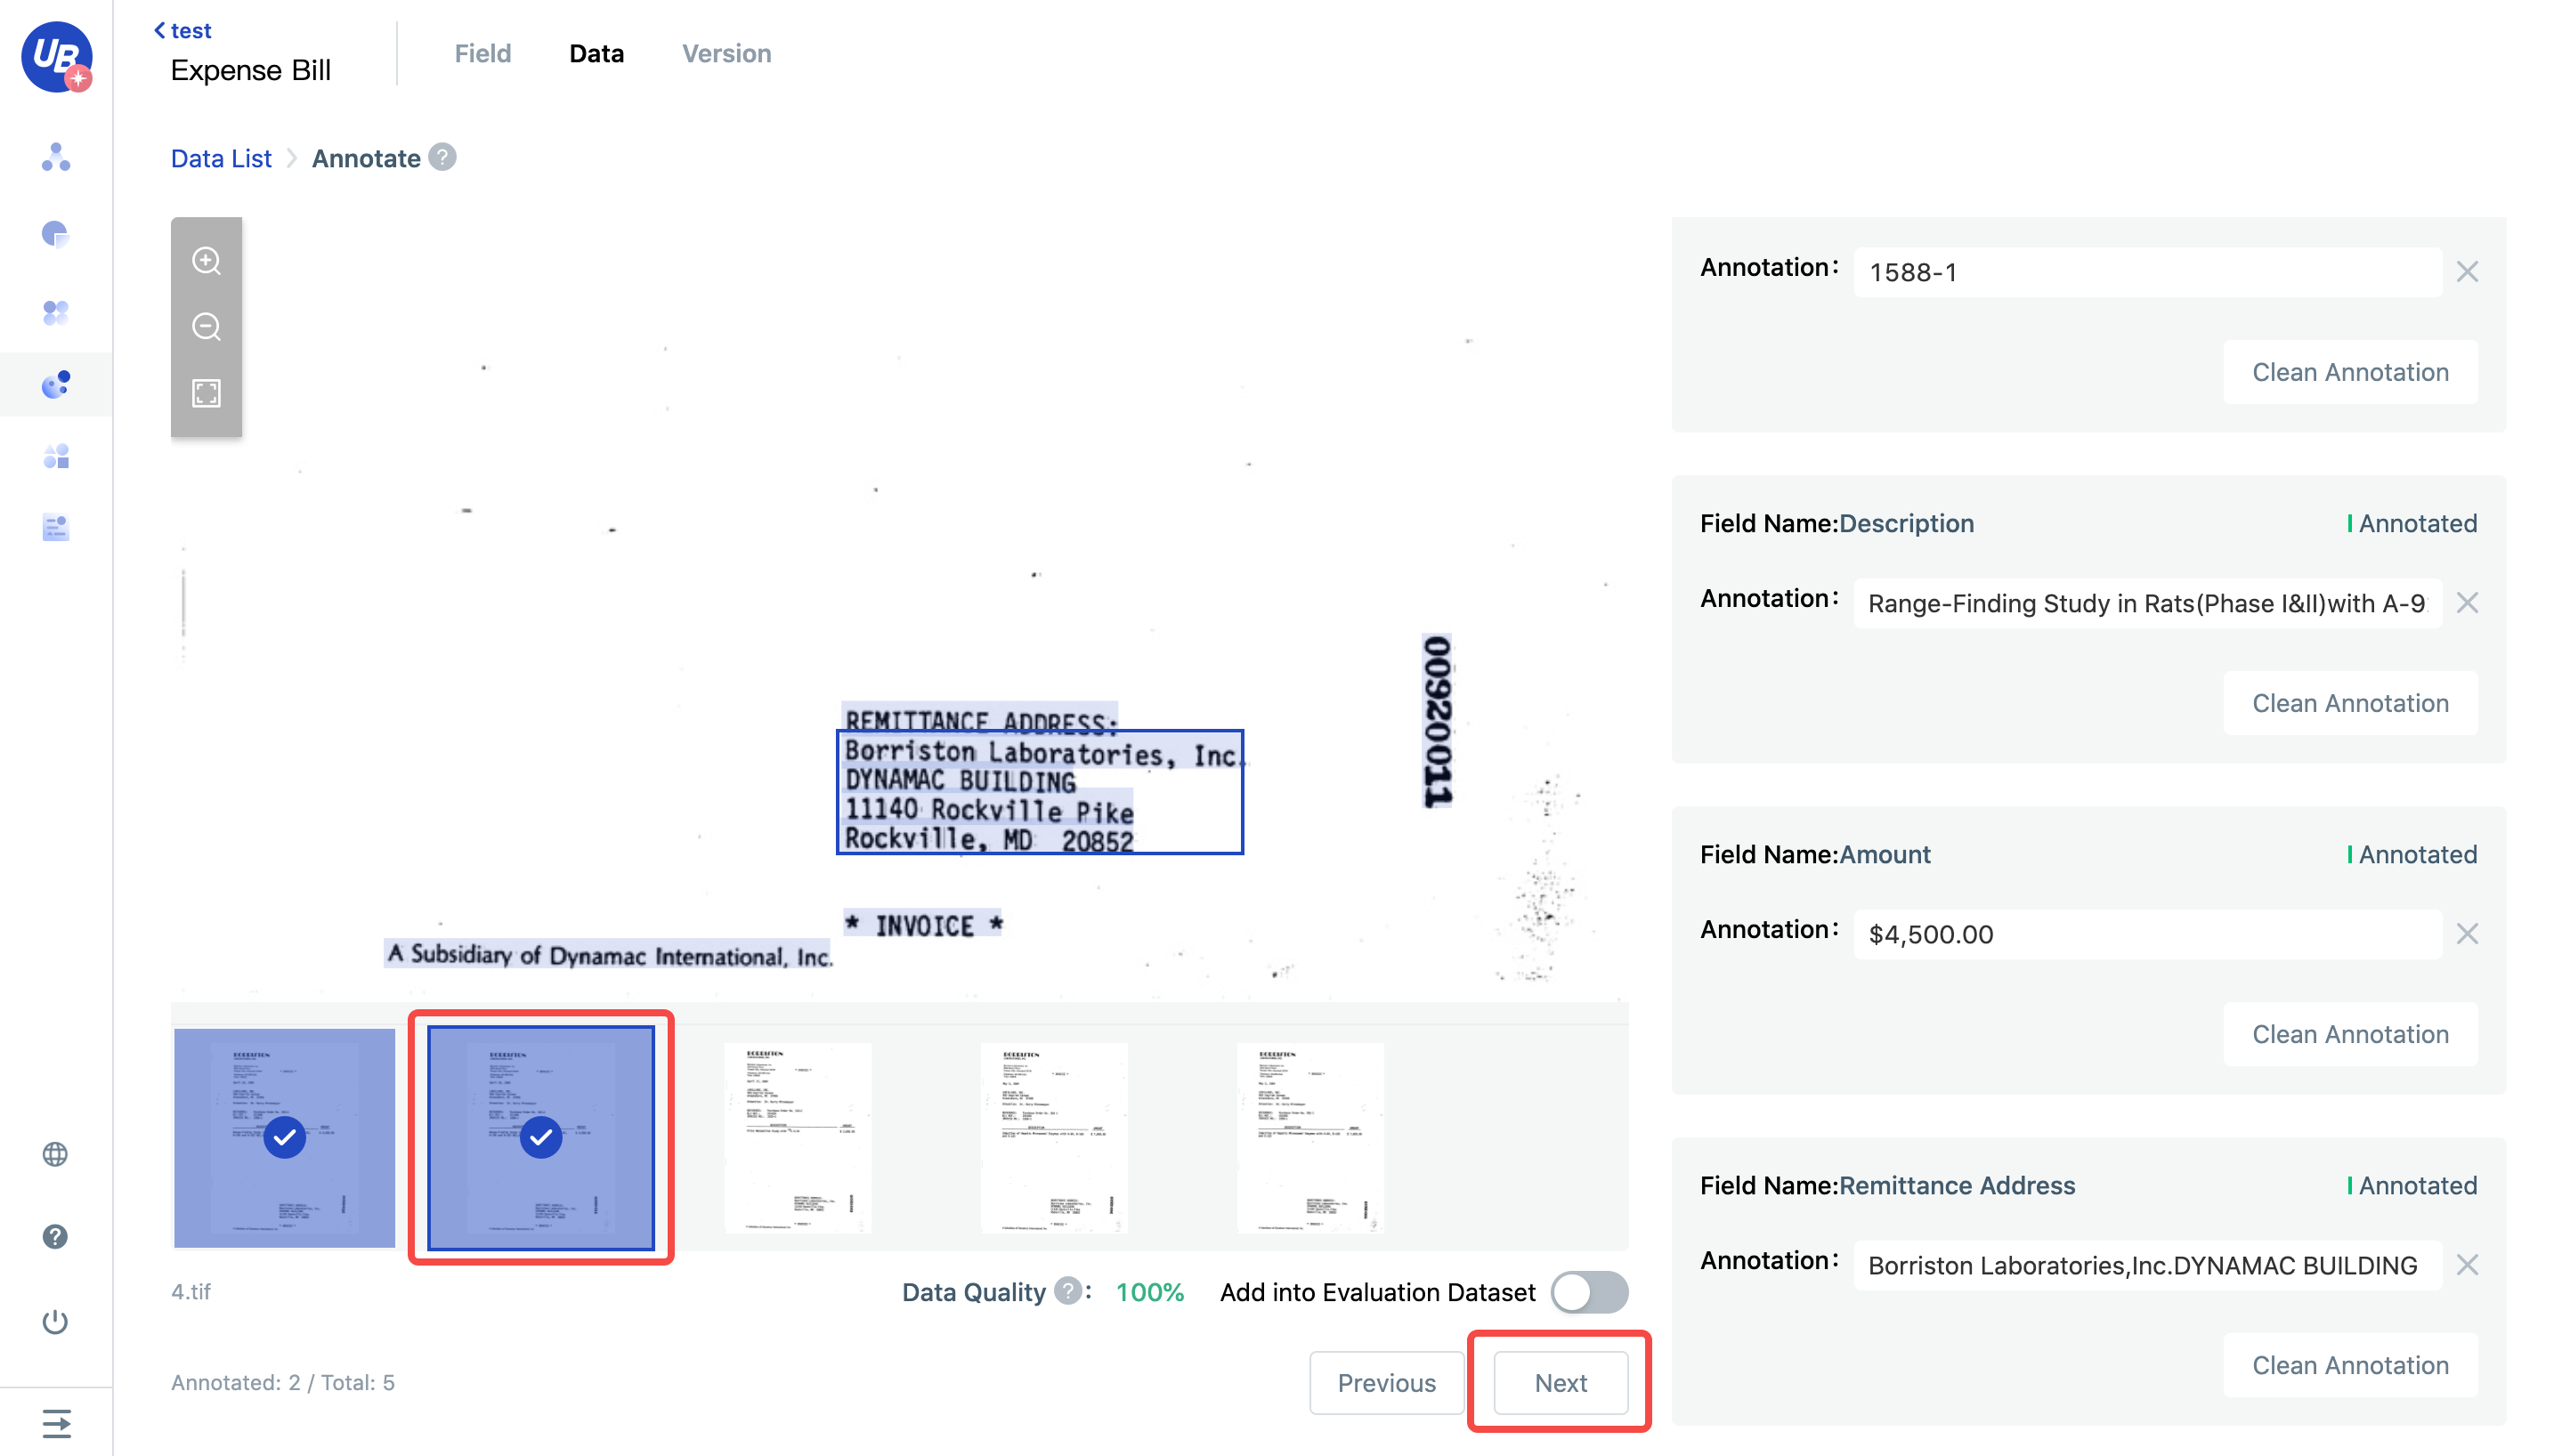
12)After entering, the labelling method will be prompted in the upper left corner, that is: place the mouse on the picture, move to the area of the field value to be labelled, click and then slide the box to select the field value
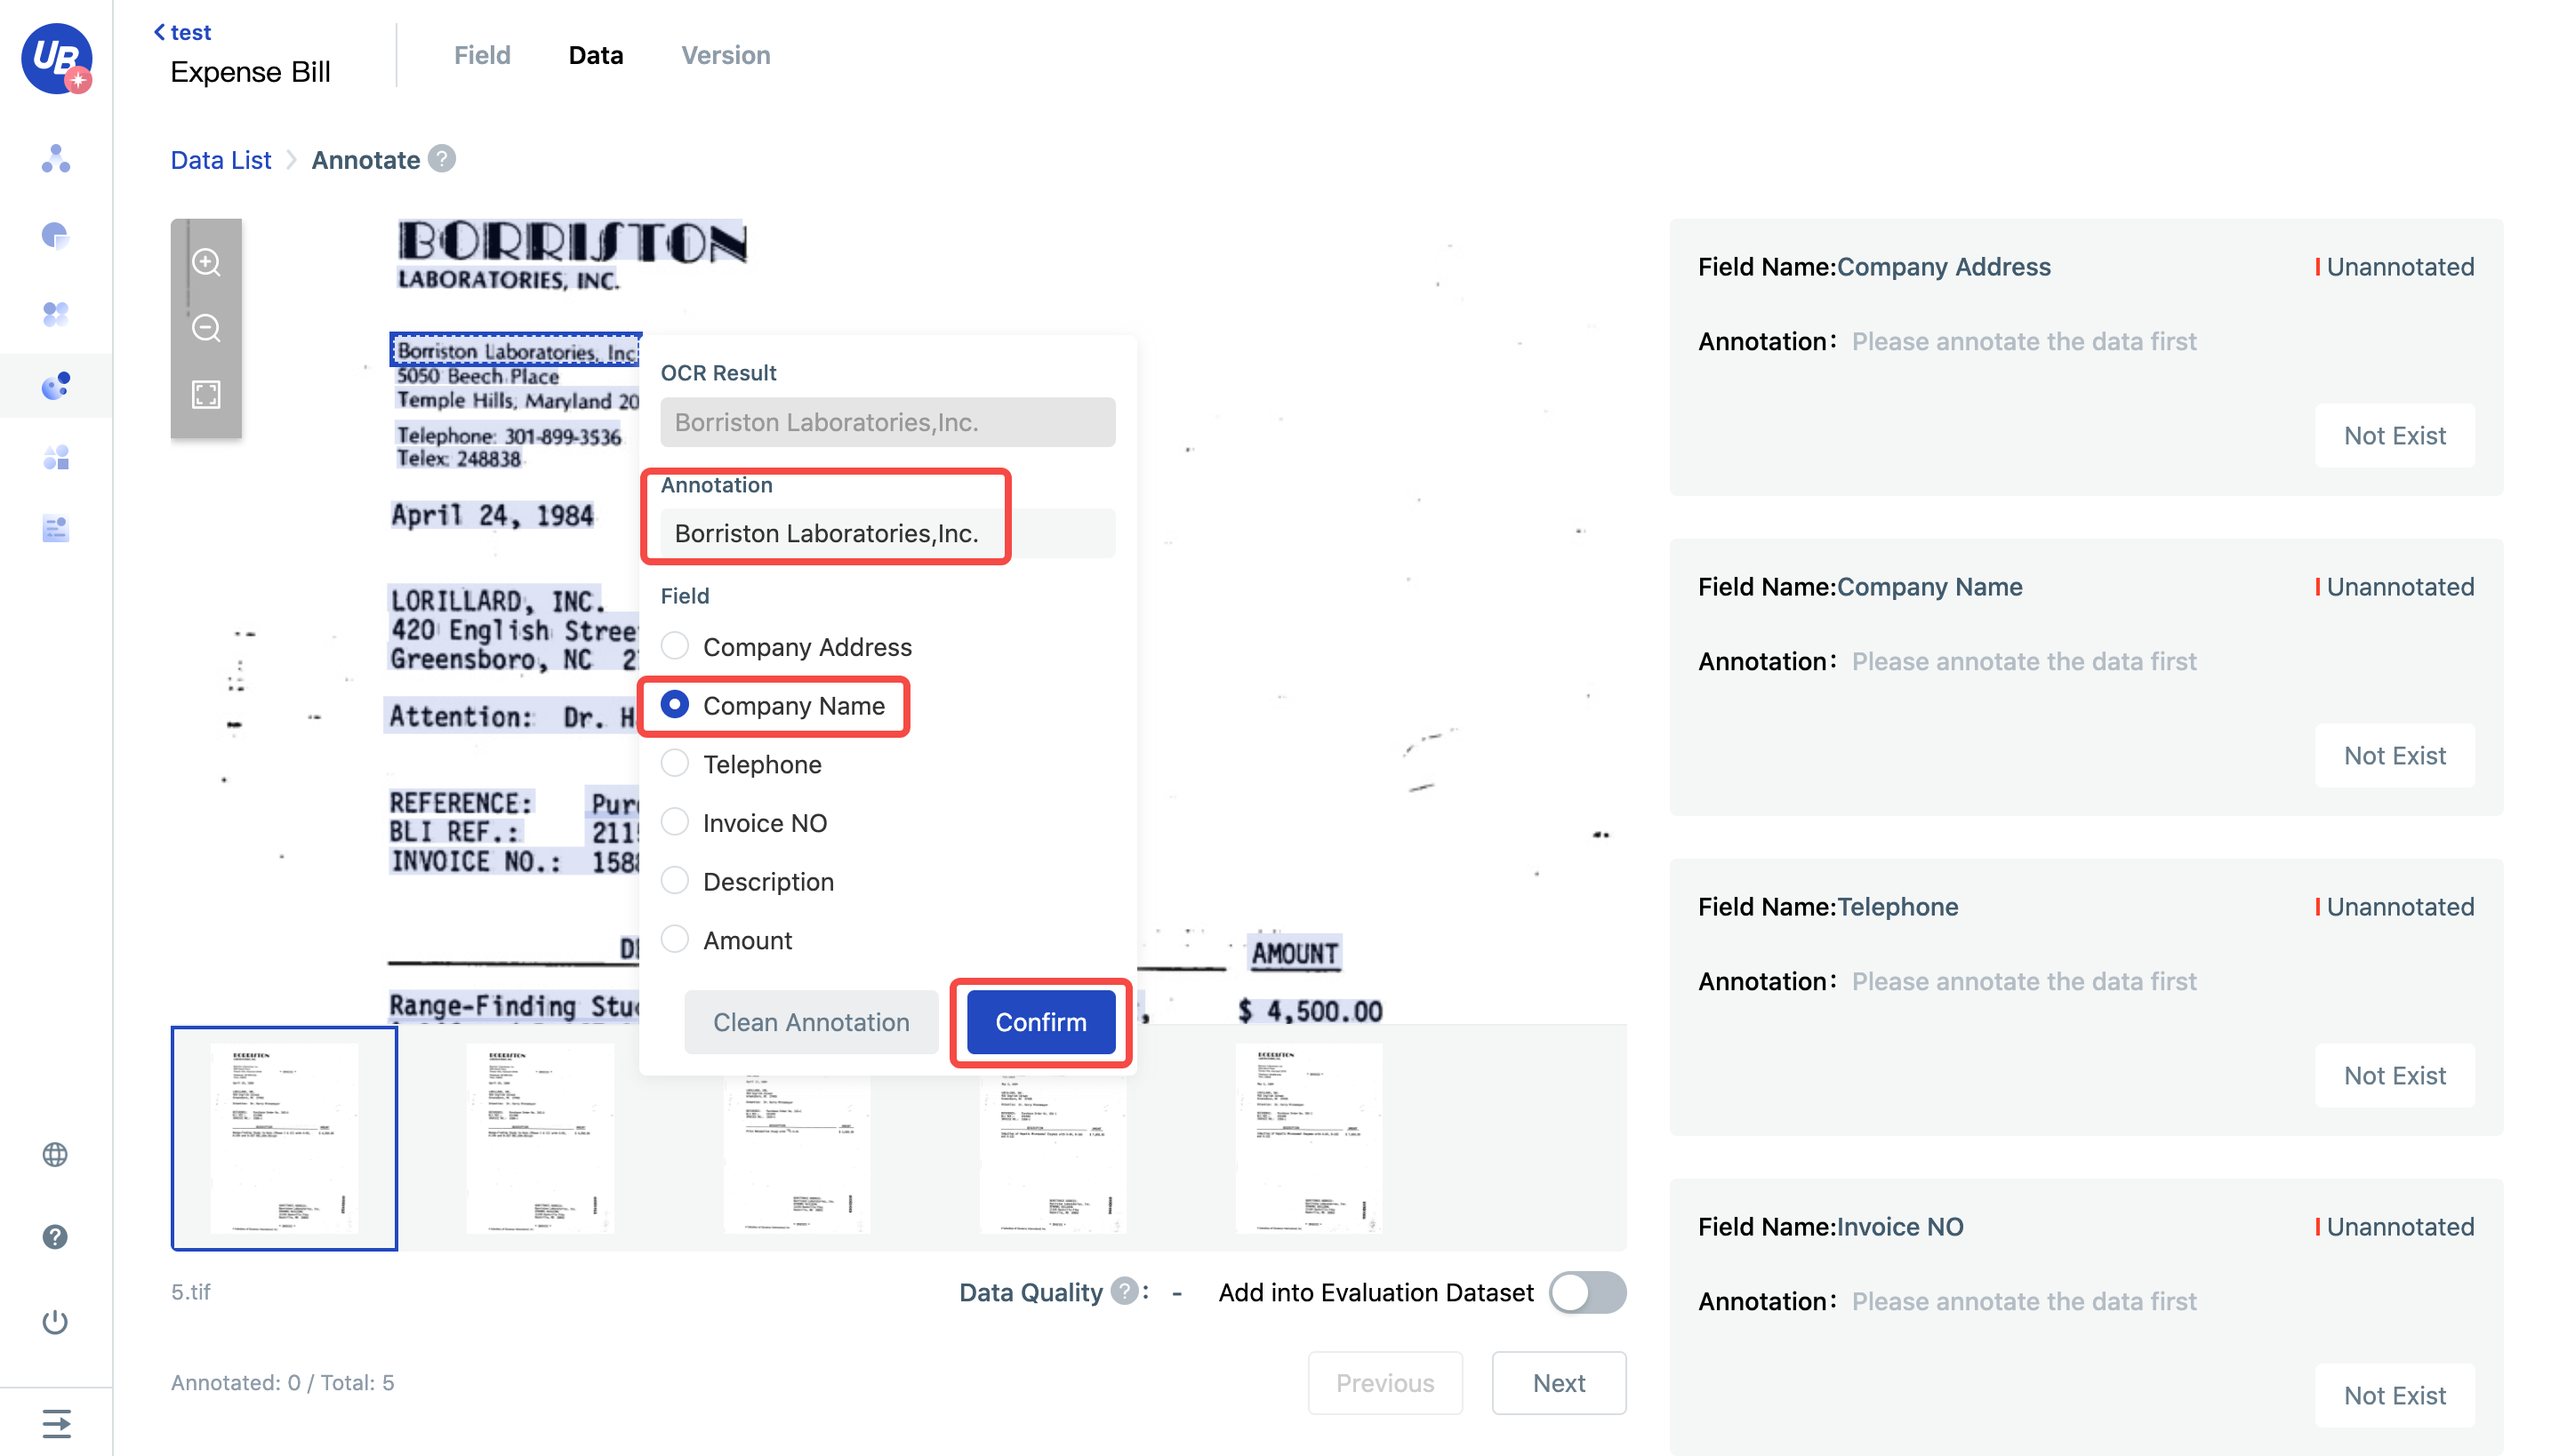
13) After sliding the box to select, the system will automatically pop up the labelling pop-up window, you can modify the labelling result in this pop-up window (modify when the OCR recognizes the error), select the field, and finally click OK to save the labelling content
Note: A field can be annotated multiple times
14)After annotating all the fields, the system will prompt to add this picture to the evaluation set, click to open, and use it to evaluate the effect of the model

15)Then click Next to continue annotating all the data. The annotated data will be displayed as annotated state
Although the labelling is a bit time-consuming, you can use the data marked this time to evaluate the accuracy after the labelling is completed, no matter what changes are made to the model in the future. It is much more convenient than check the effect manually after each model modification
16)After all the annotations are completed, go back to the data list, the status of all the data has become annotated, and they have all been added to the evaluation set as well

Build new version
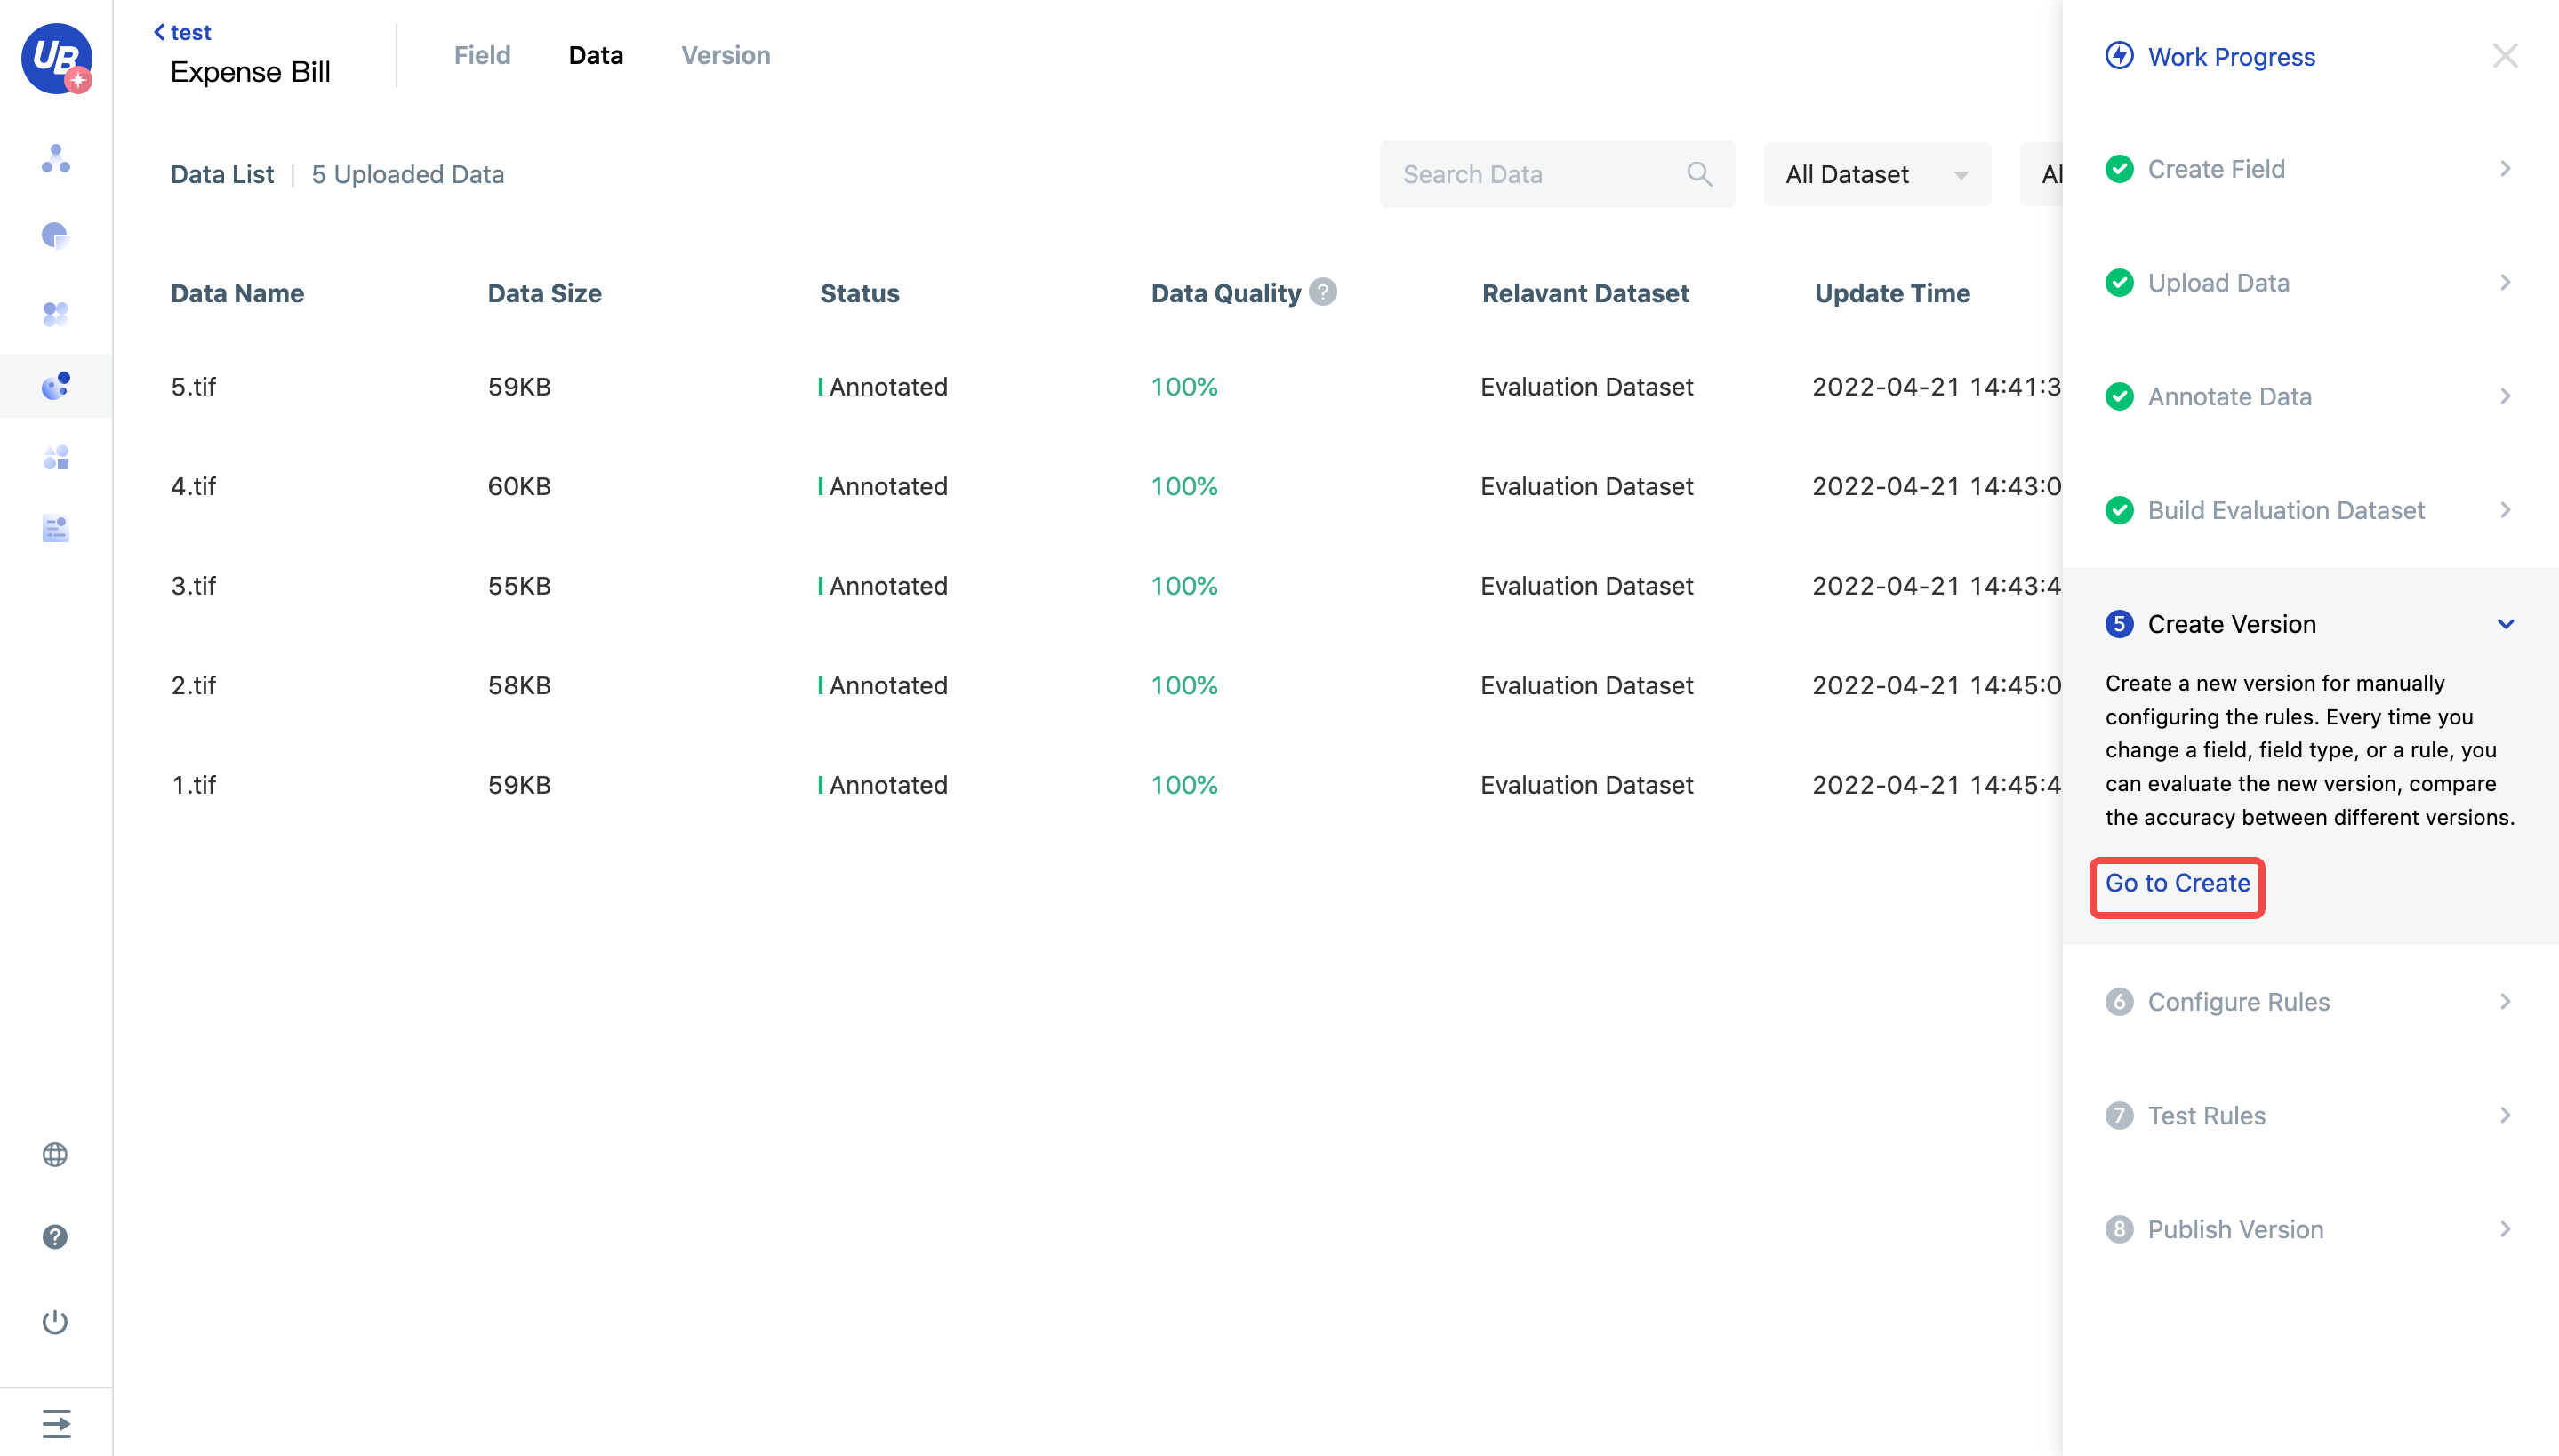
17)Going back to the work progress guide, you will find that both "Marking Data" and "Building Evaluation Set" have been completed, click "New Version" to go to the next step
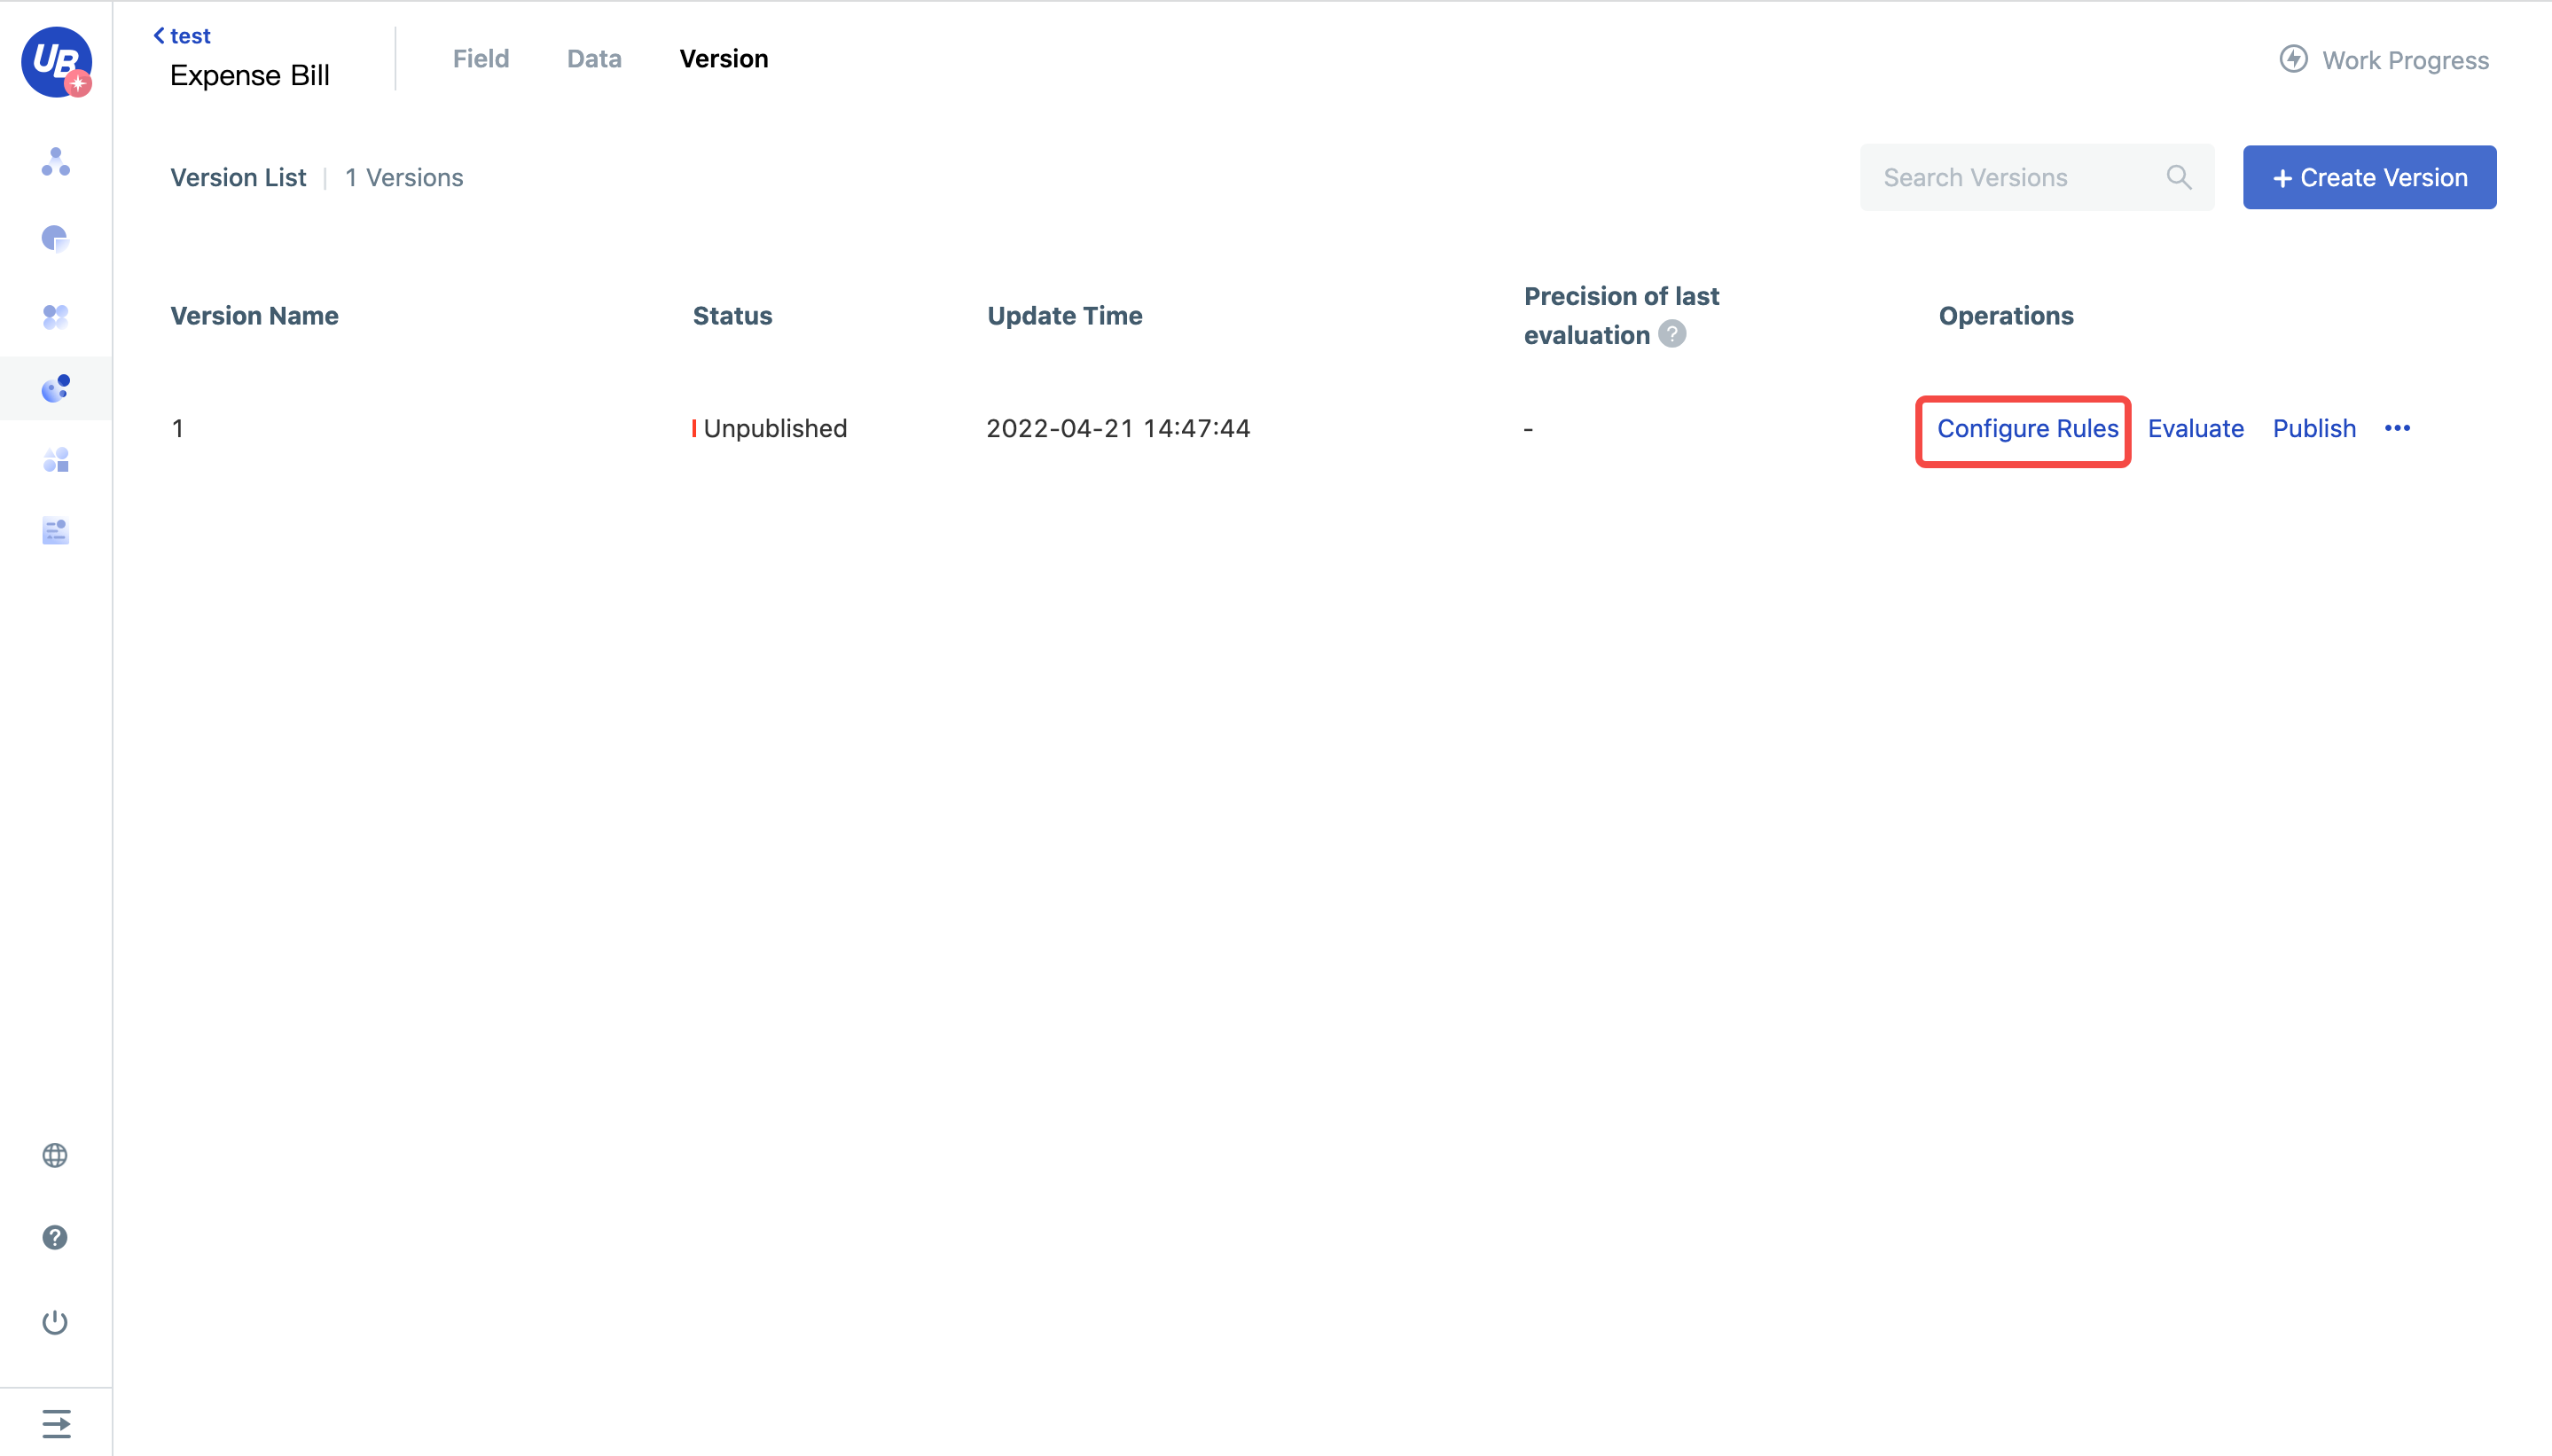
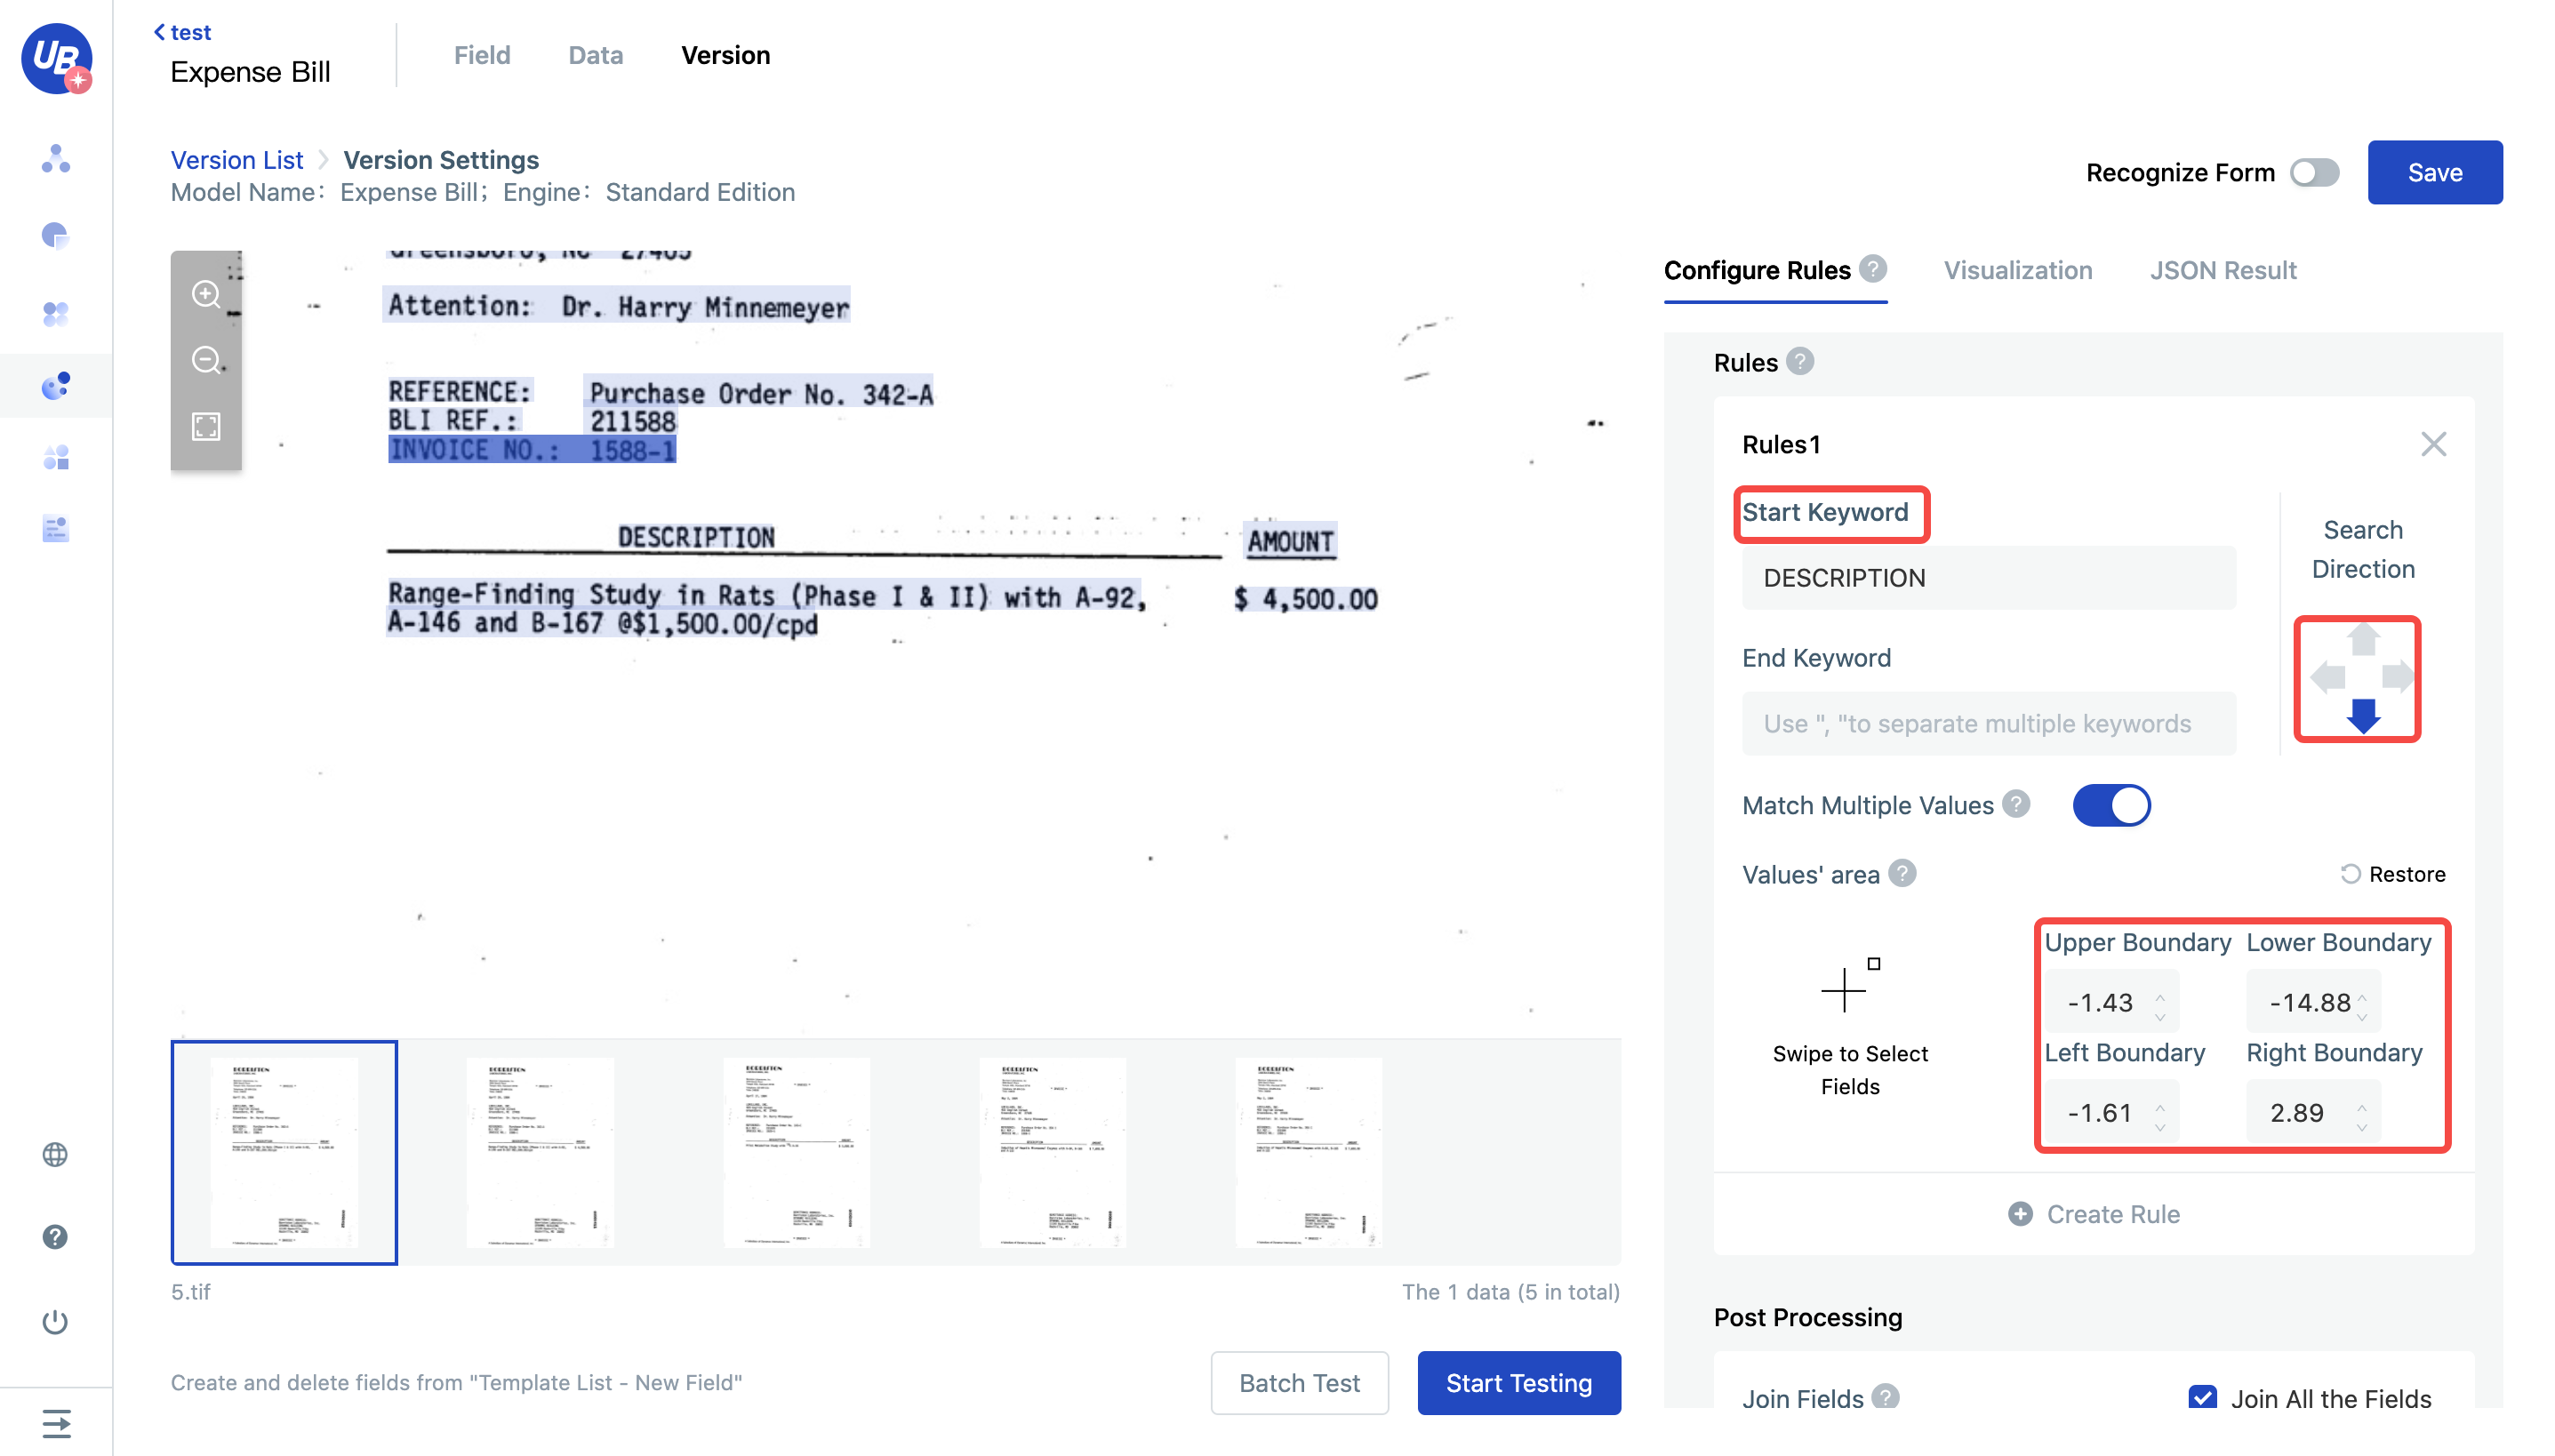
18)Create a version named "1" through the New Version button, and then click Configure Rules to specify how to extract the desired fields from the picture
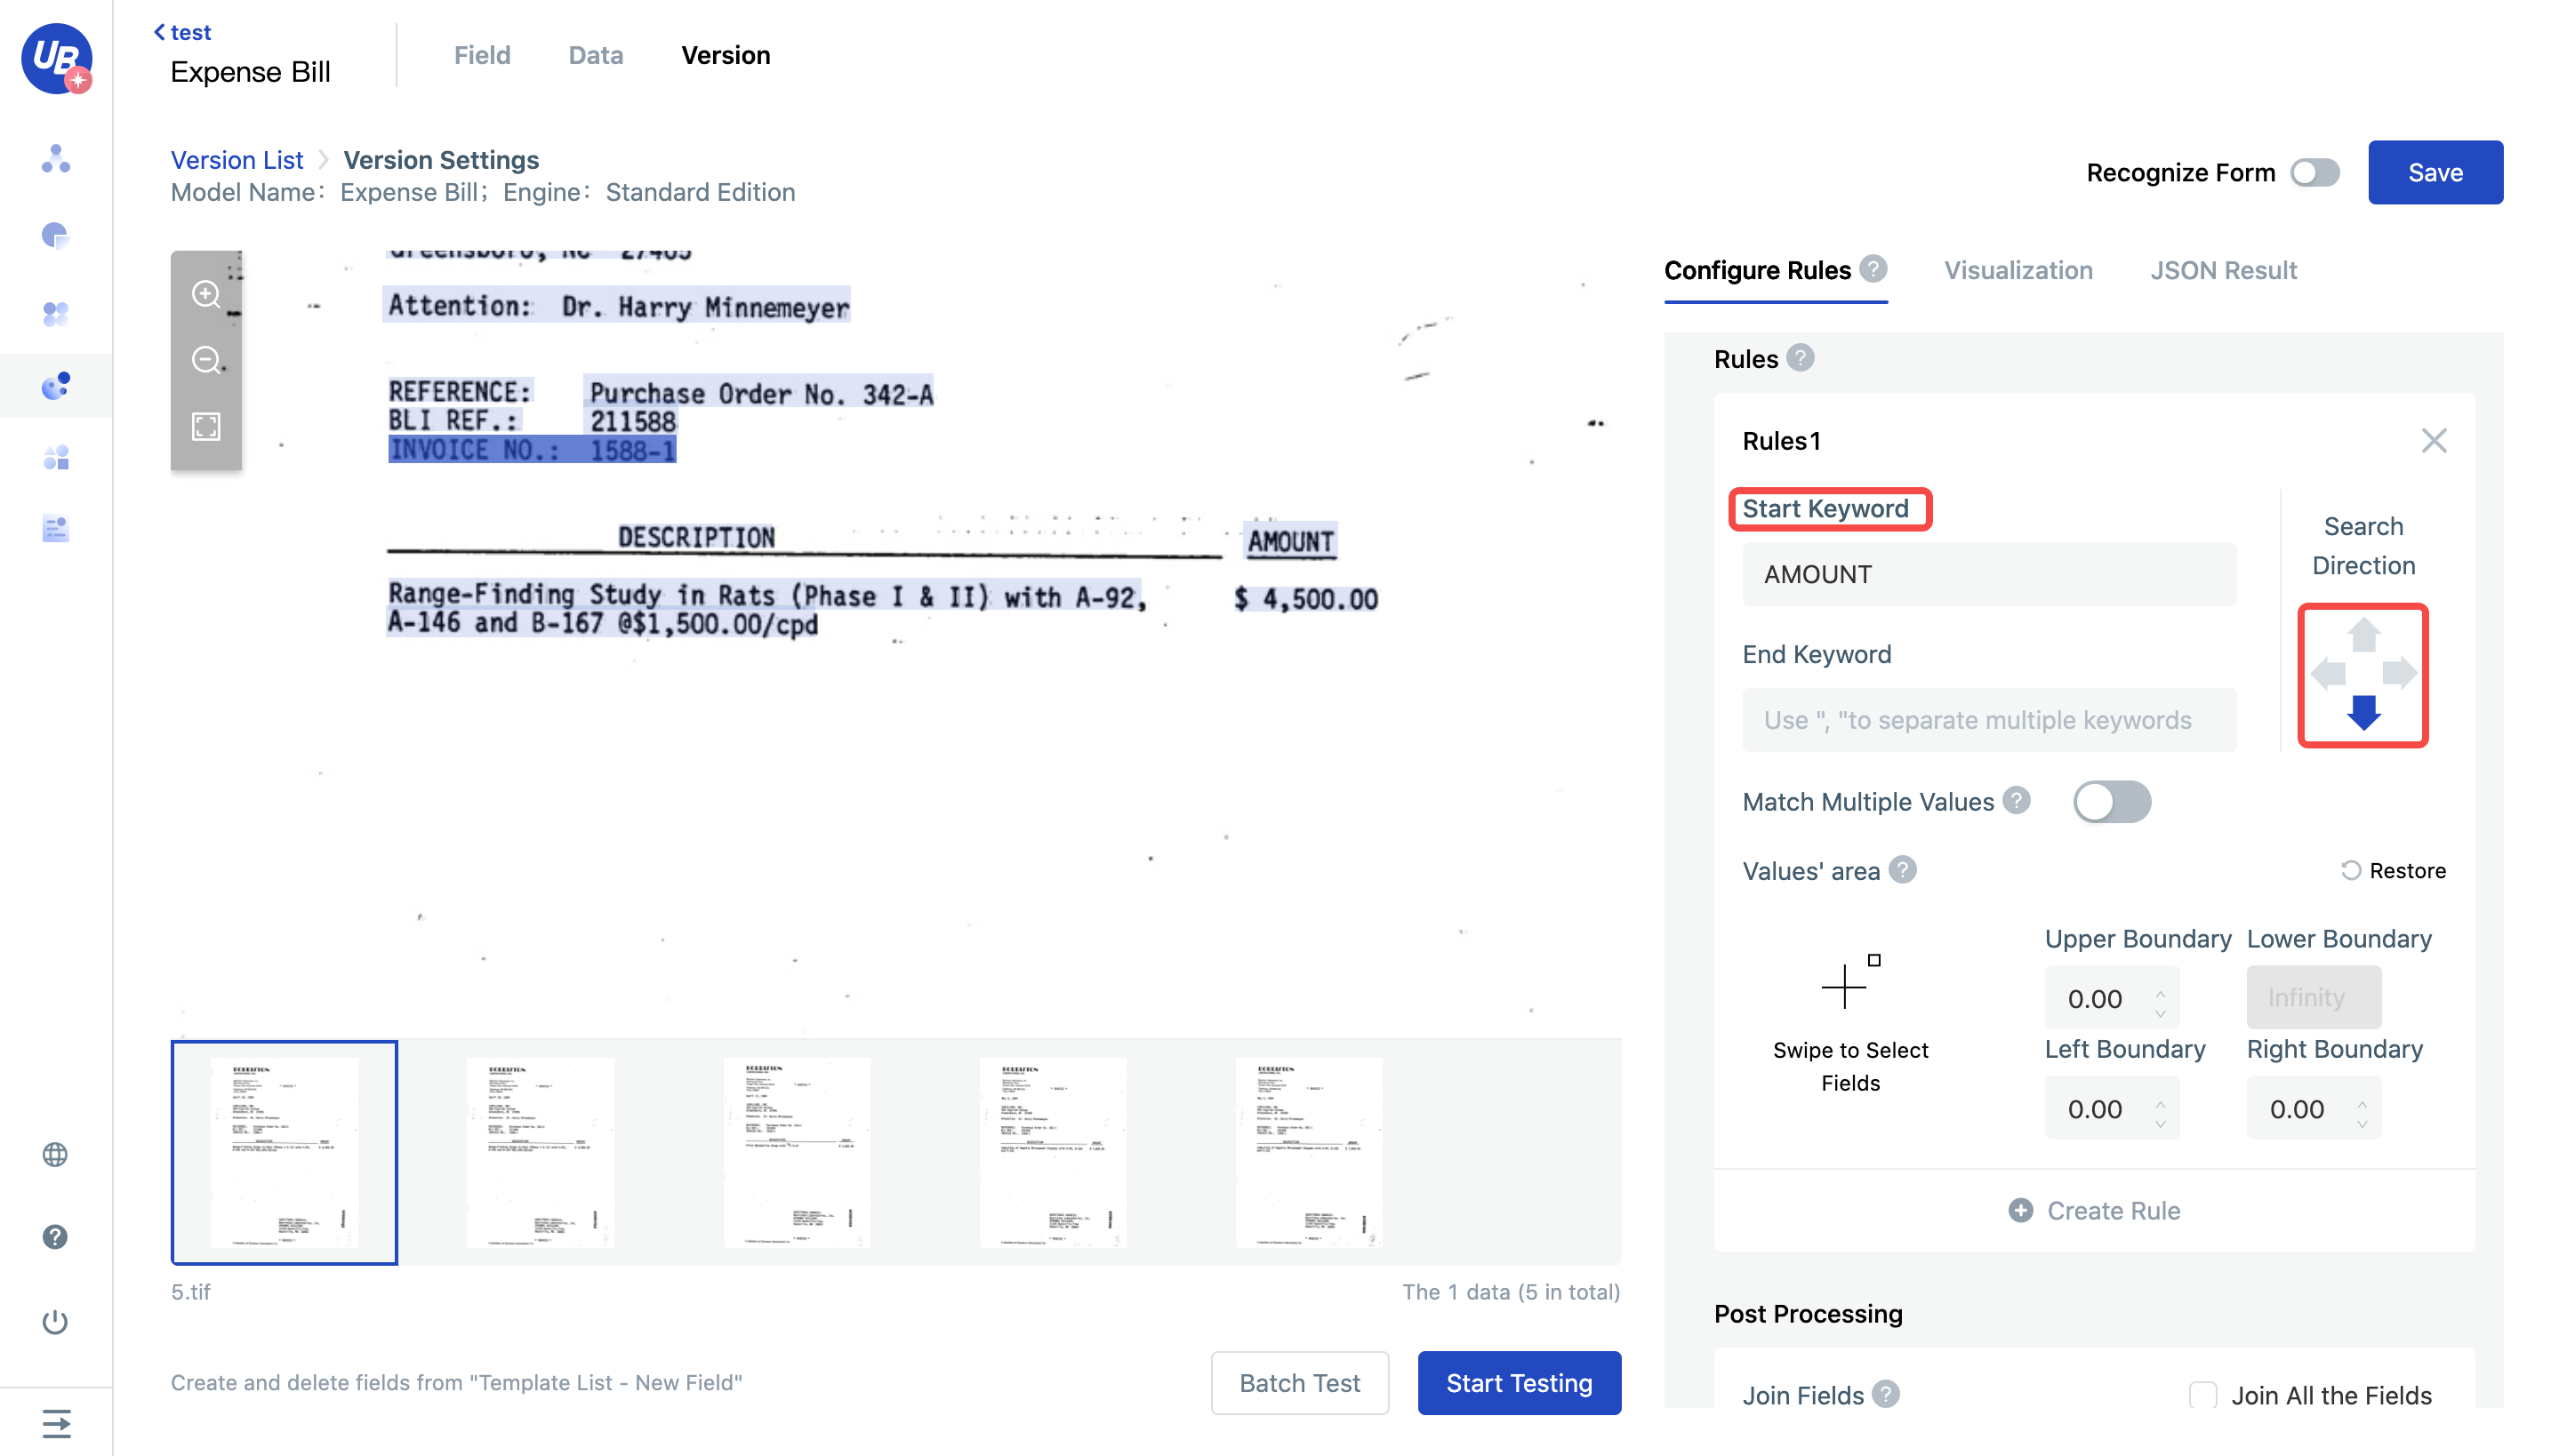
Rule configuration
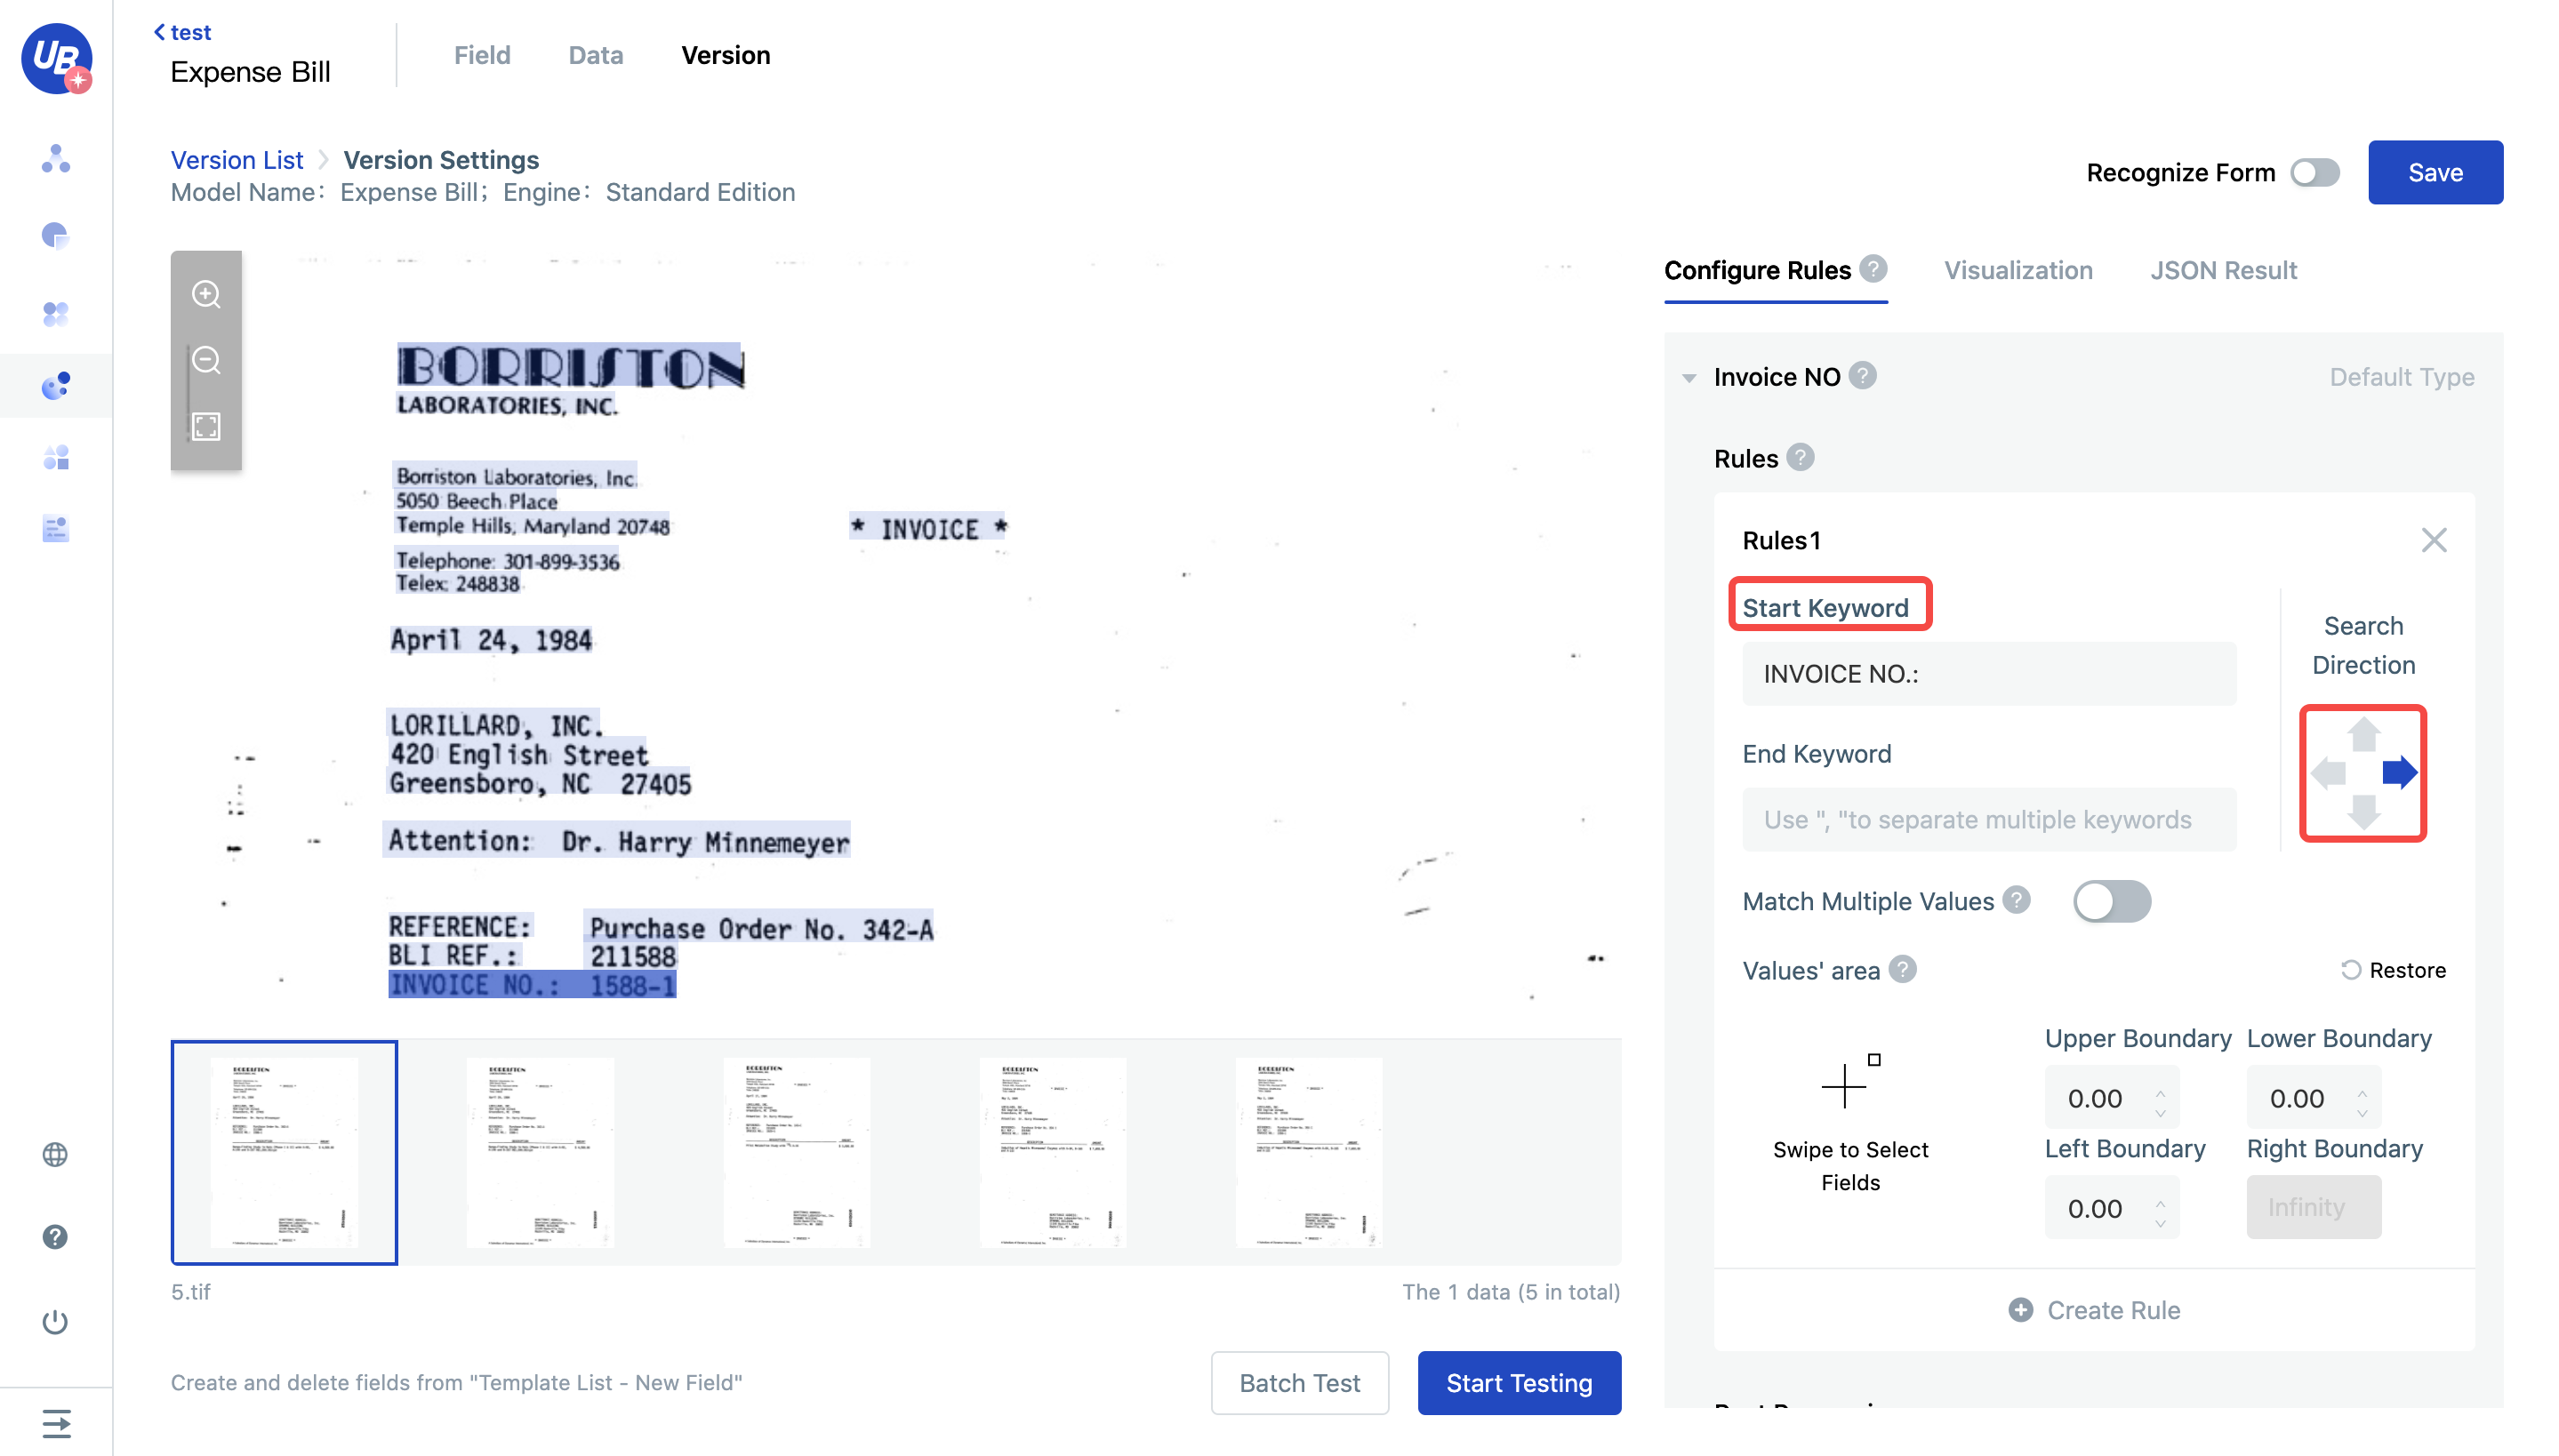
19)Search up through [5050 Beech Place]
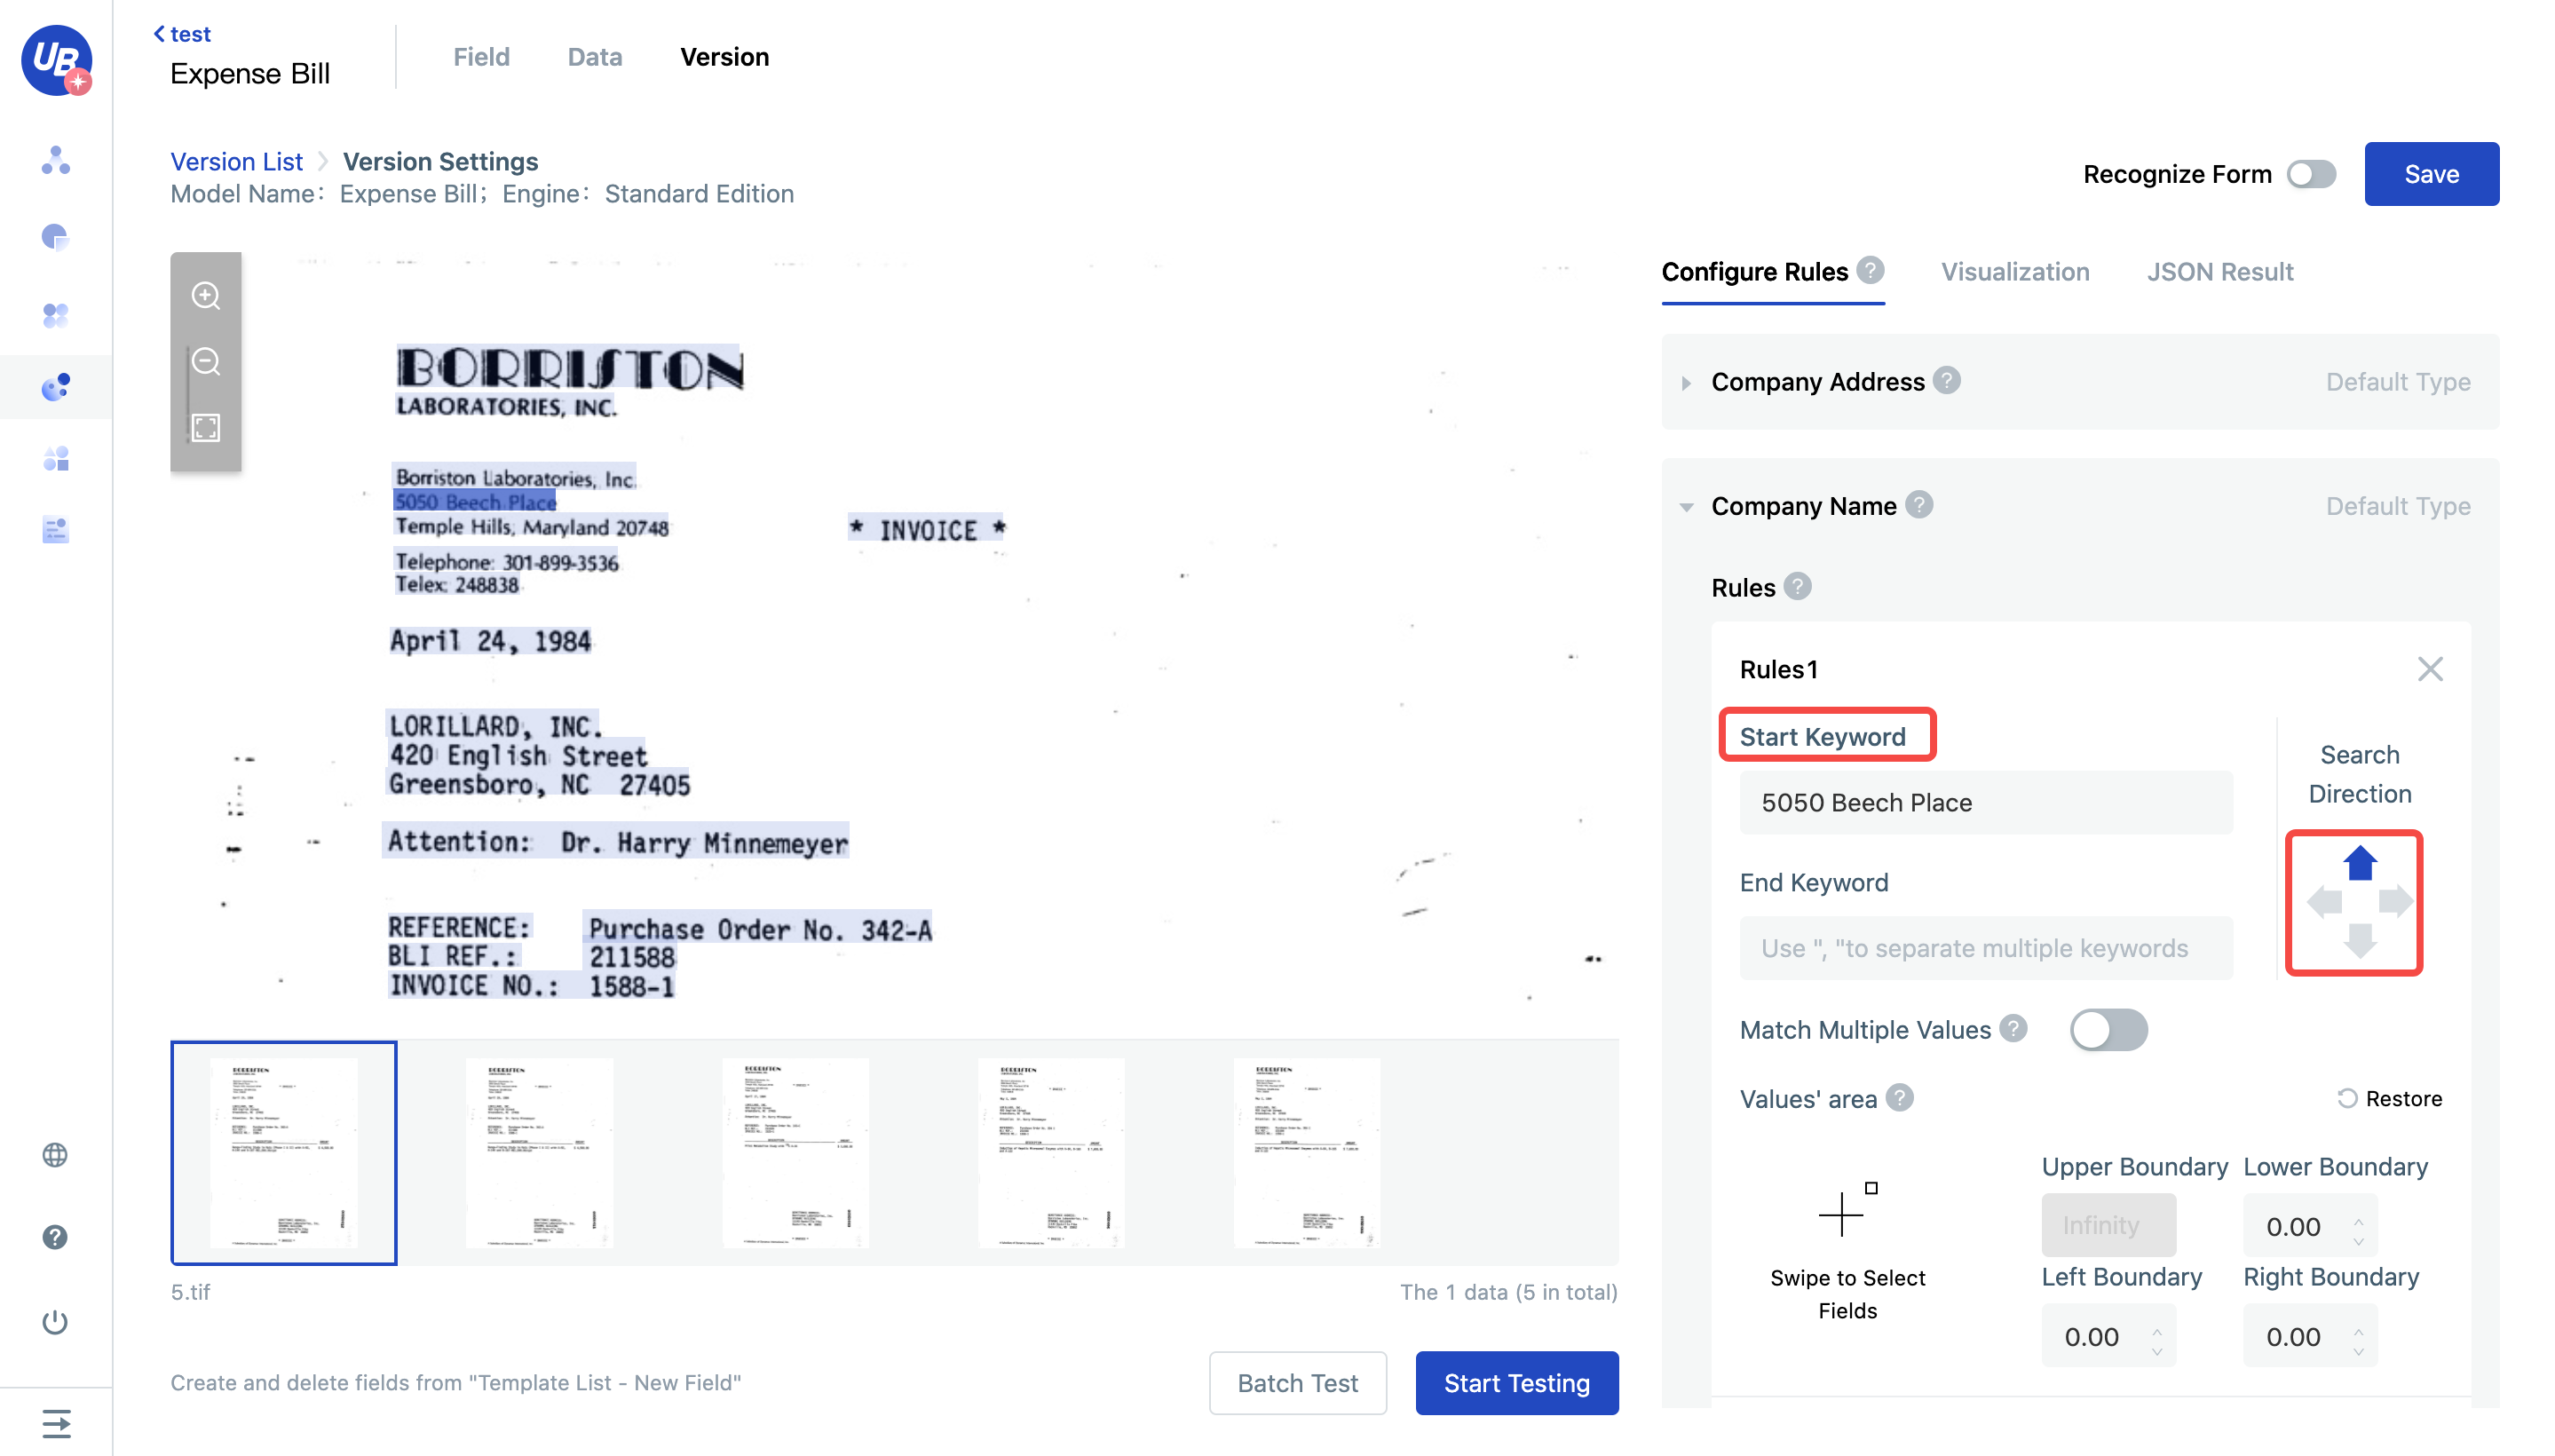
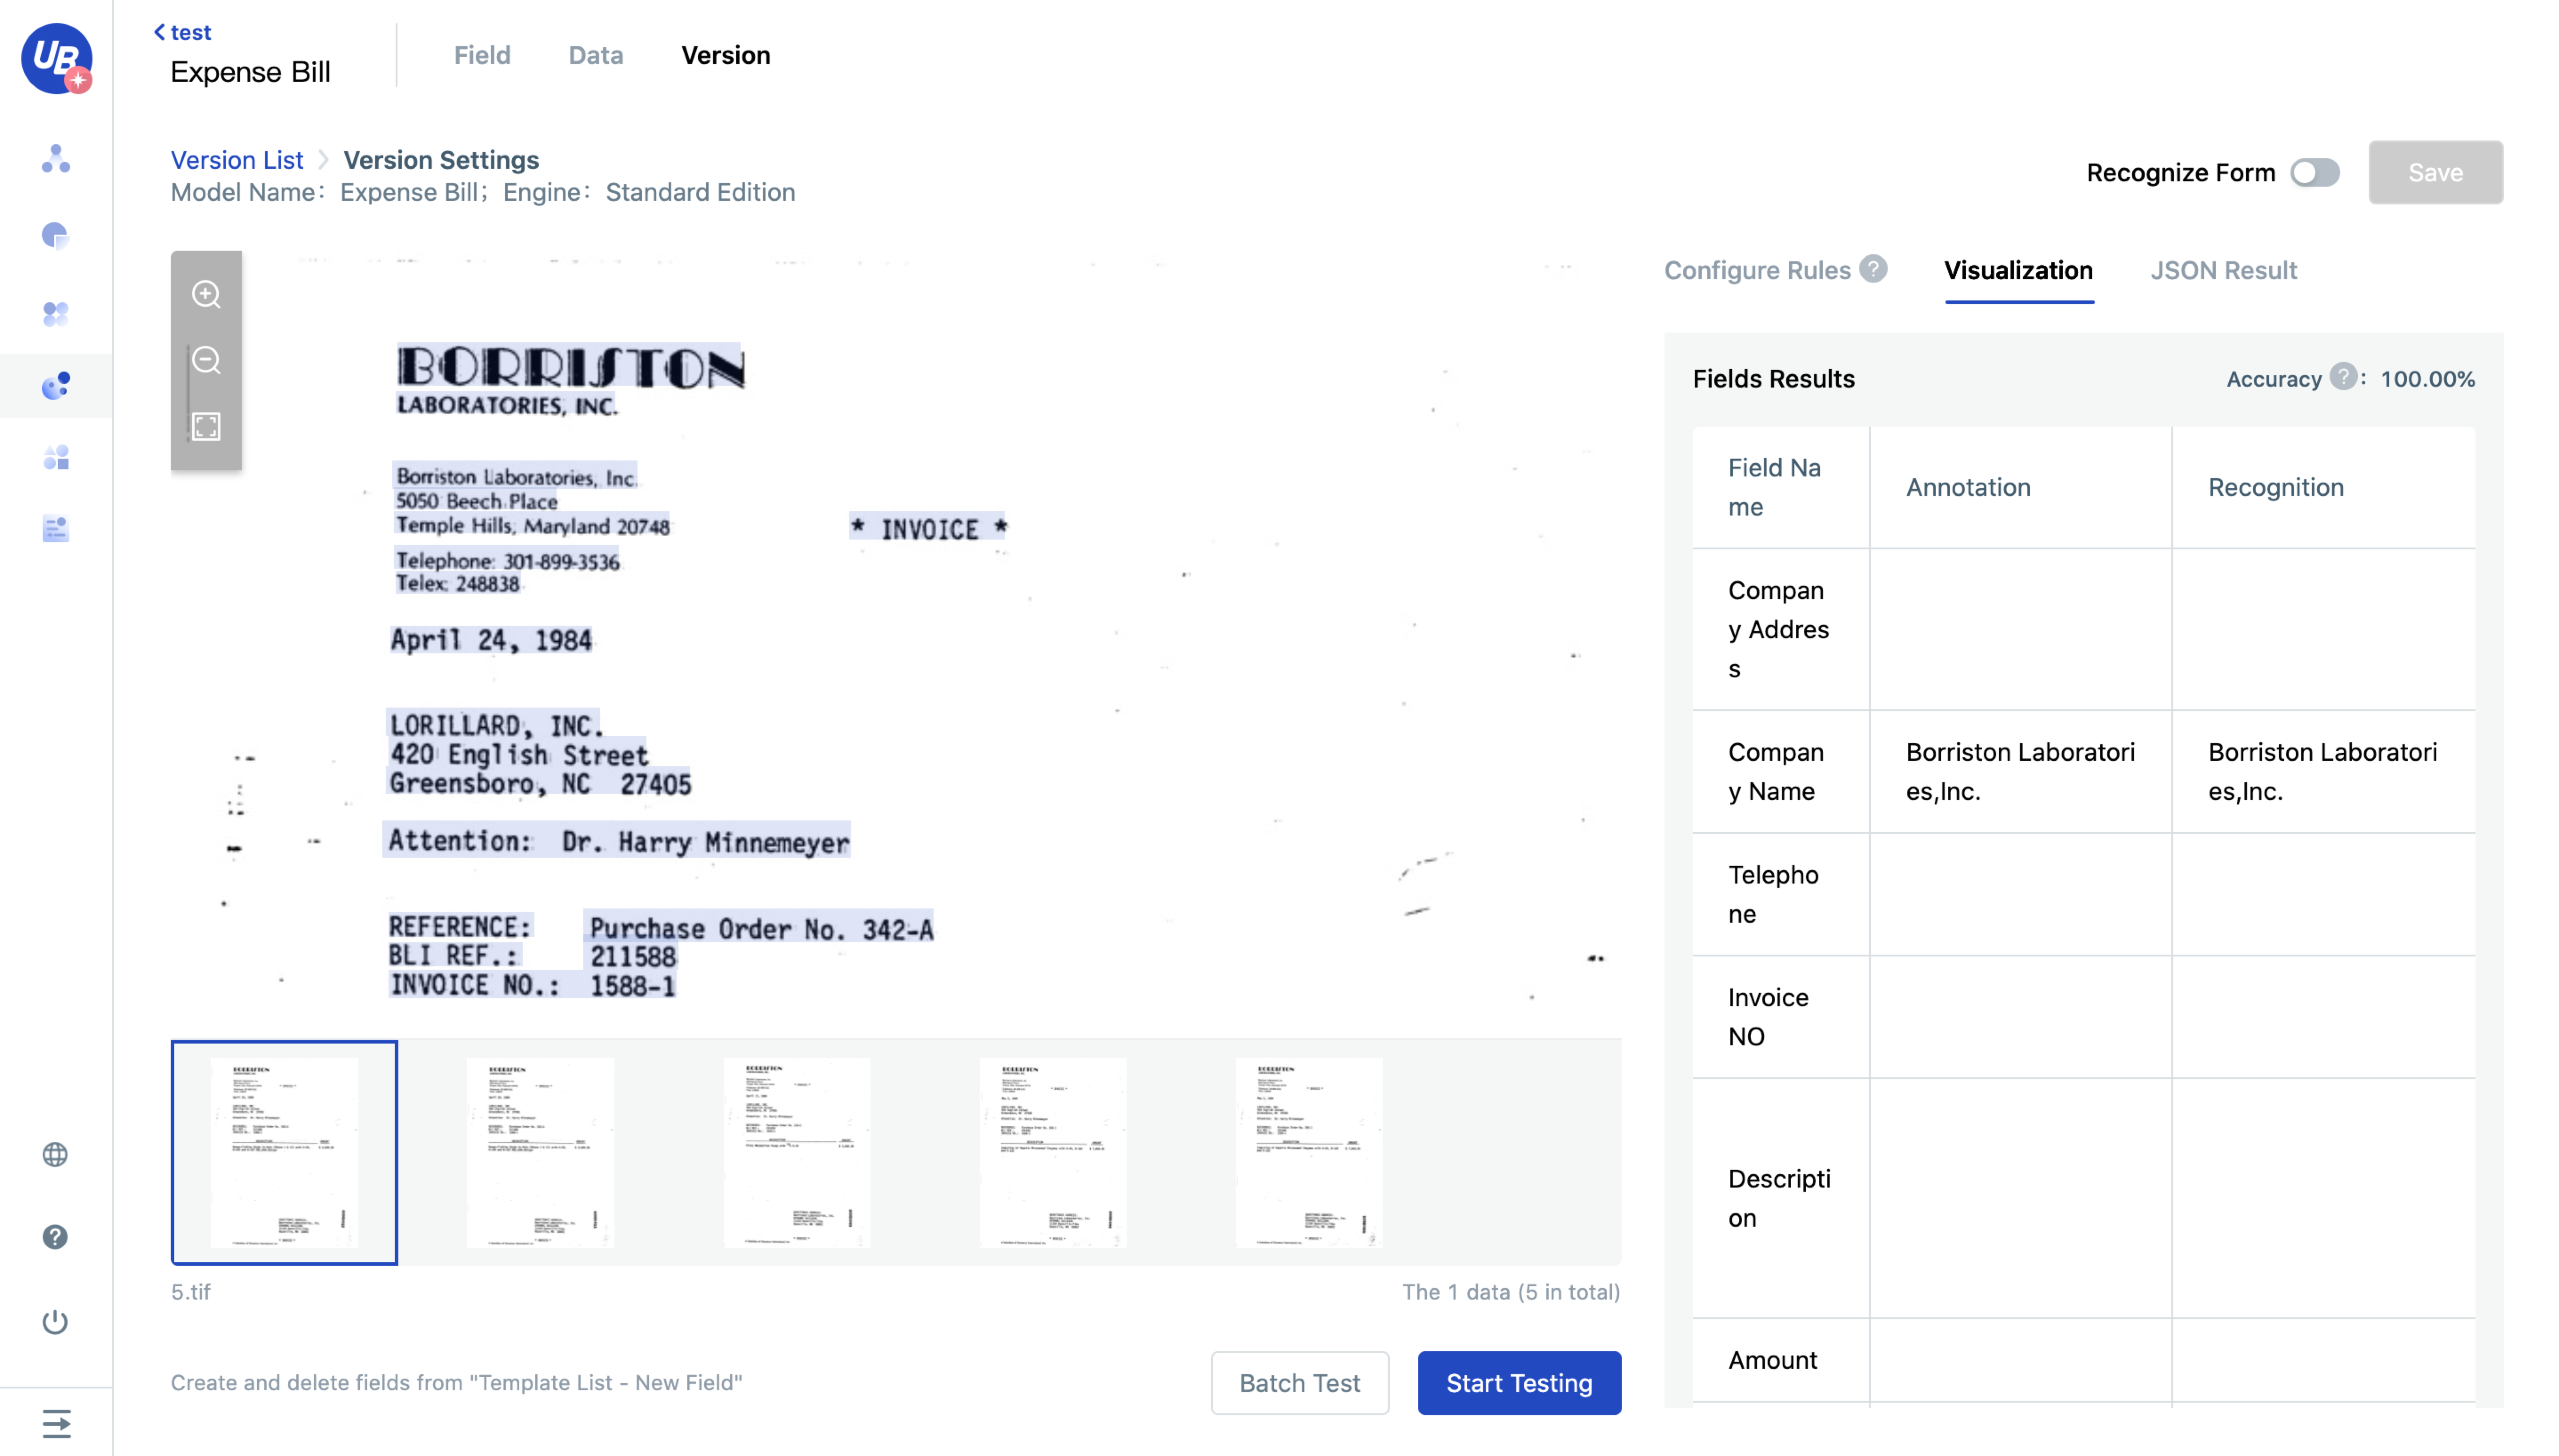
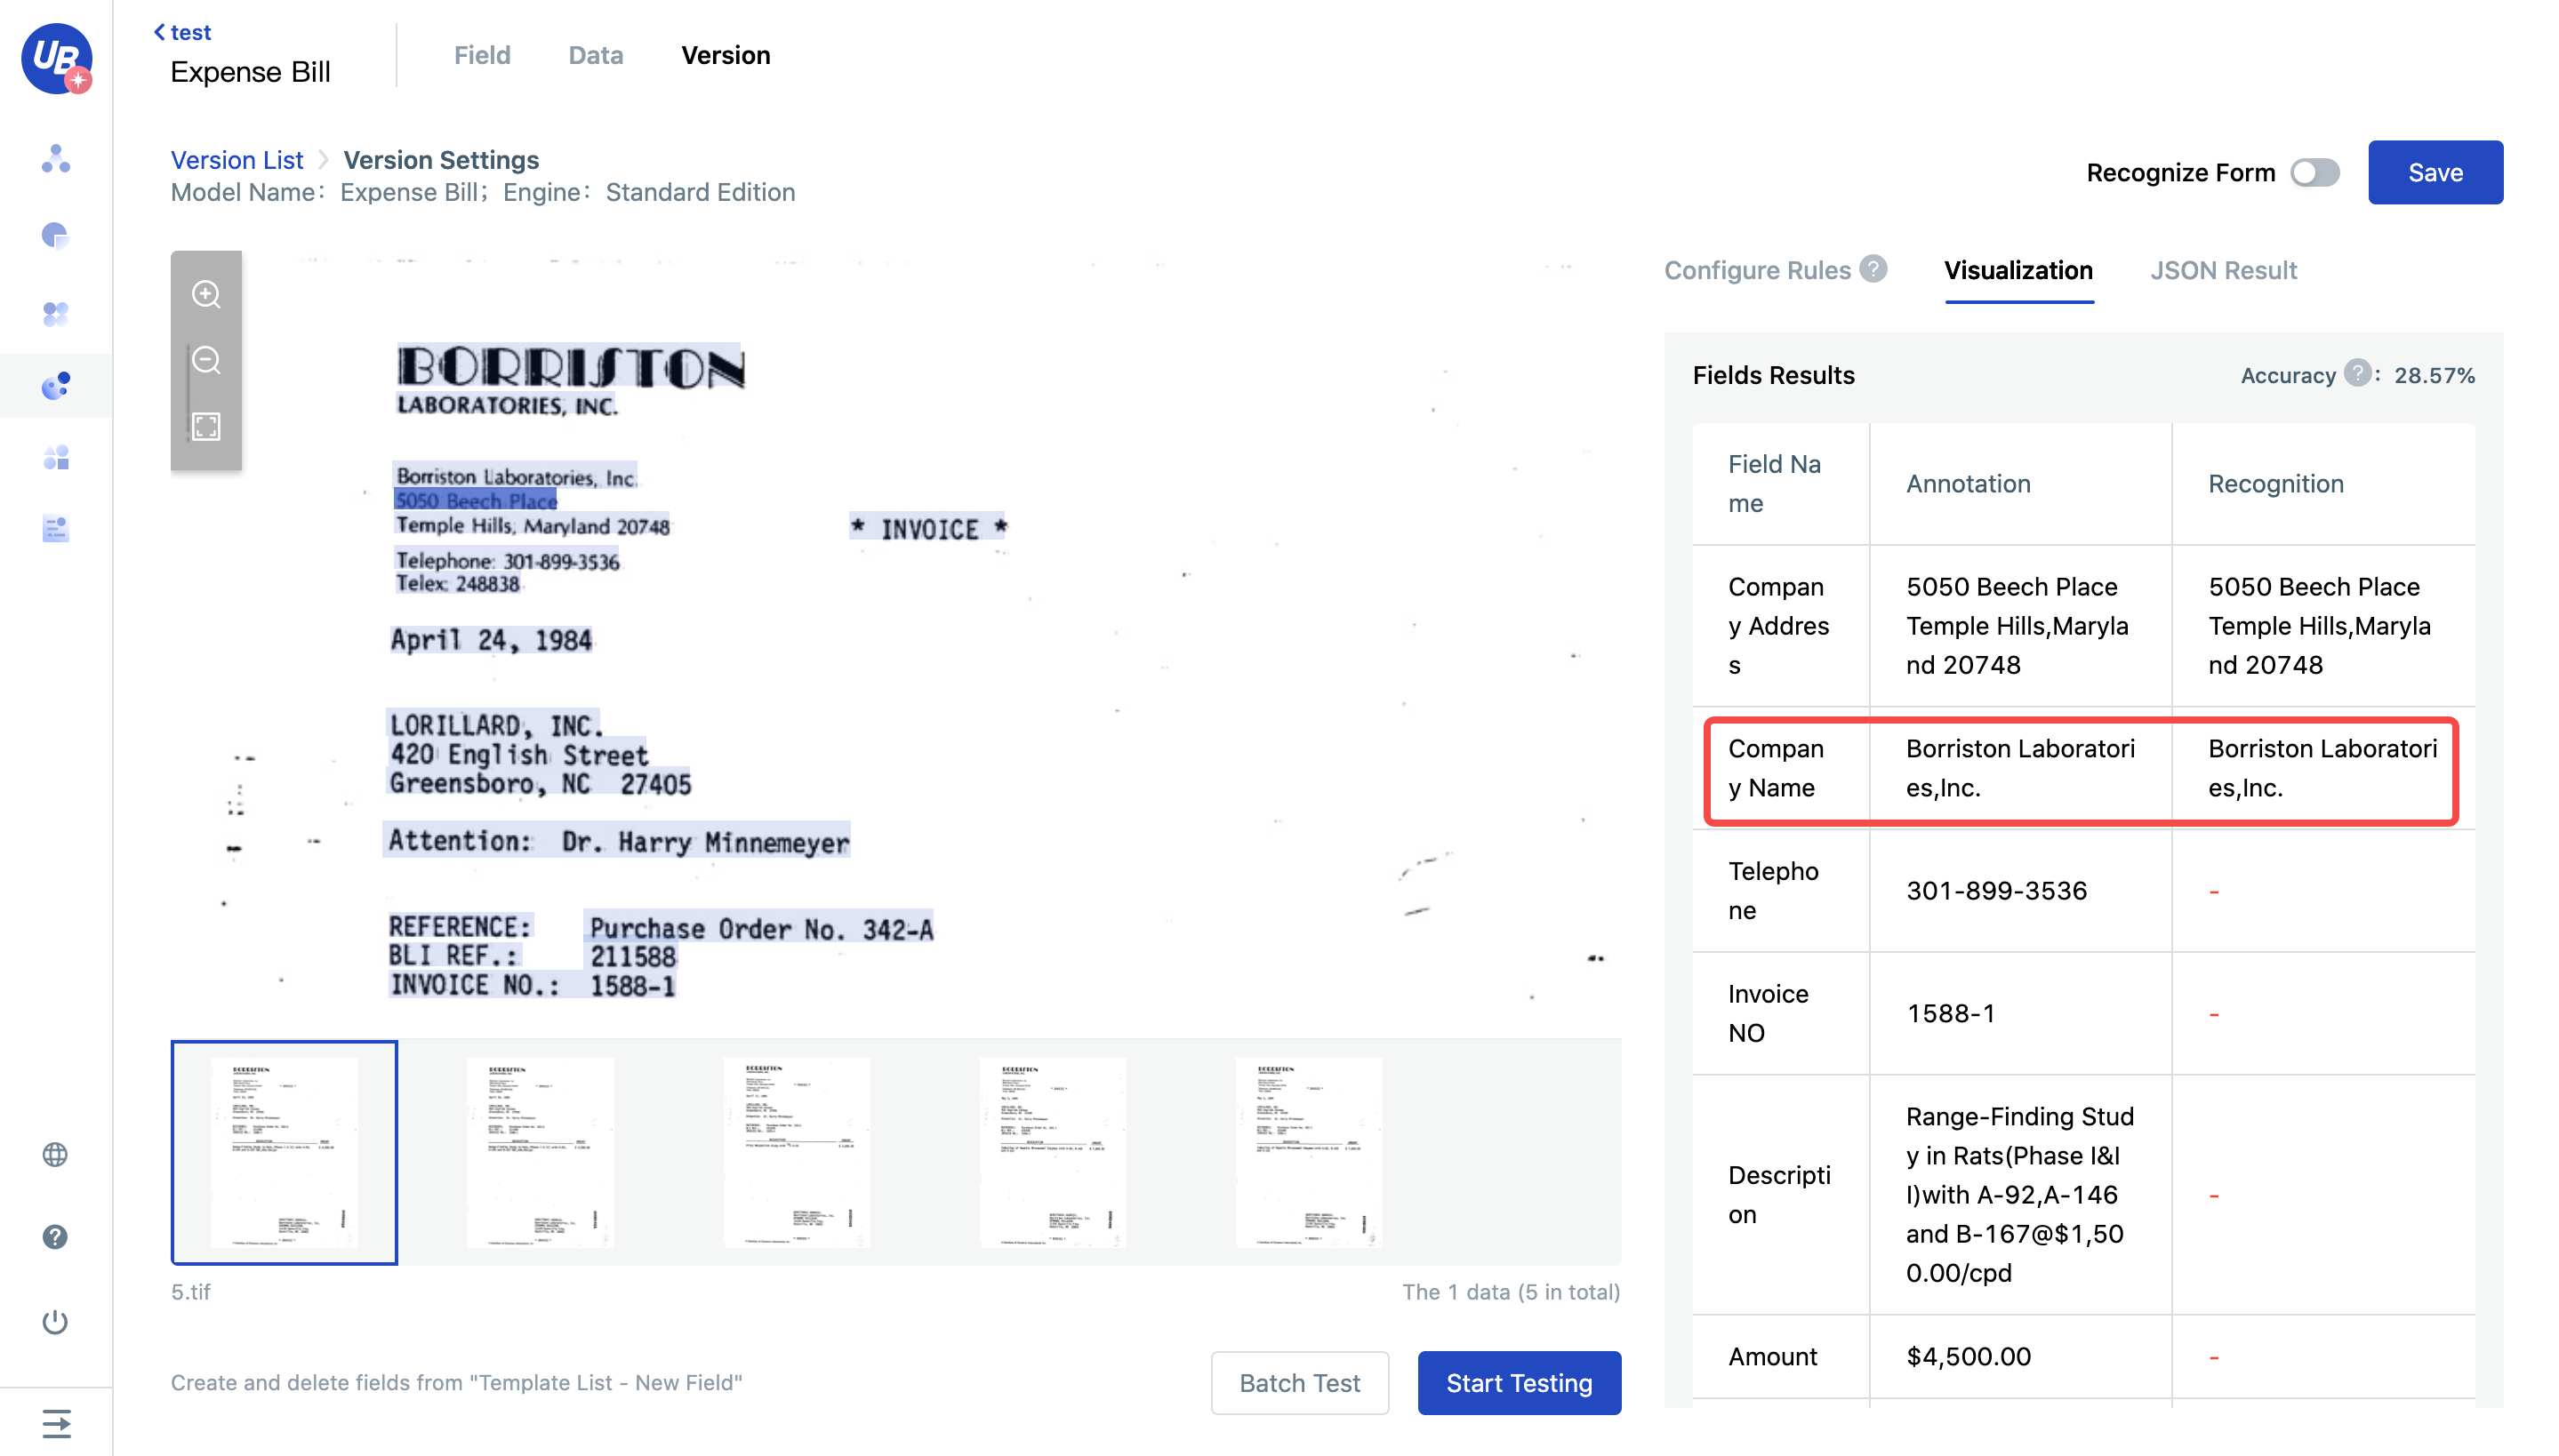
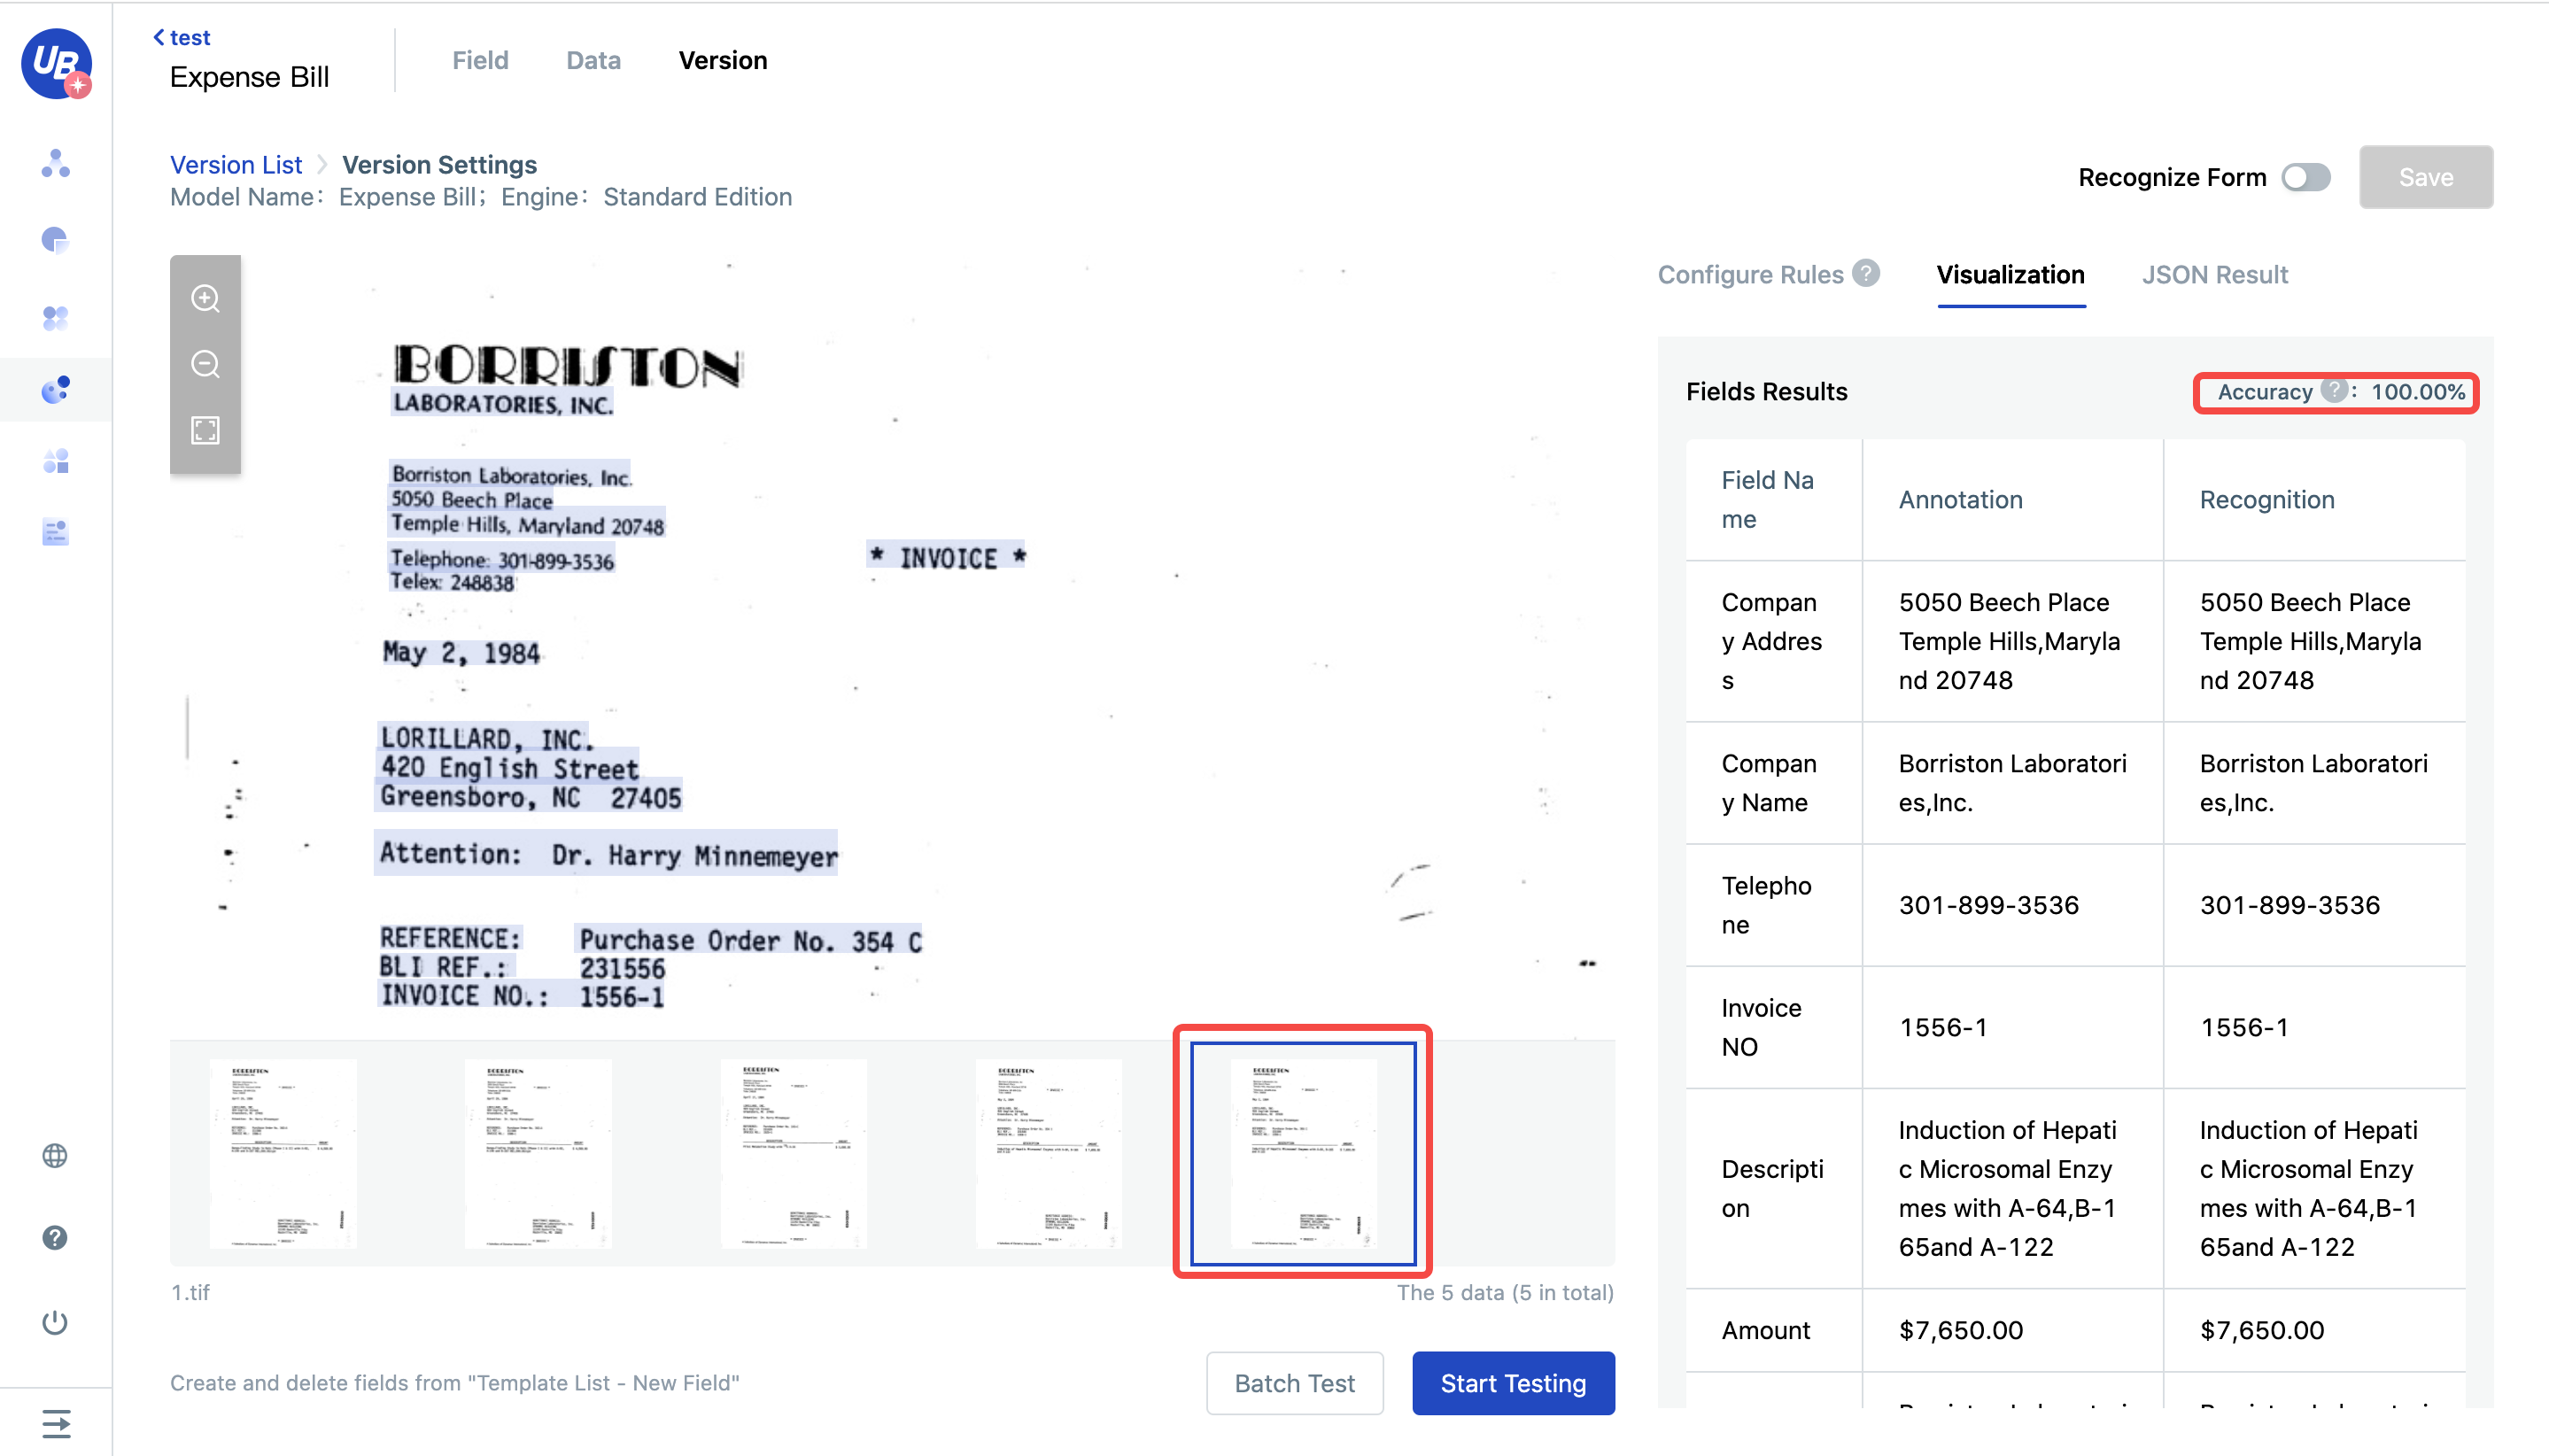
20)Click "Start Test", you can see the recognition result
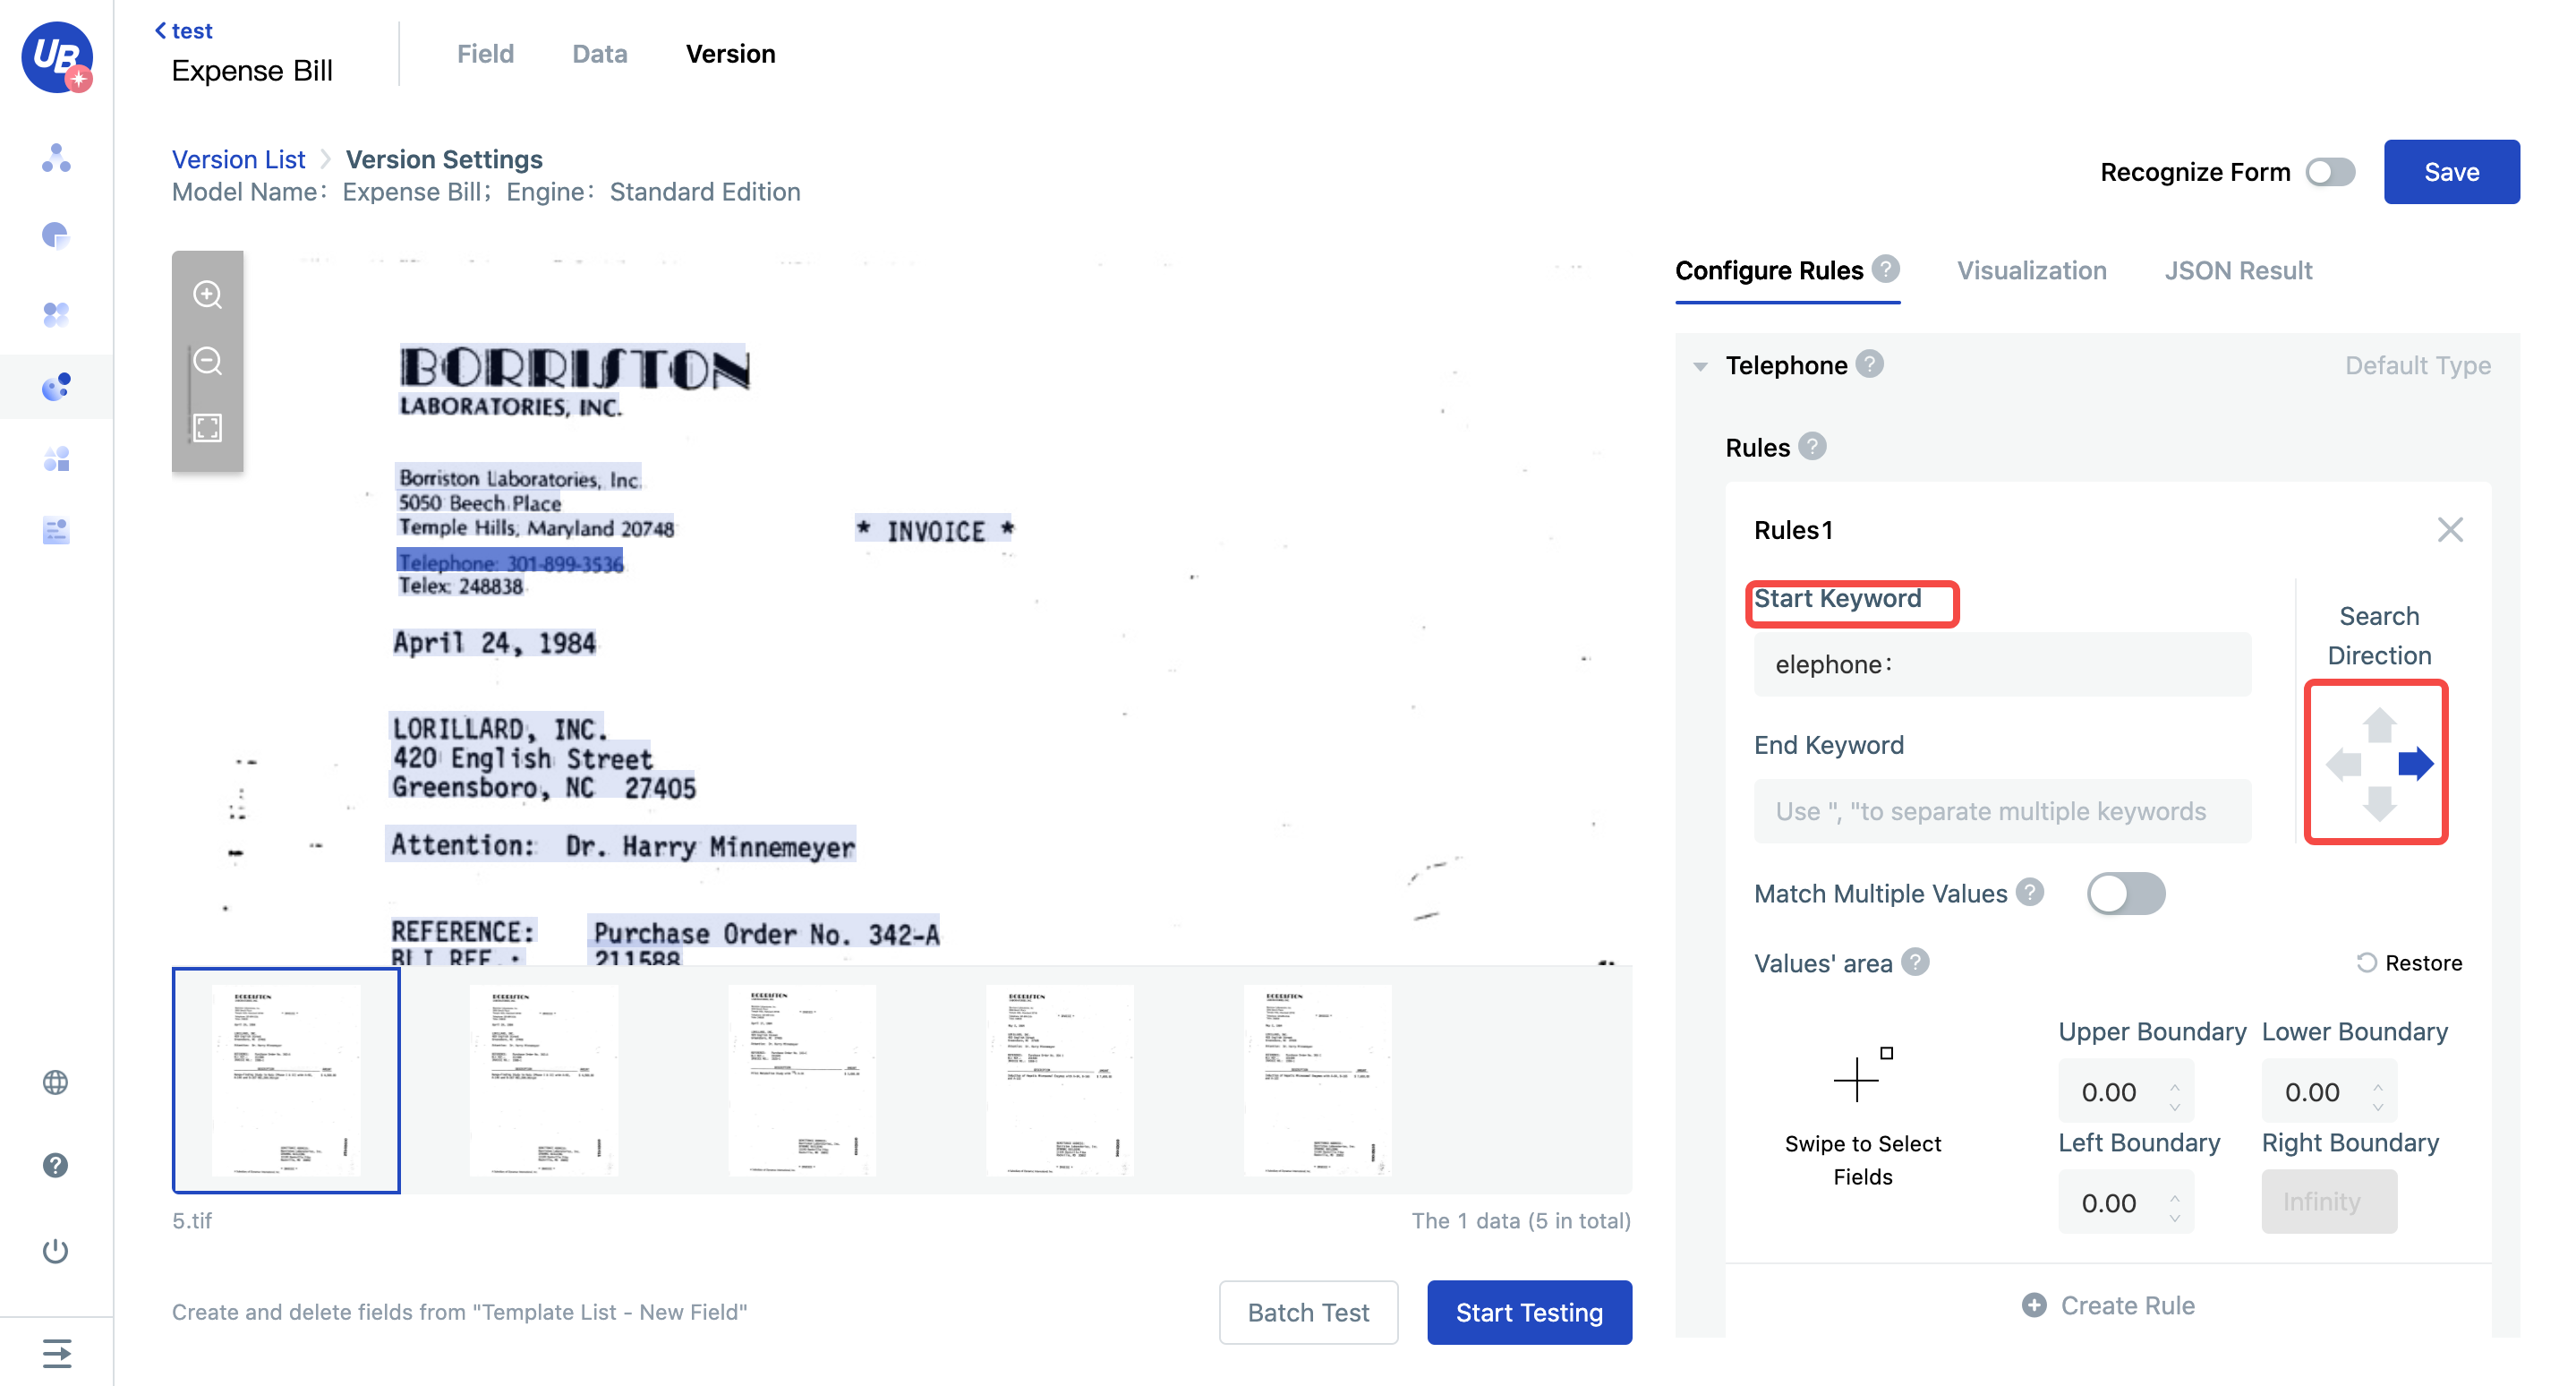
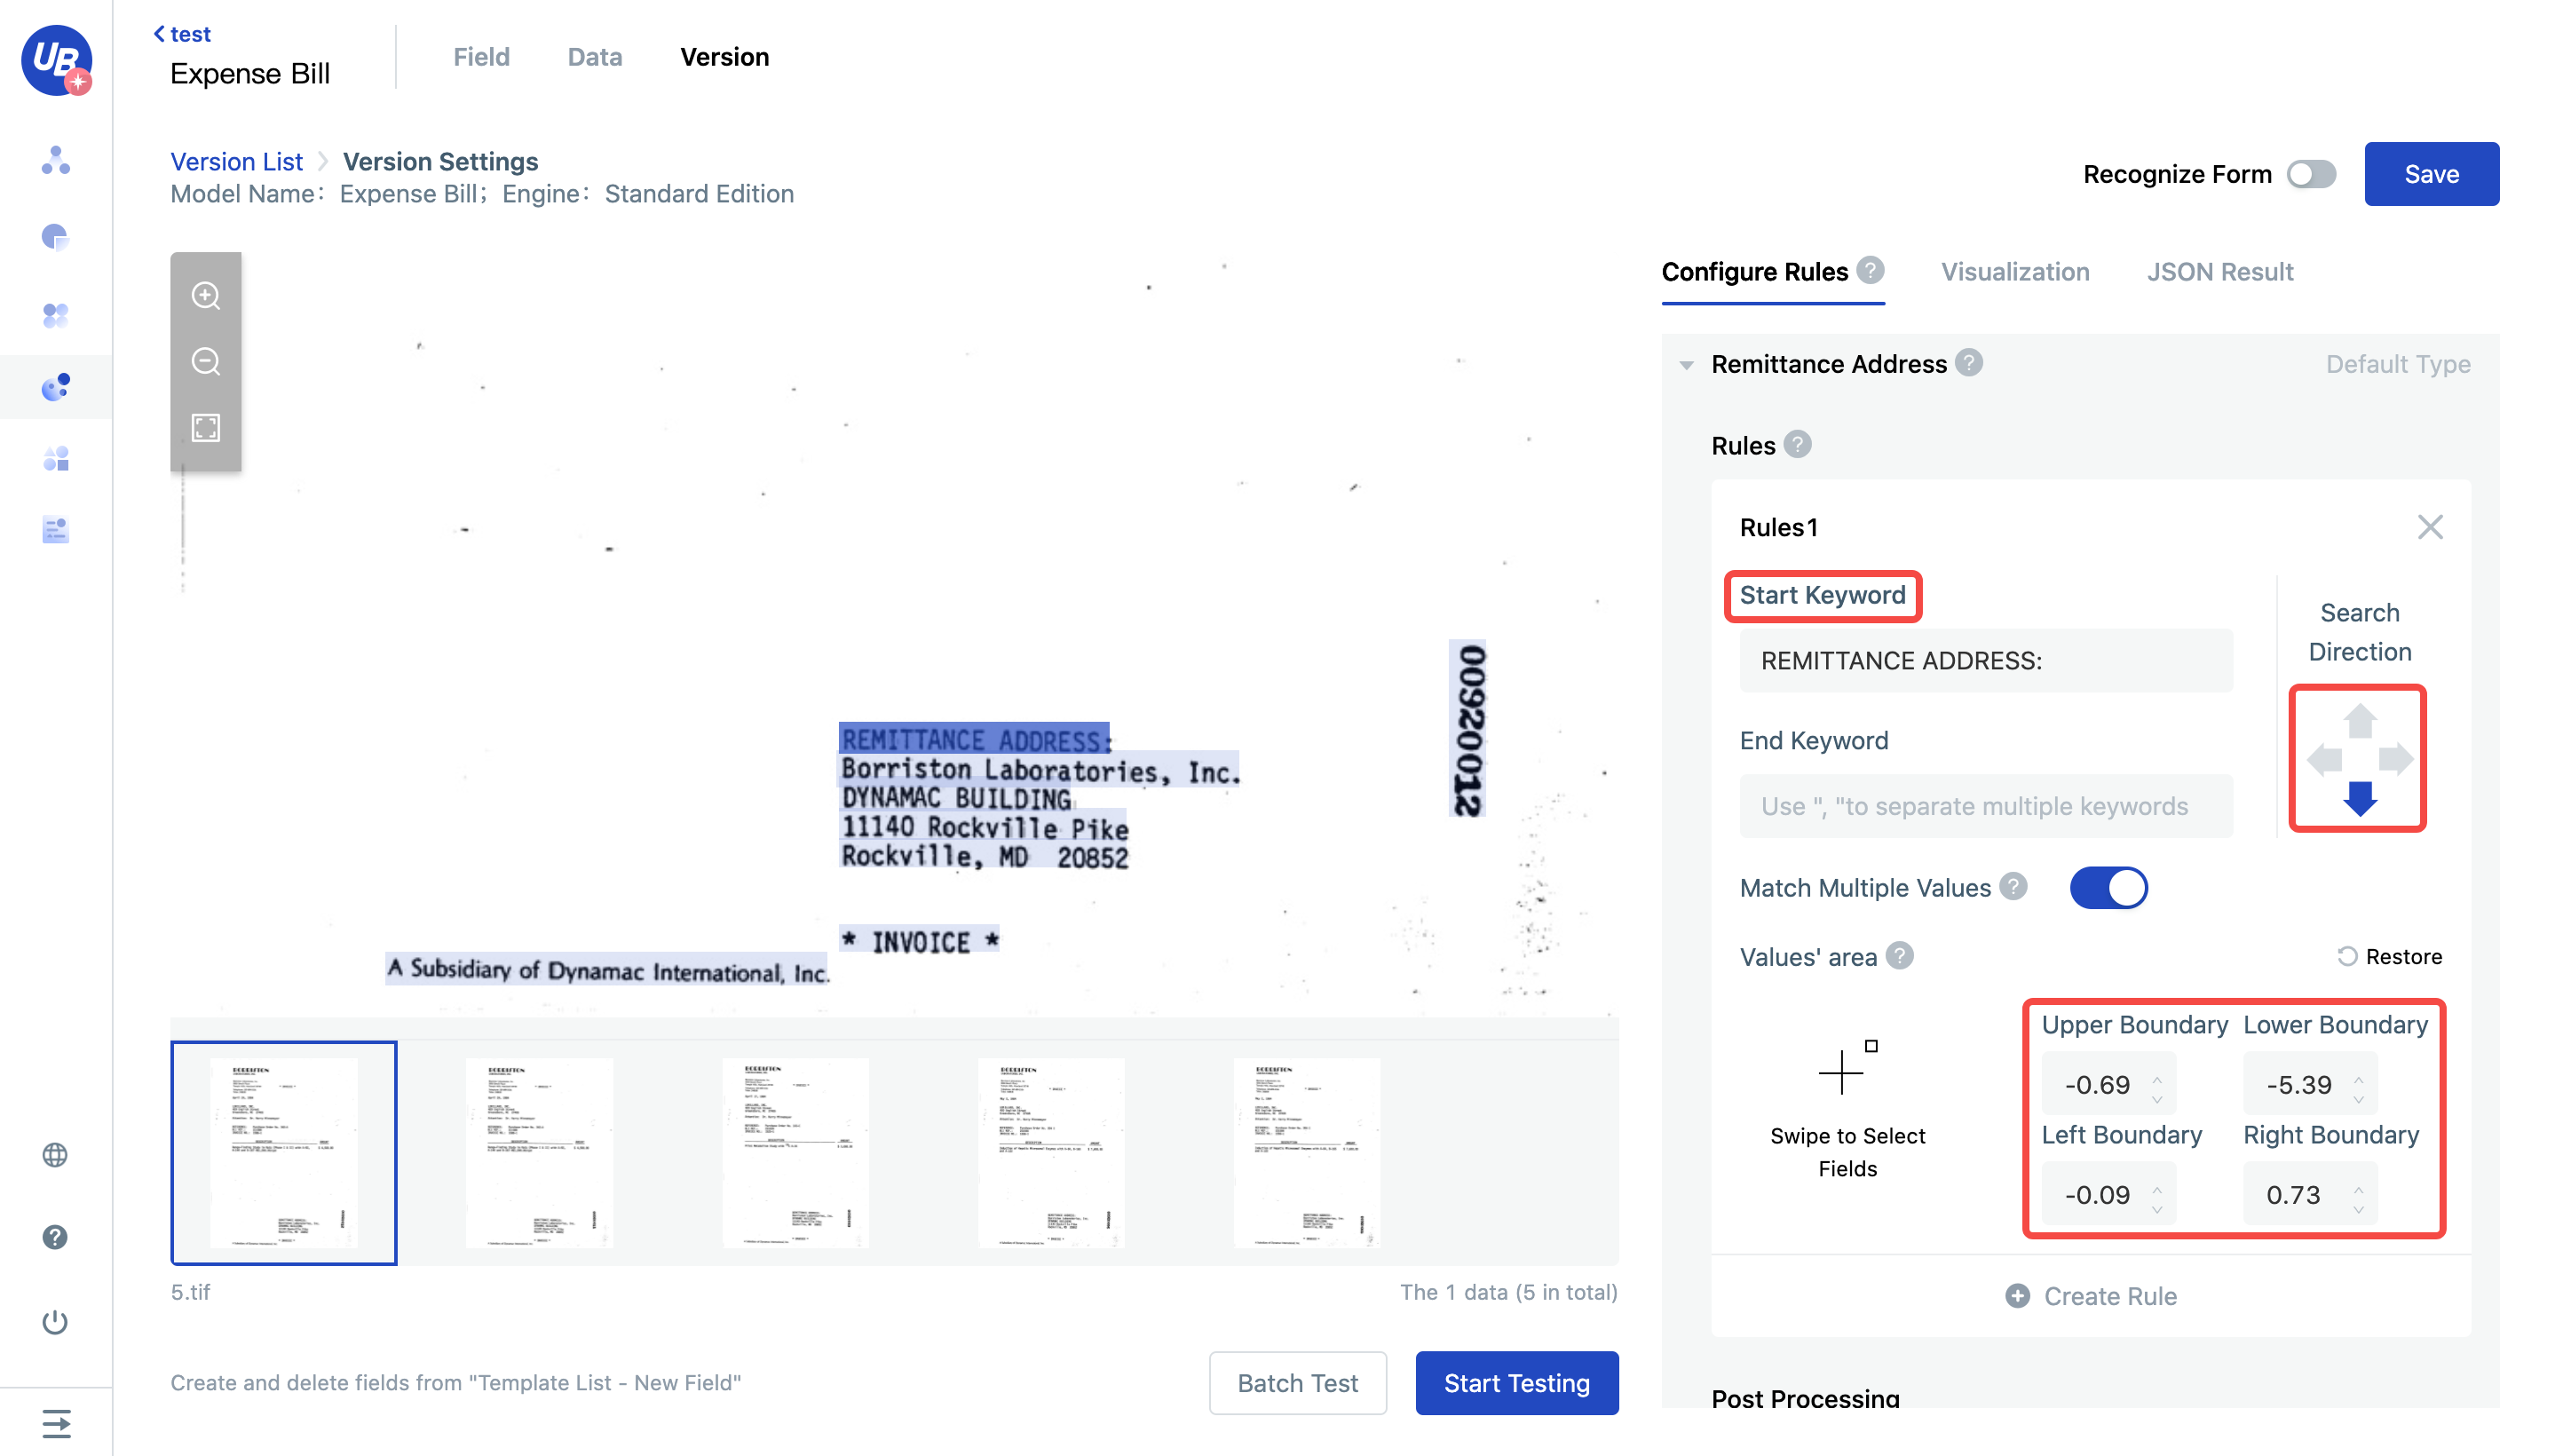
21)Search downwards through [Borriston Laborratories, Inc.]

22)configure all rules like above
23)Test and you will find that the accuracy rate is 100%
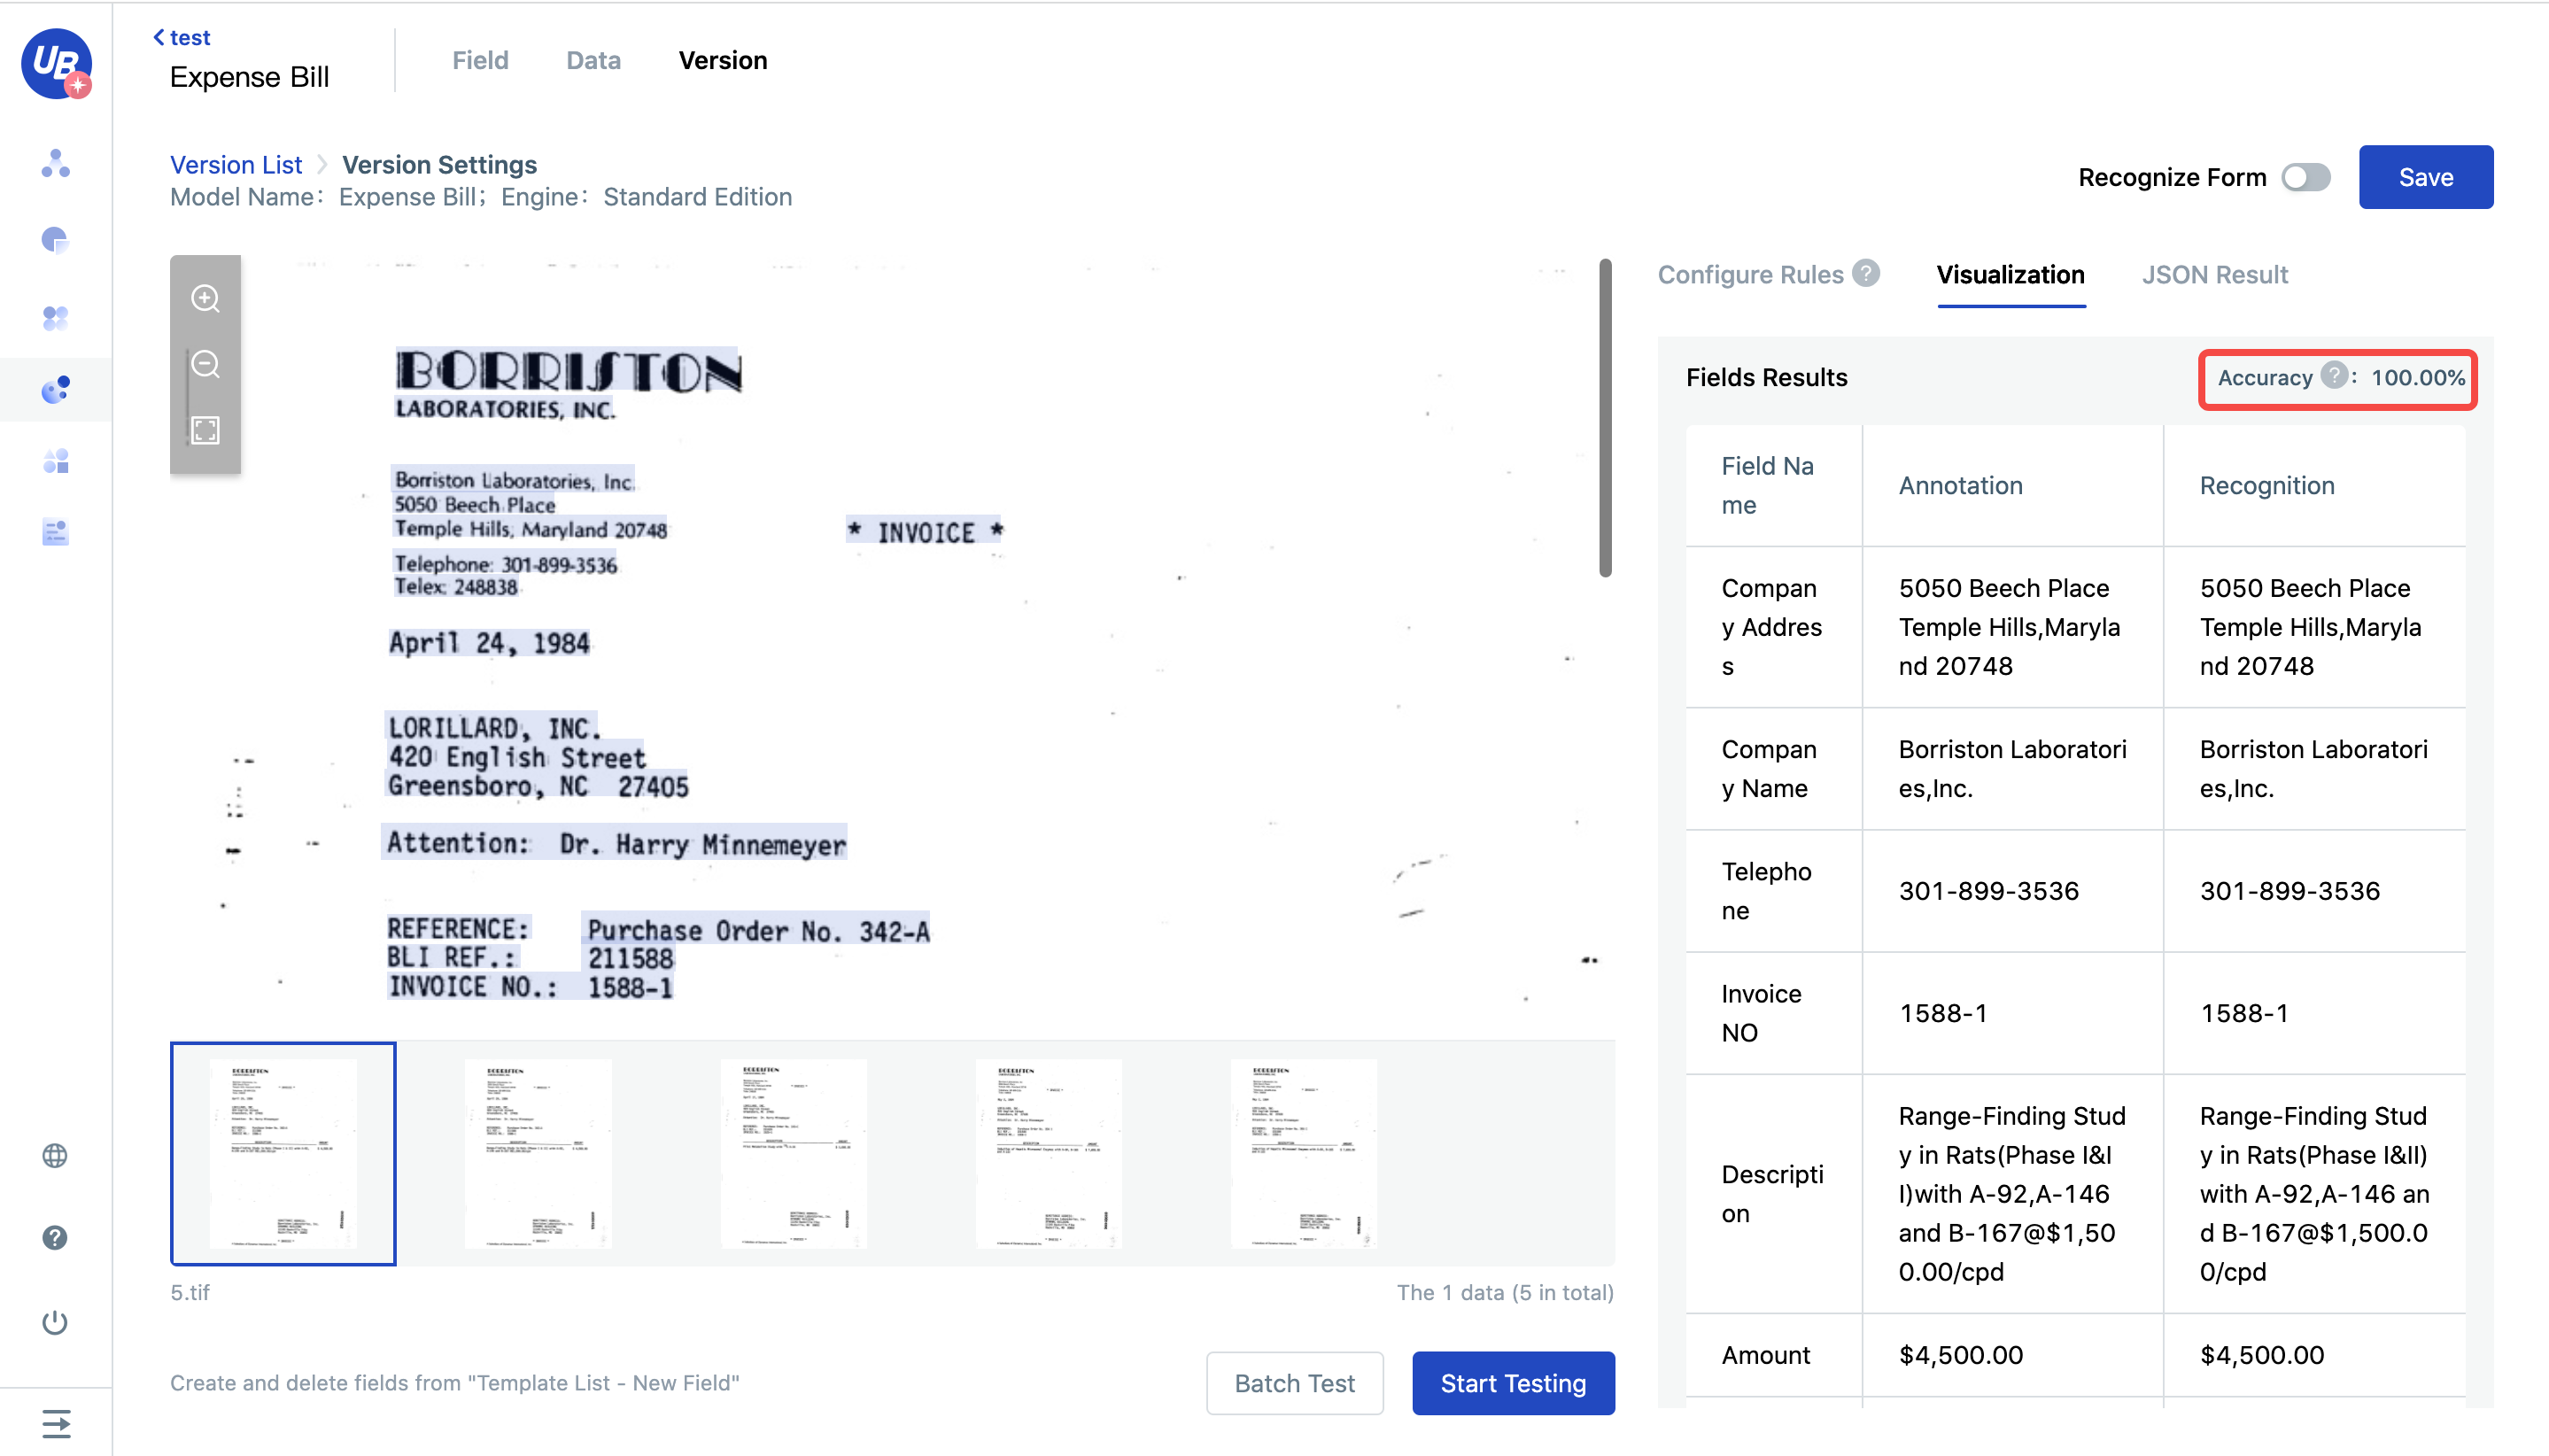
24)Click on other pictures and then you will find that they are all 100%
Evaluation rules
25)Go back to the work progress guide and you will find that the "configuration rule" is completed, click "evaluation rule" to go to the next step.
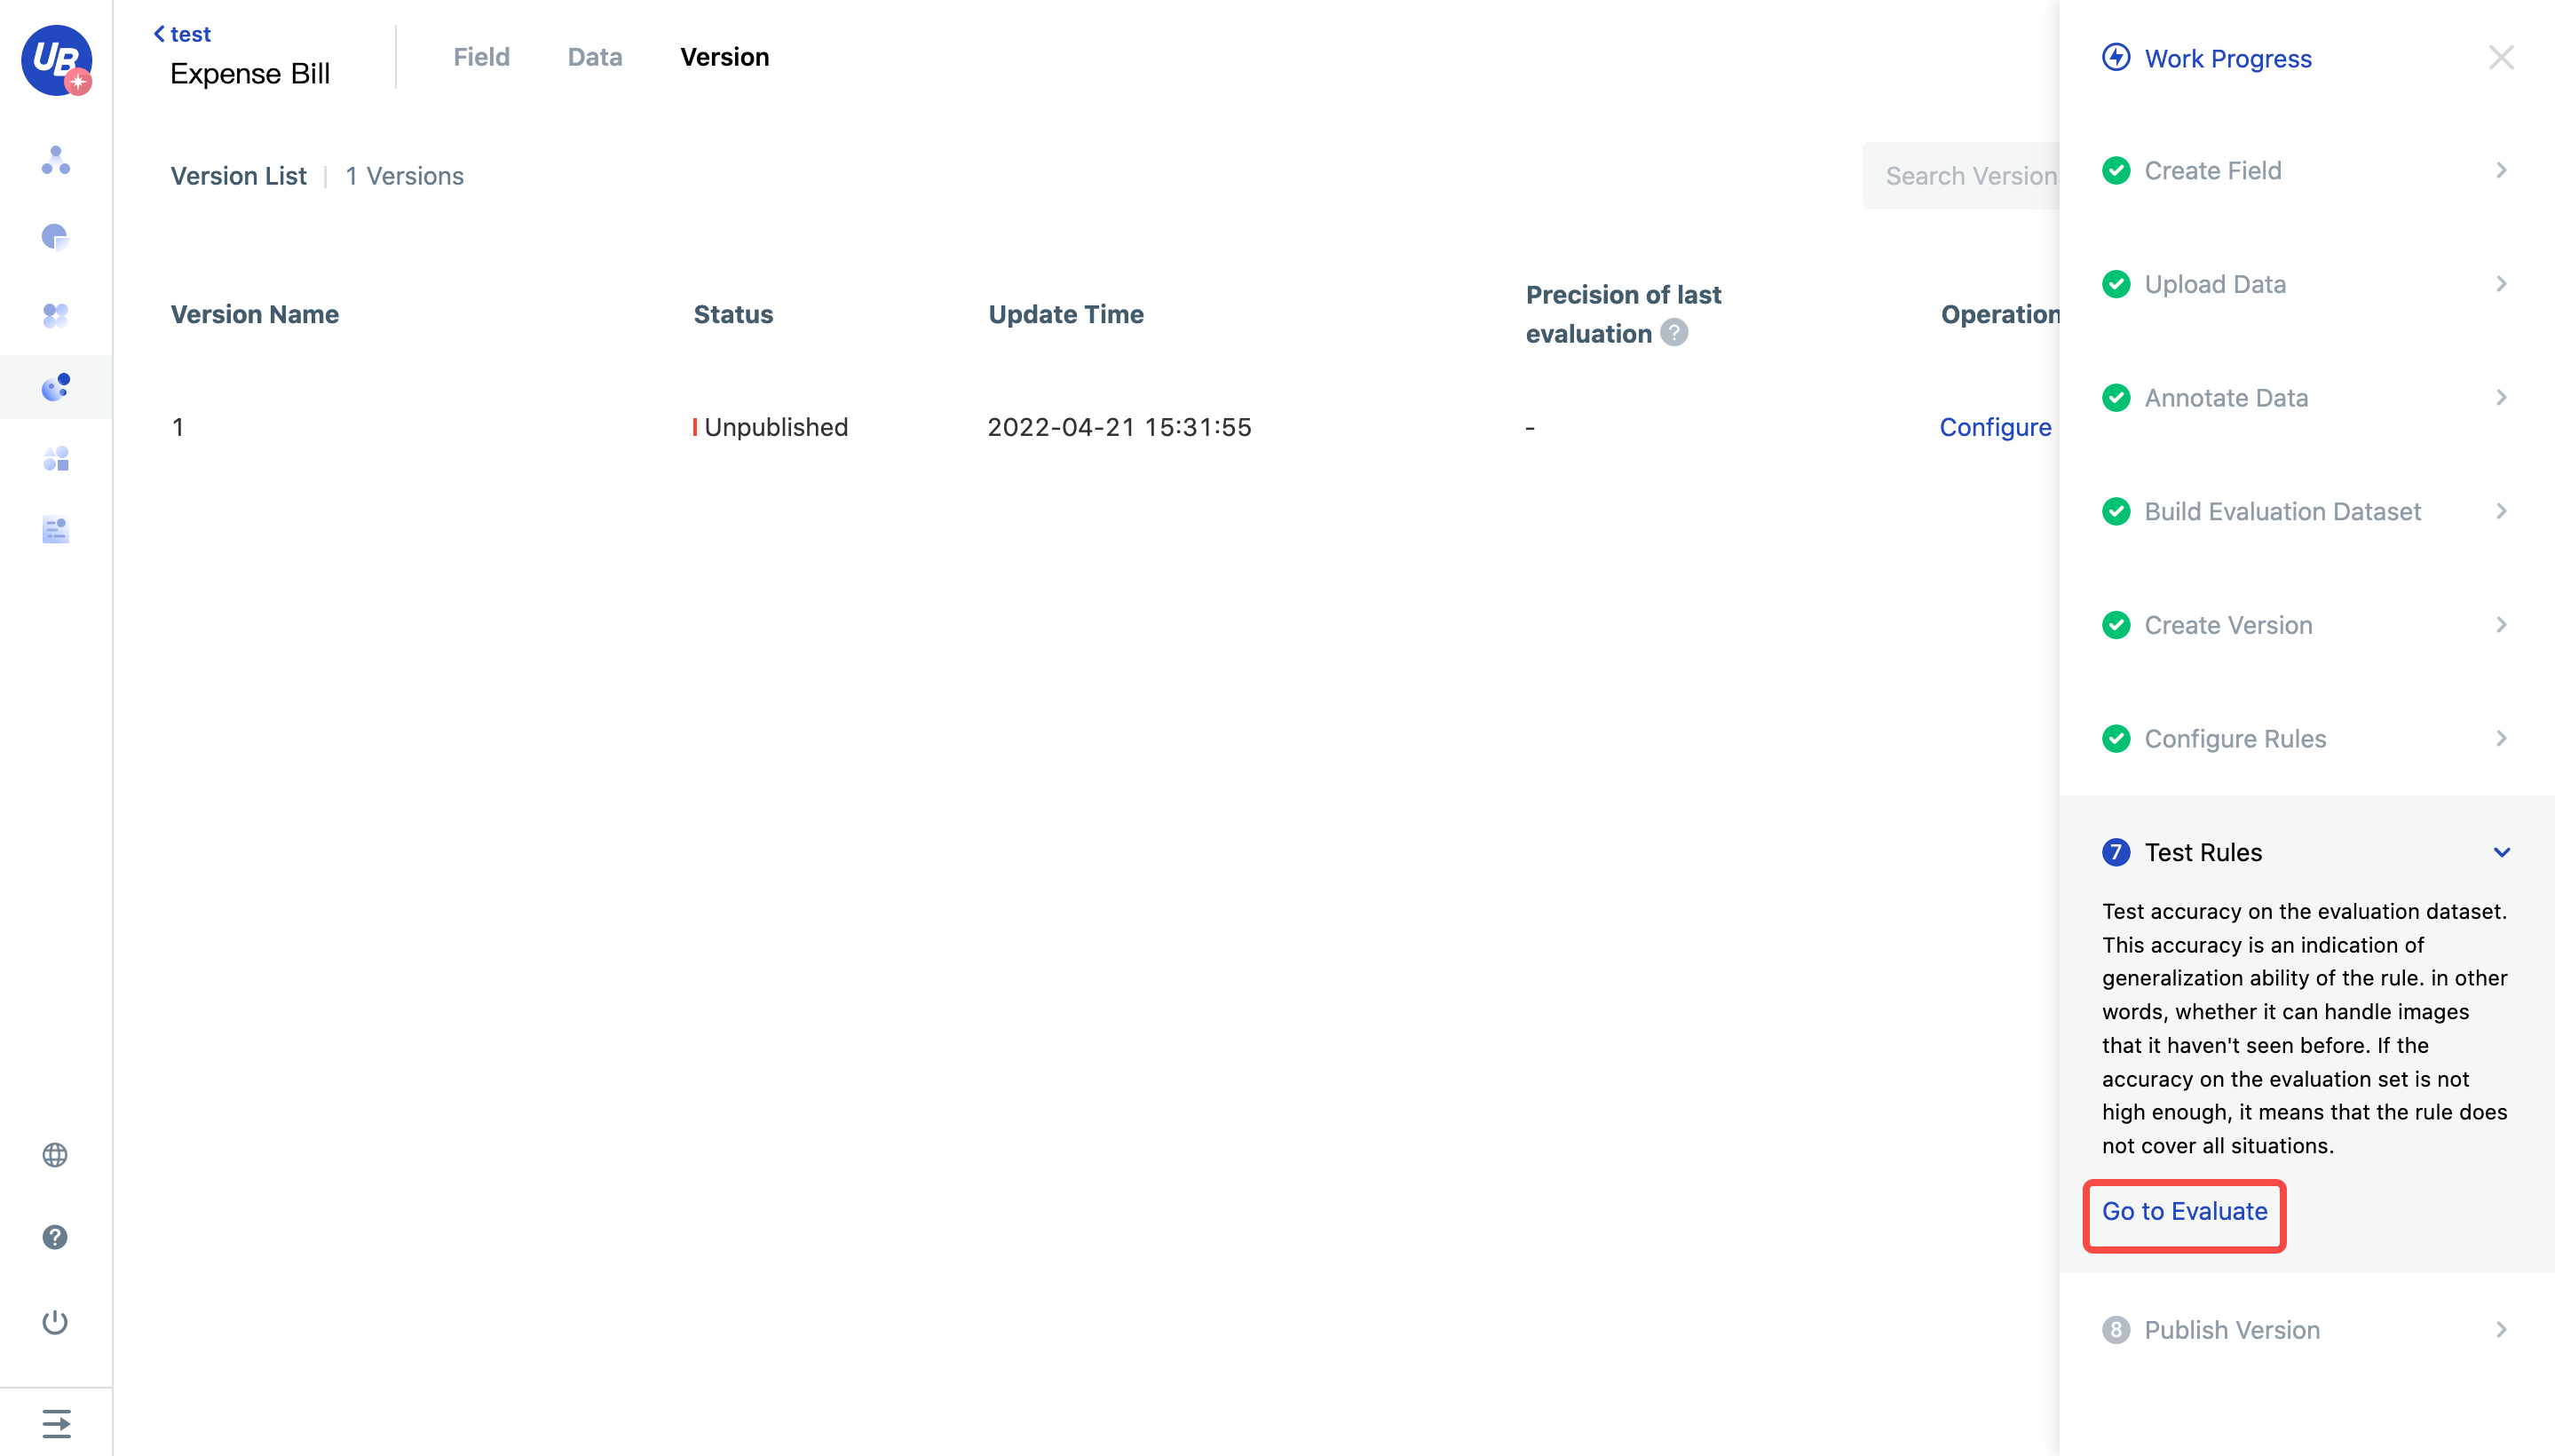
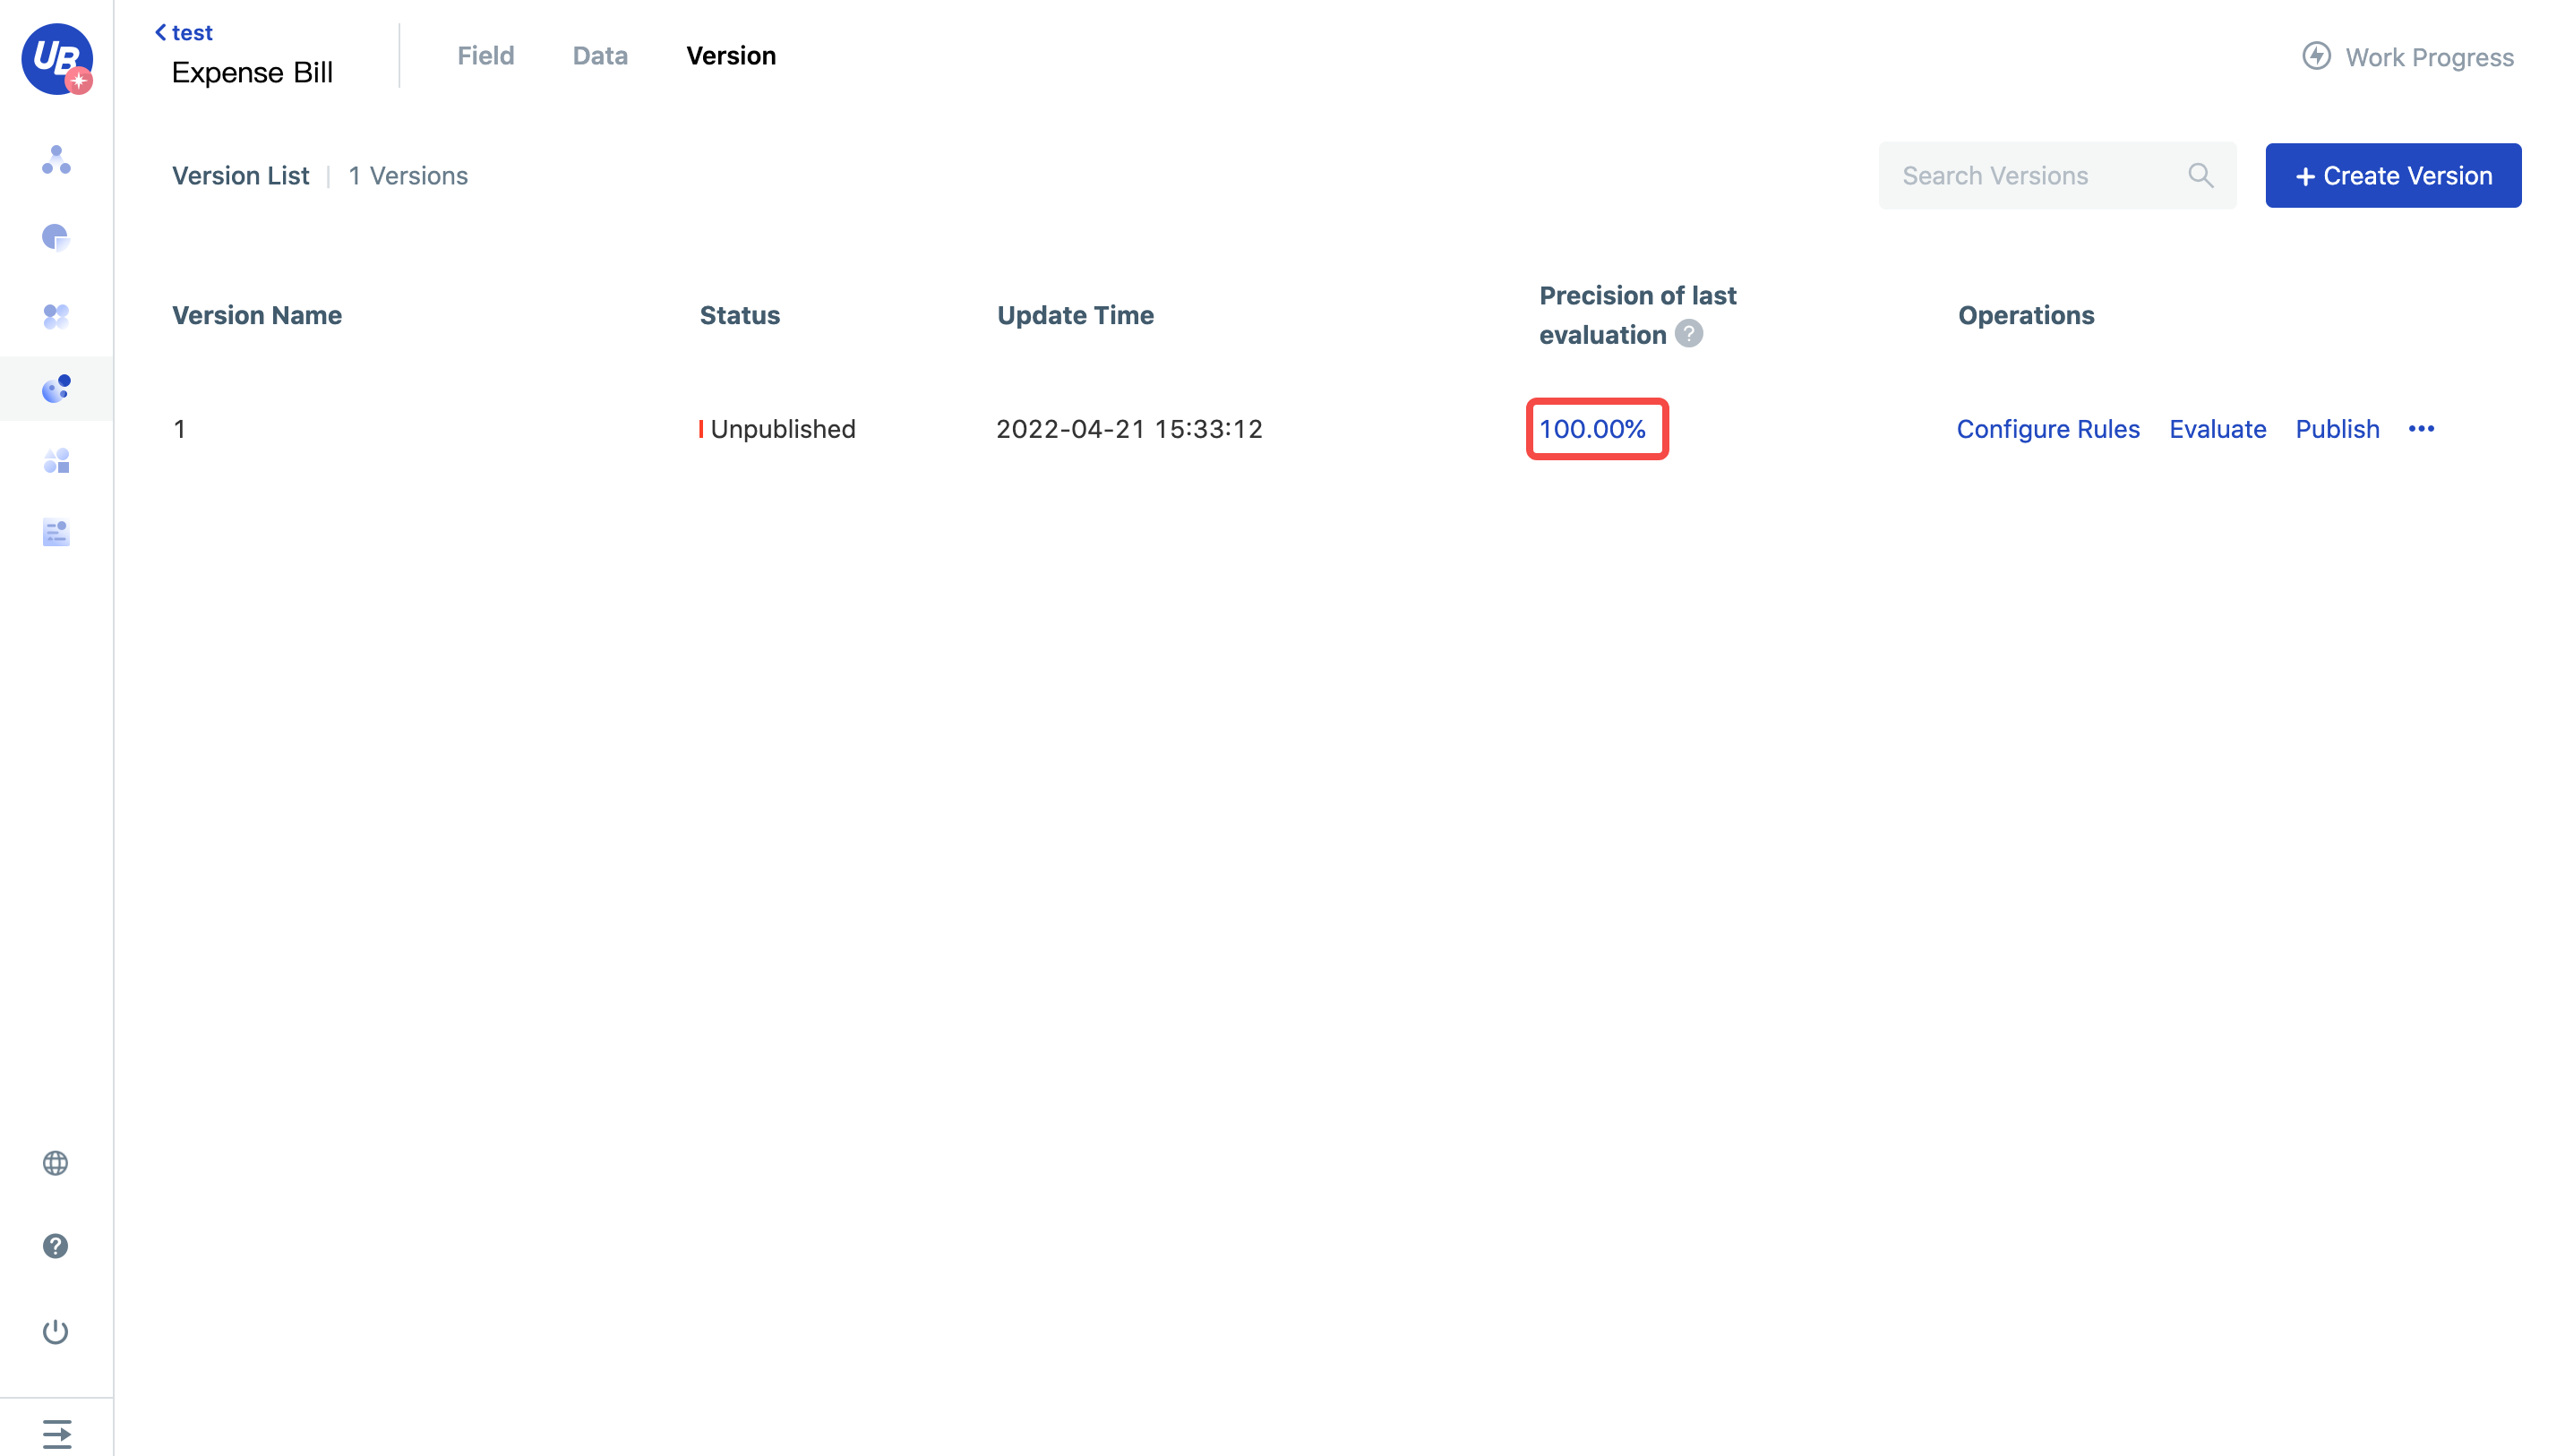
26)Click the evaluation button, and you will see the accuracy rate update in a while.
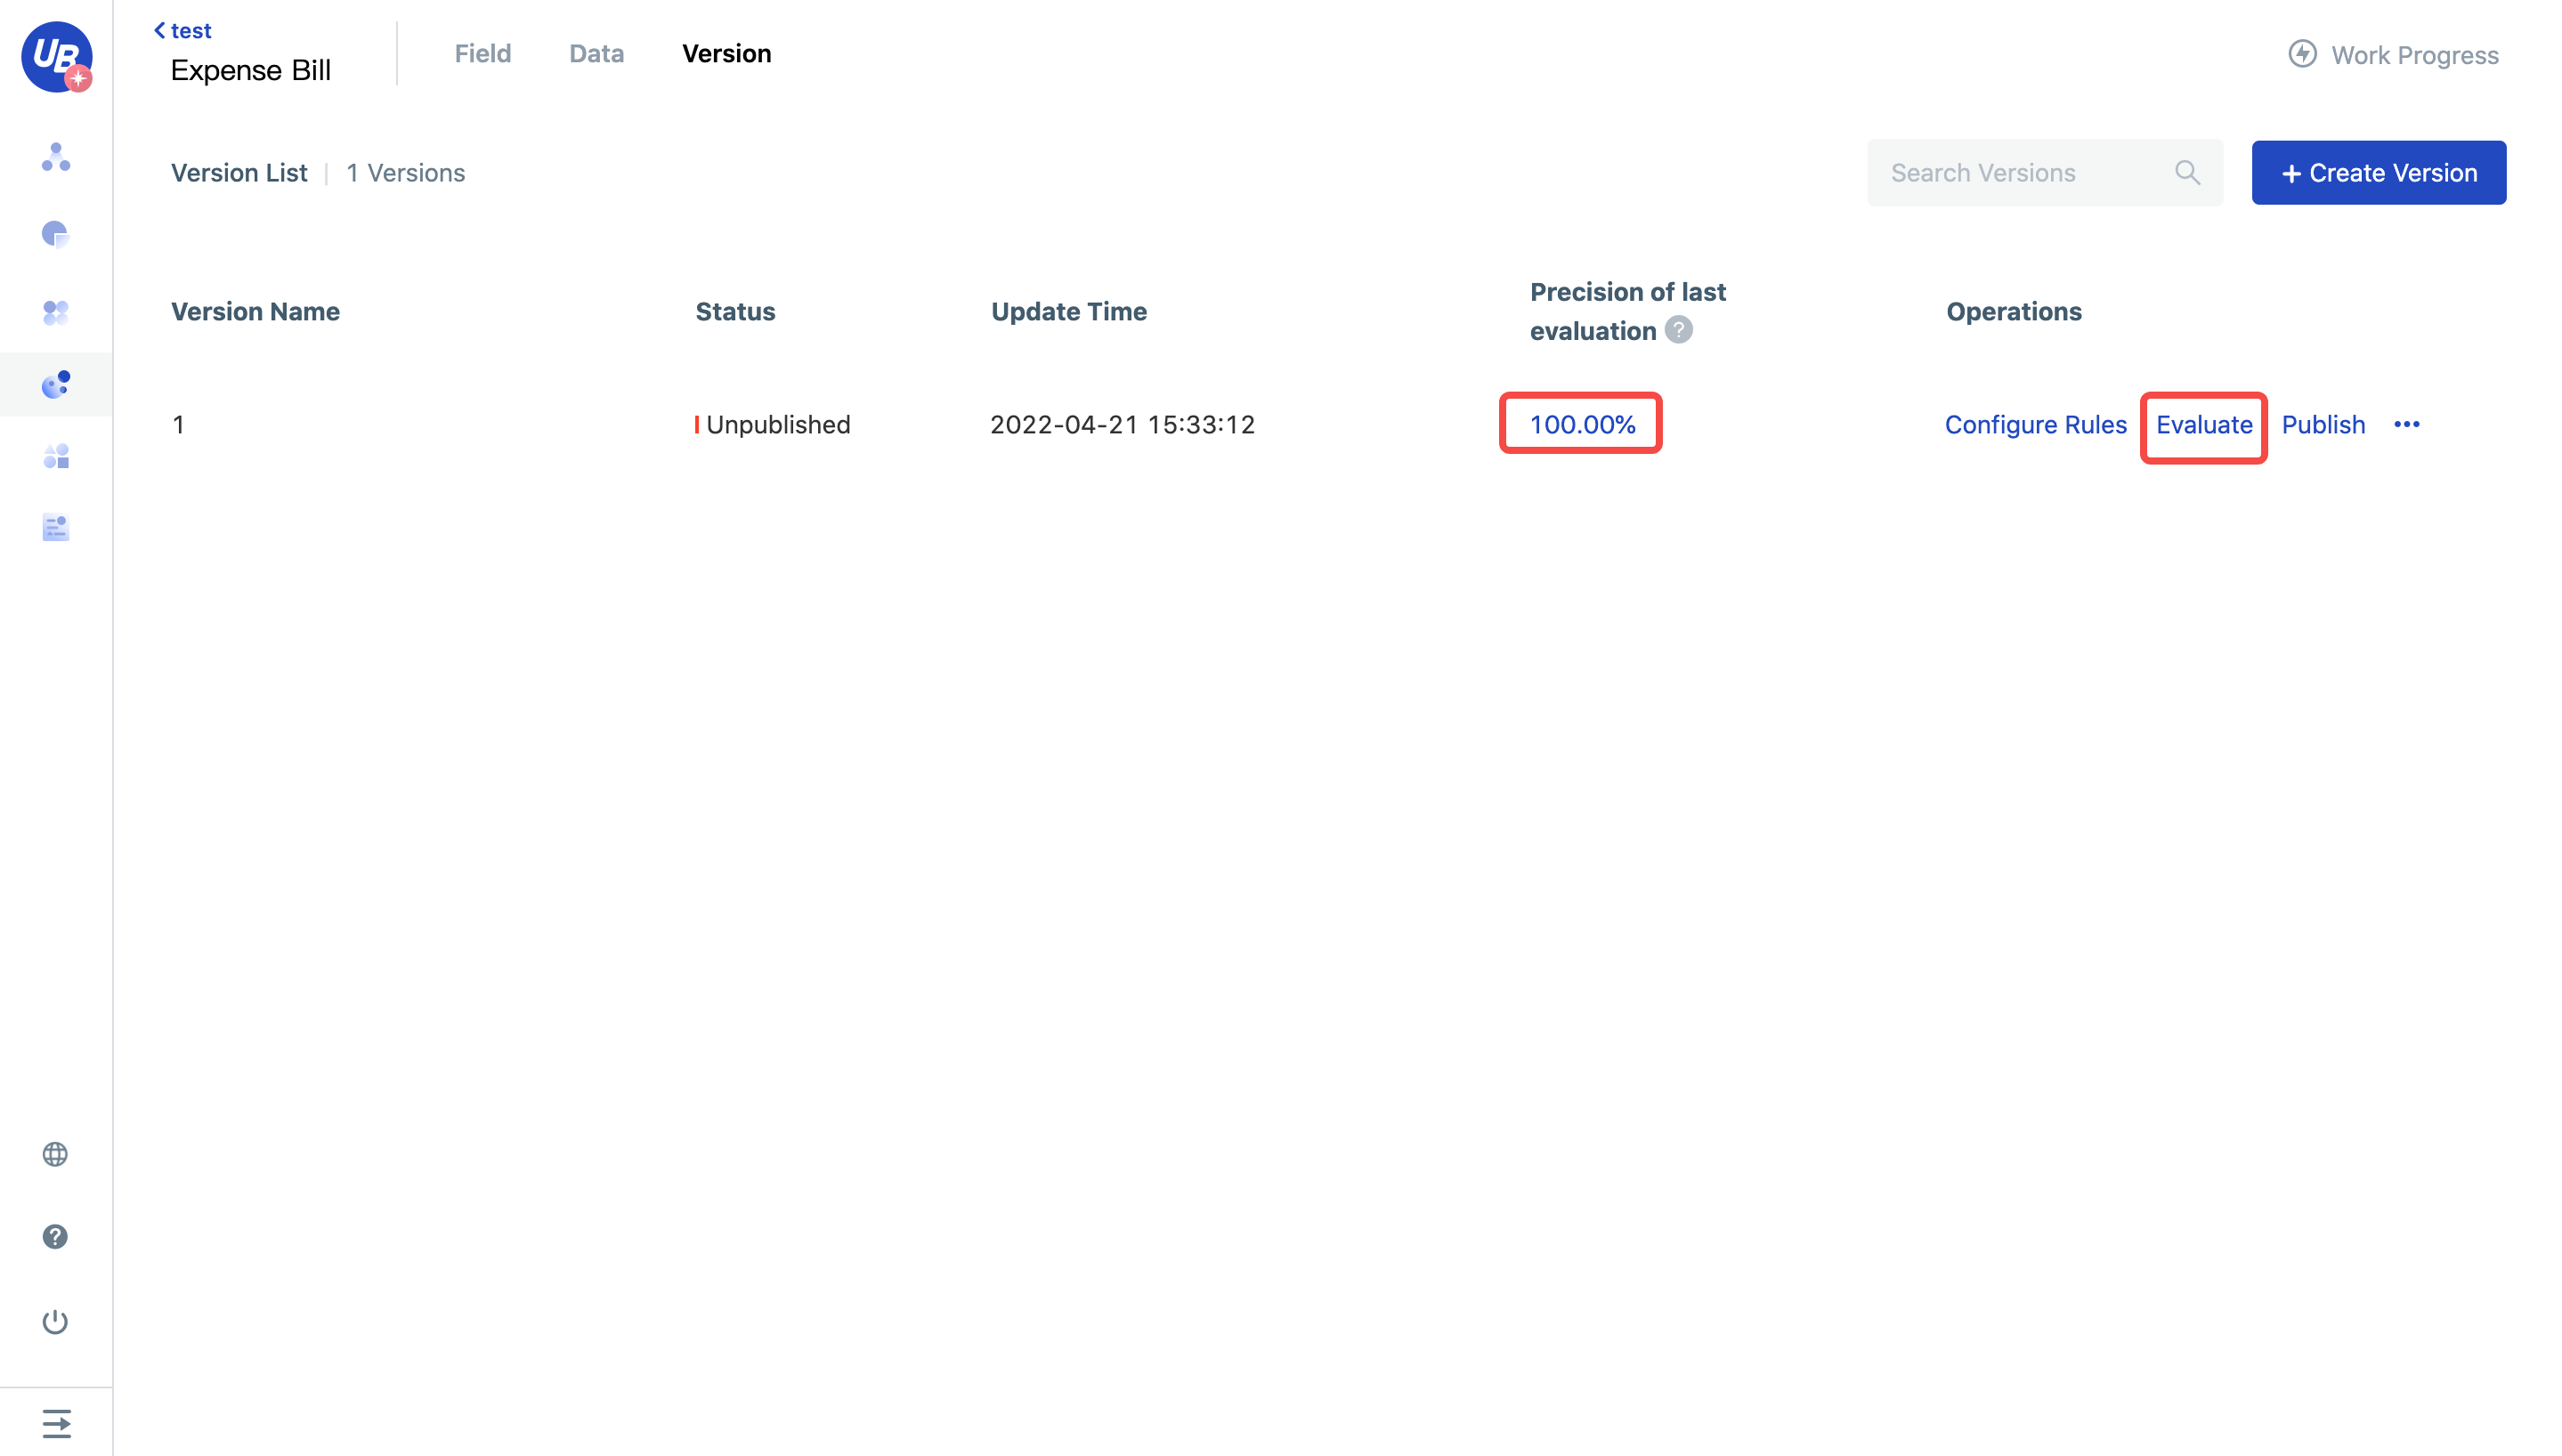
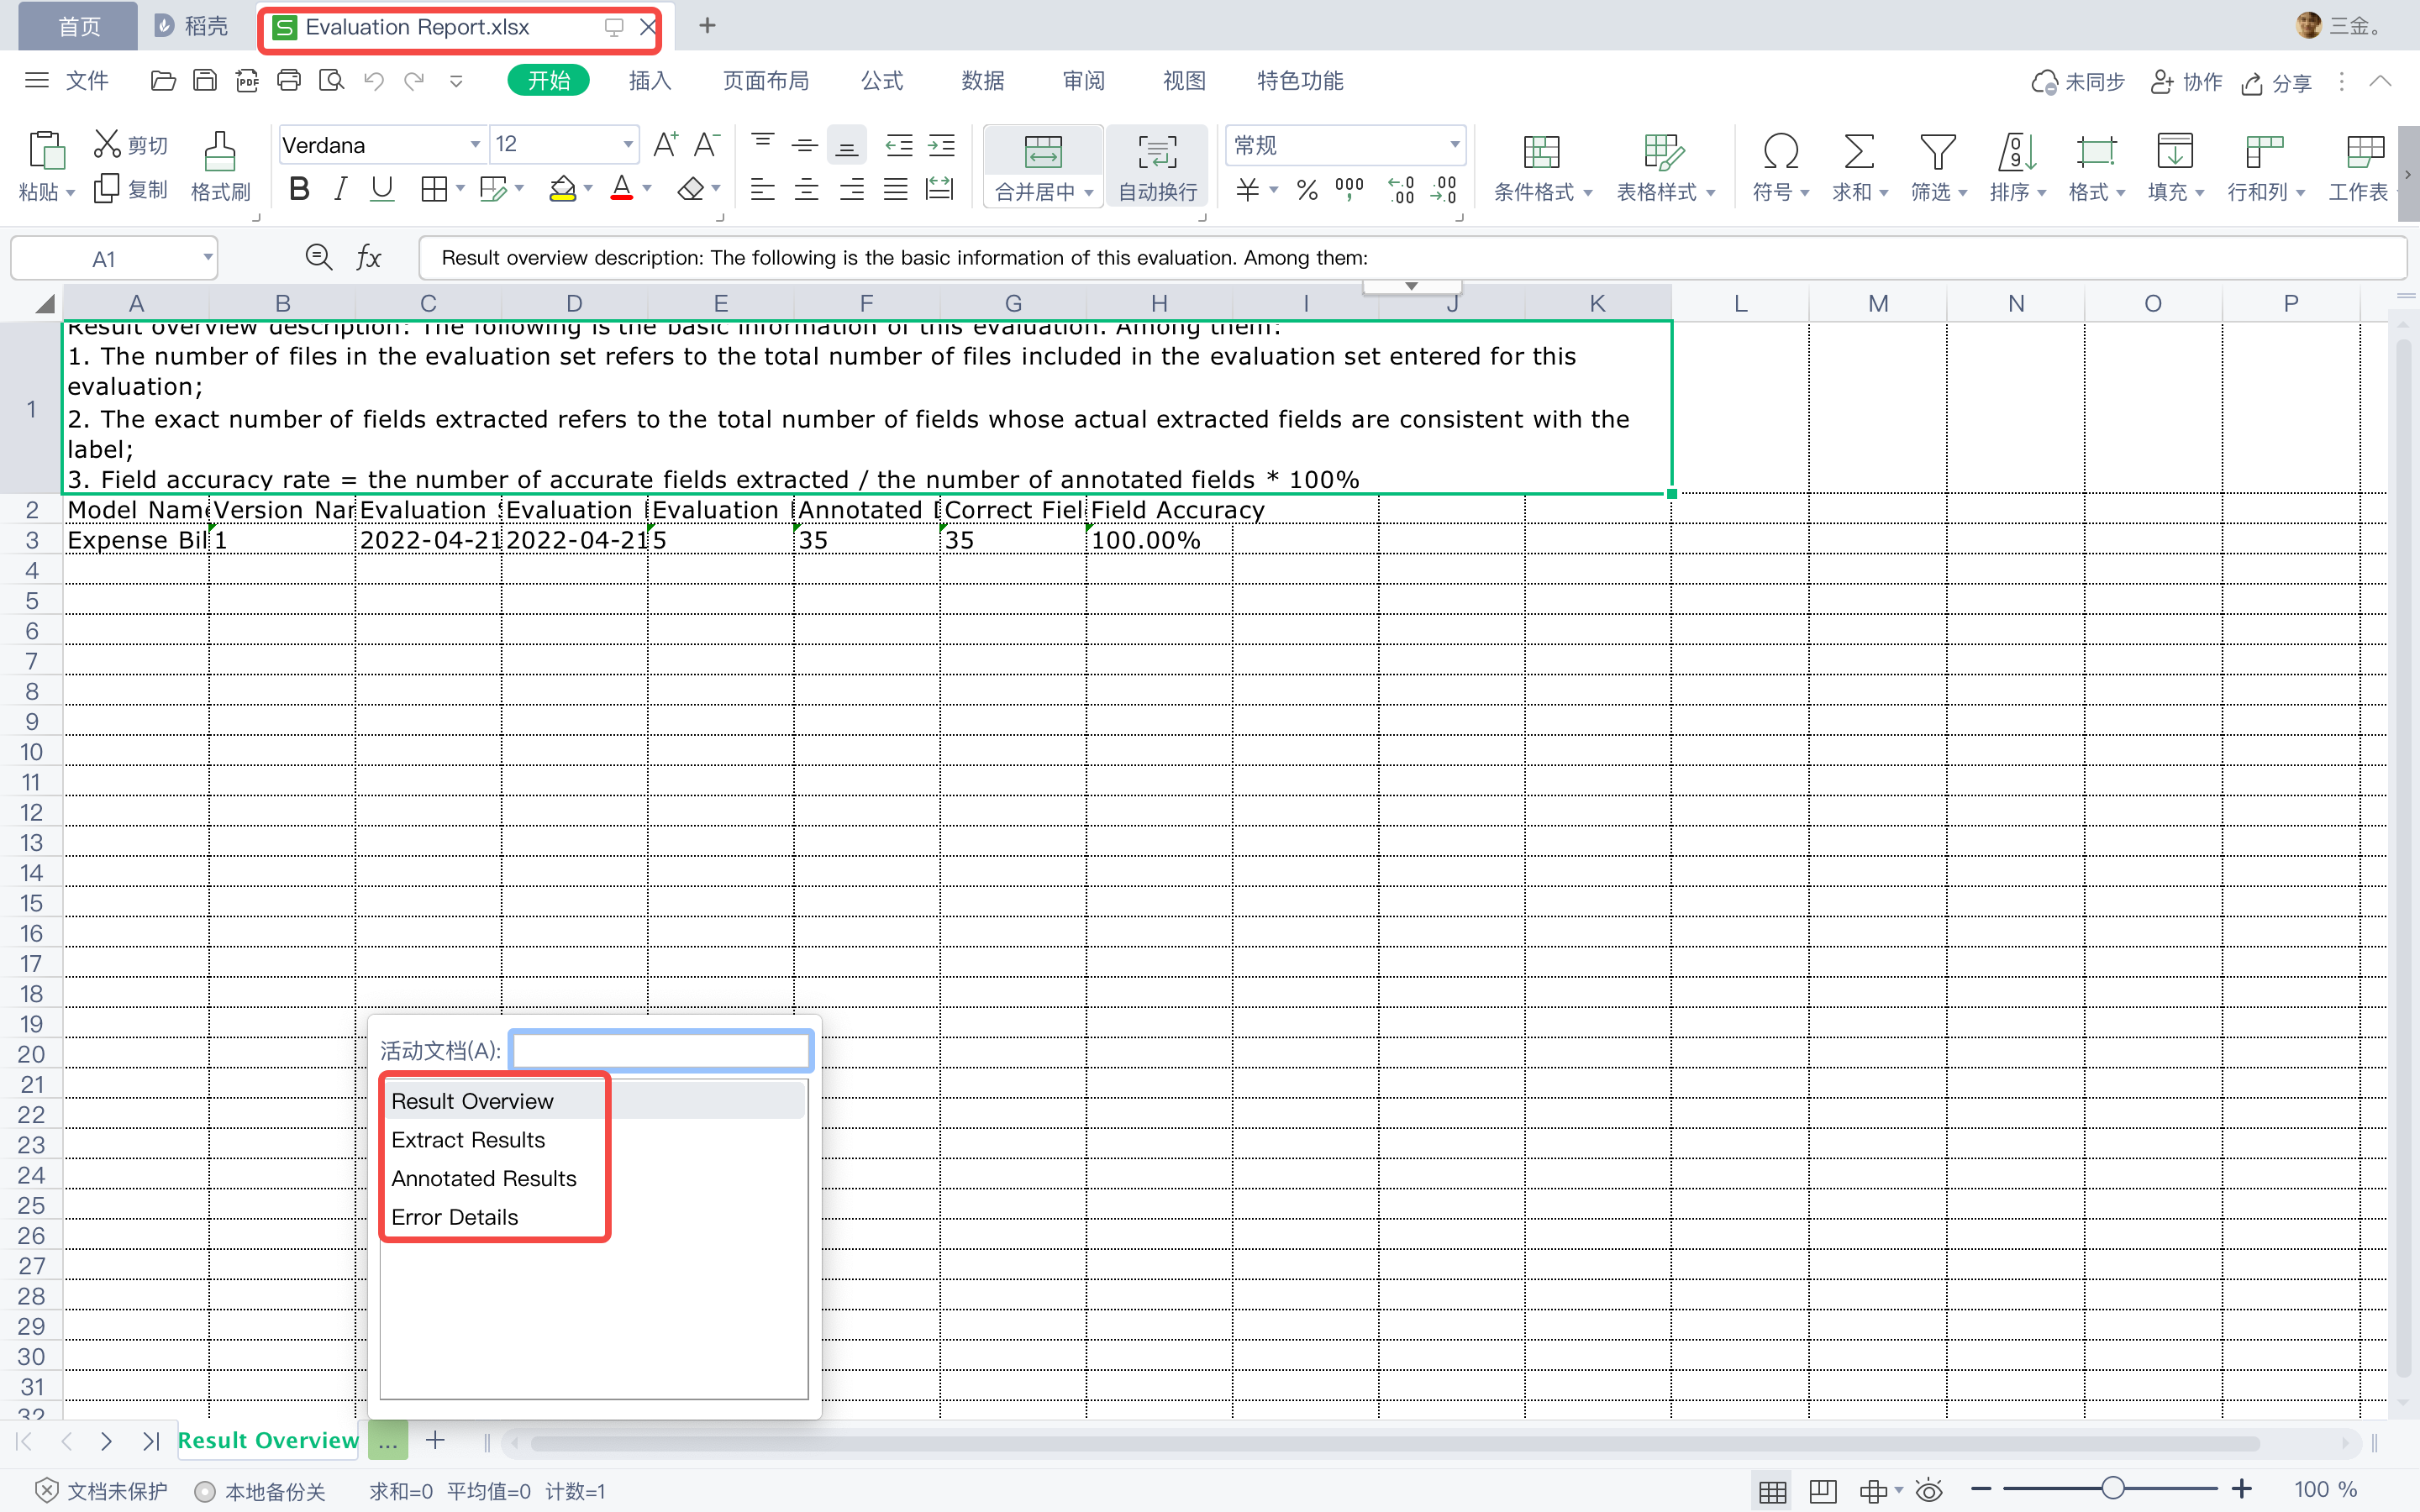
27)Click on the accuracy rate to download the evaluation report. There are 4 sheets in this report, you can view the effect of the model from different perspectives.
Release
28)After all the steps are completed, the version can be released
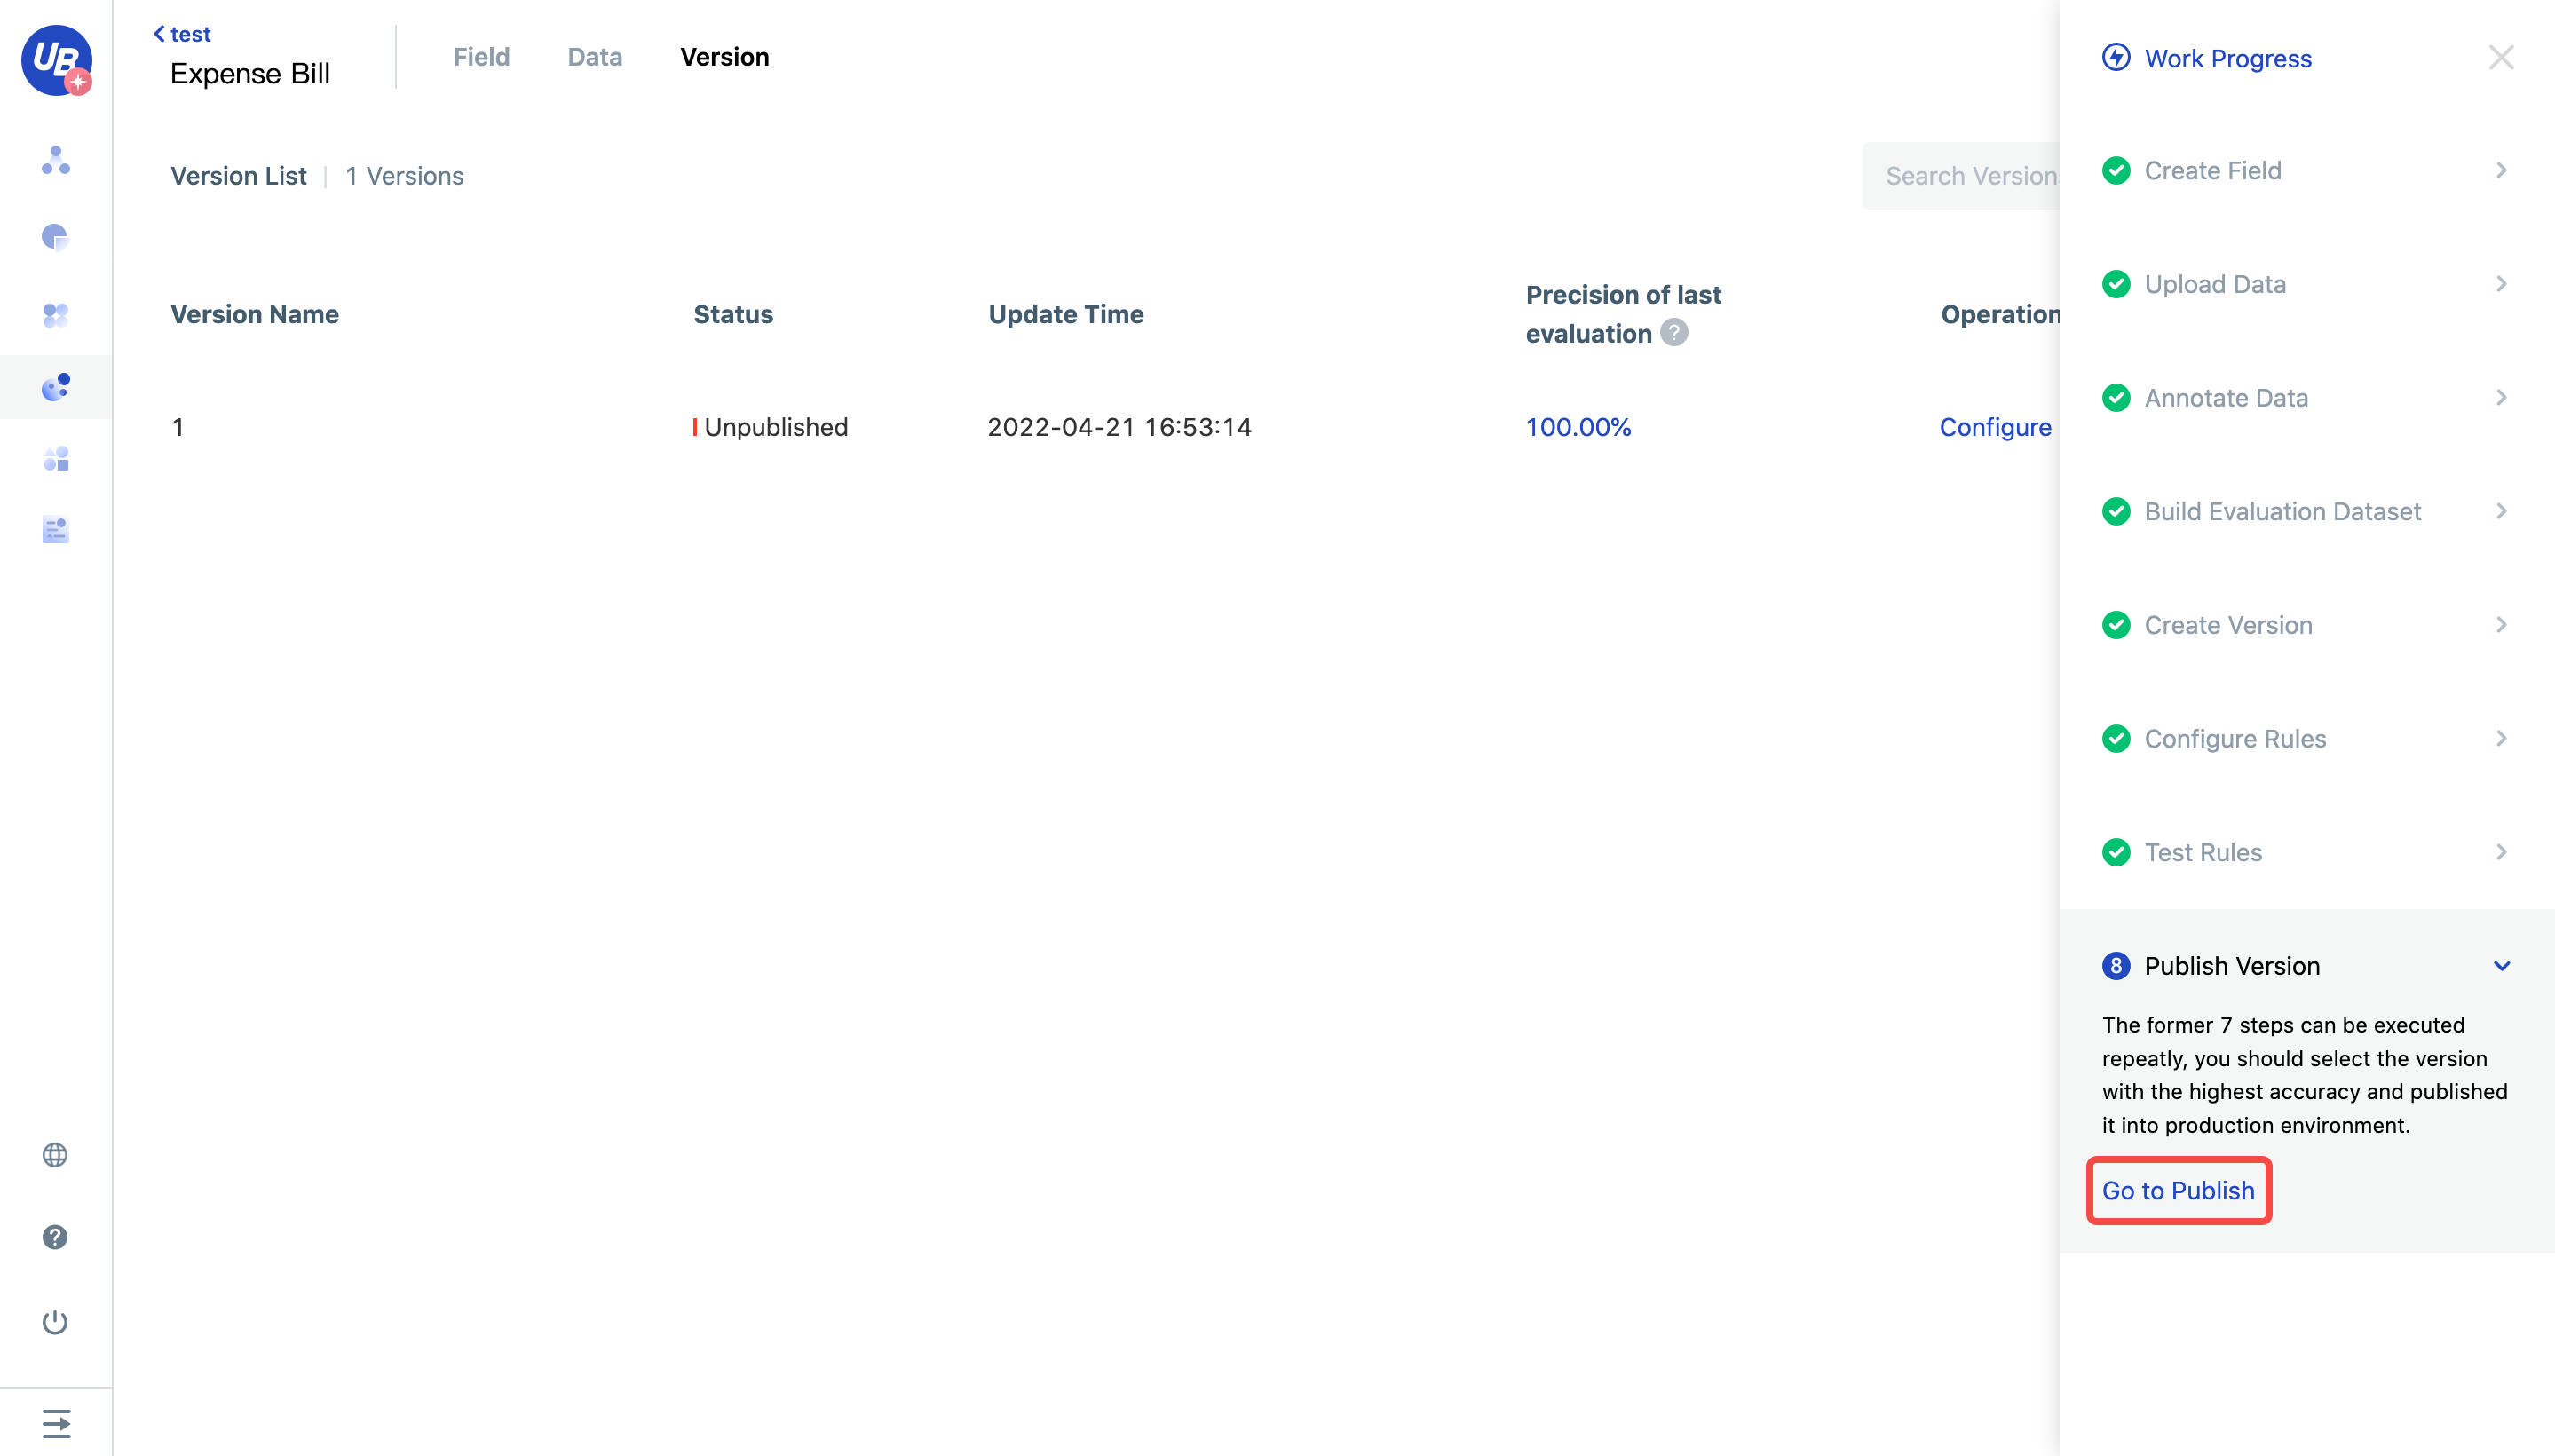
29)Click “publish” button

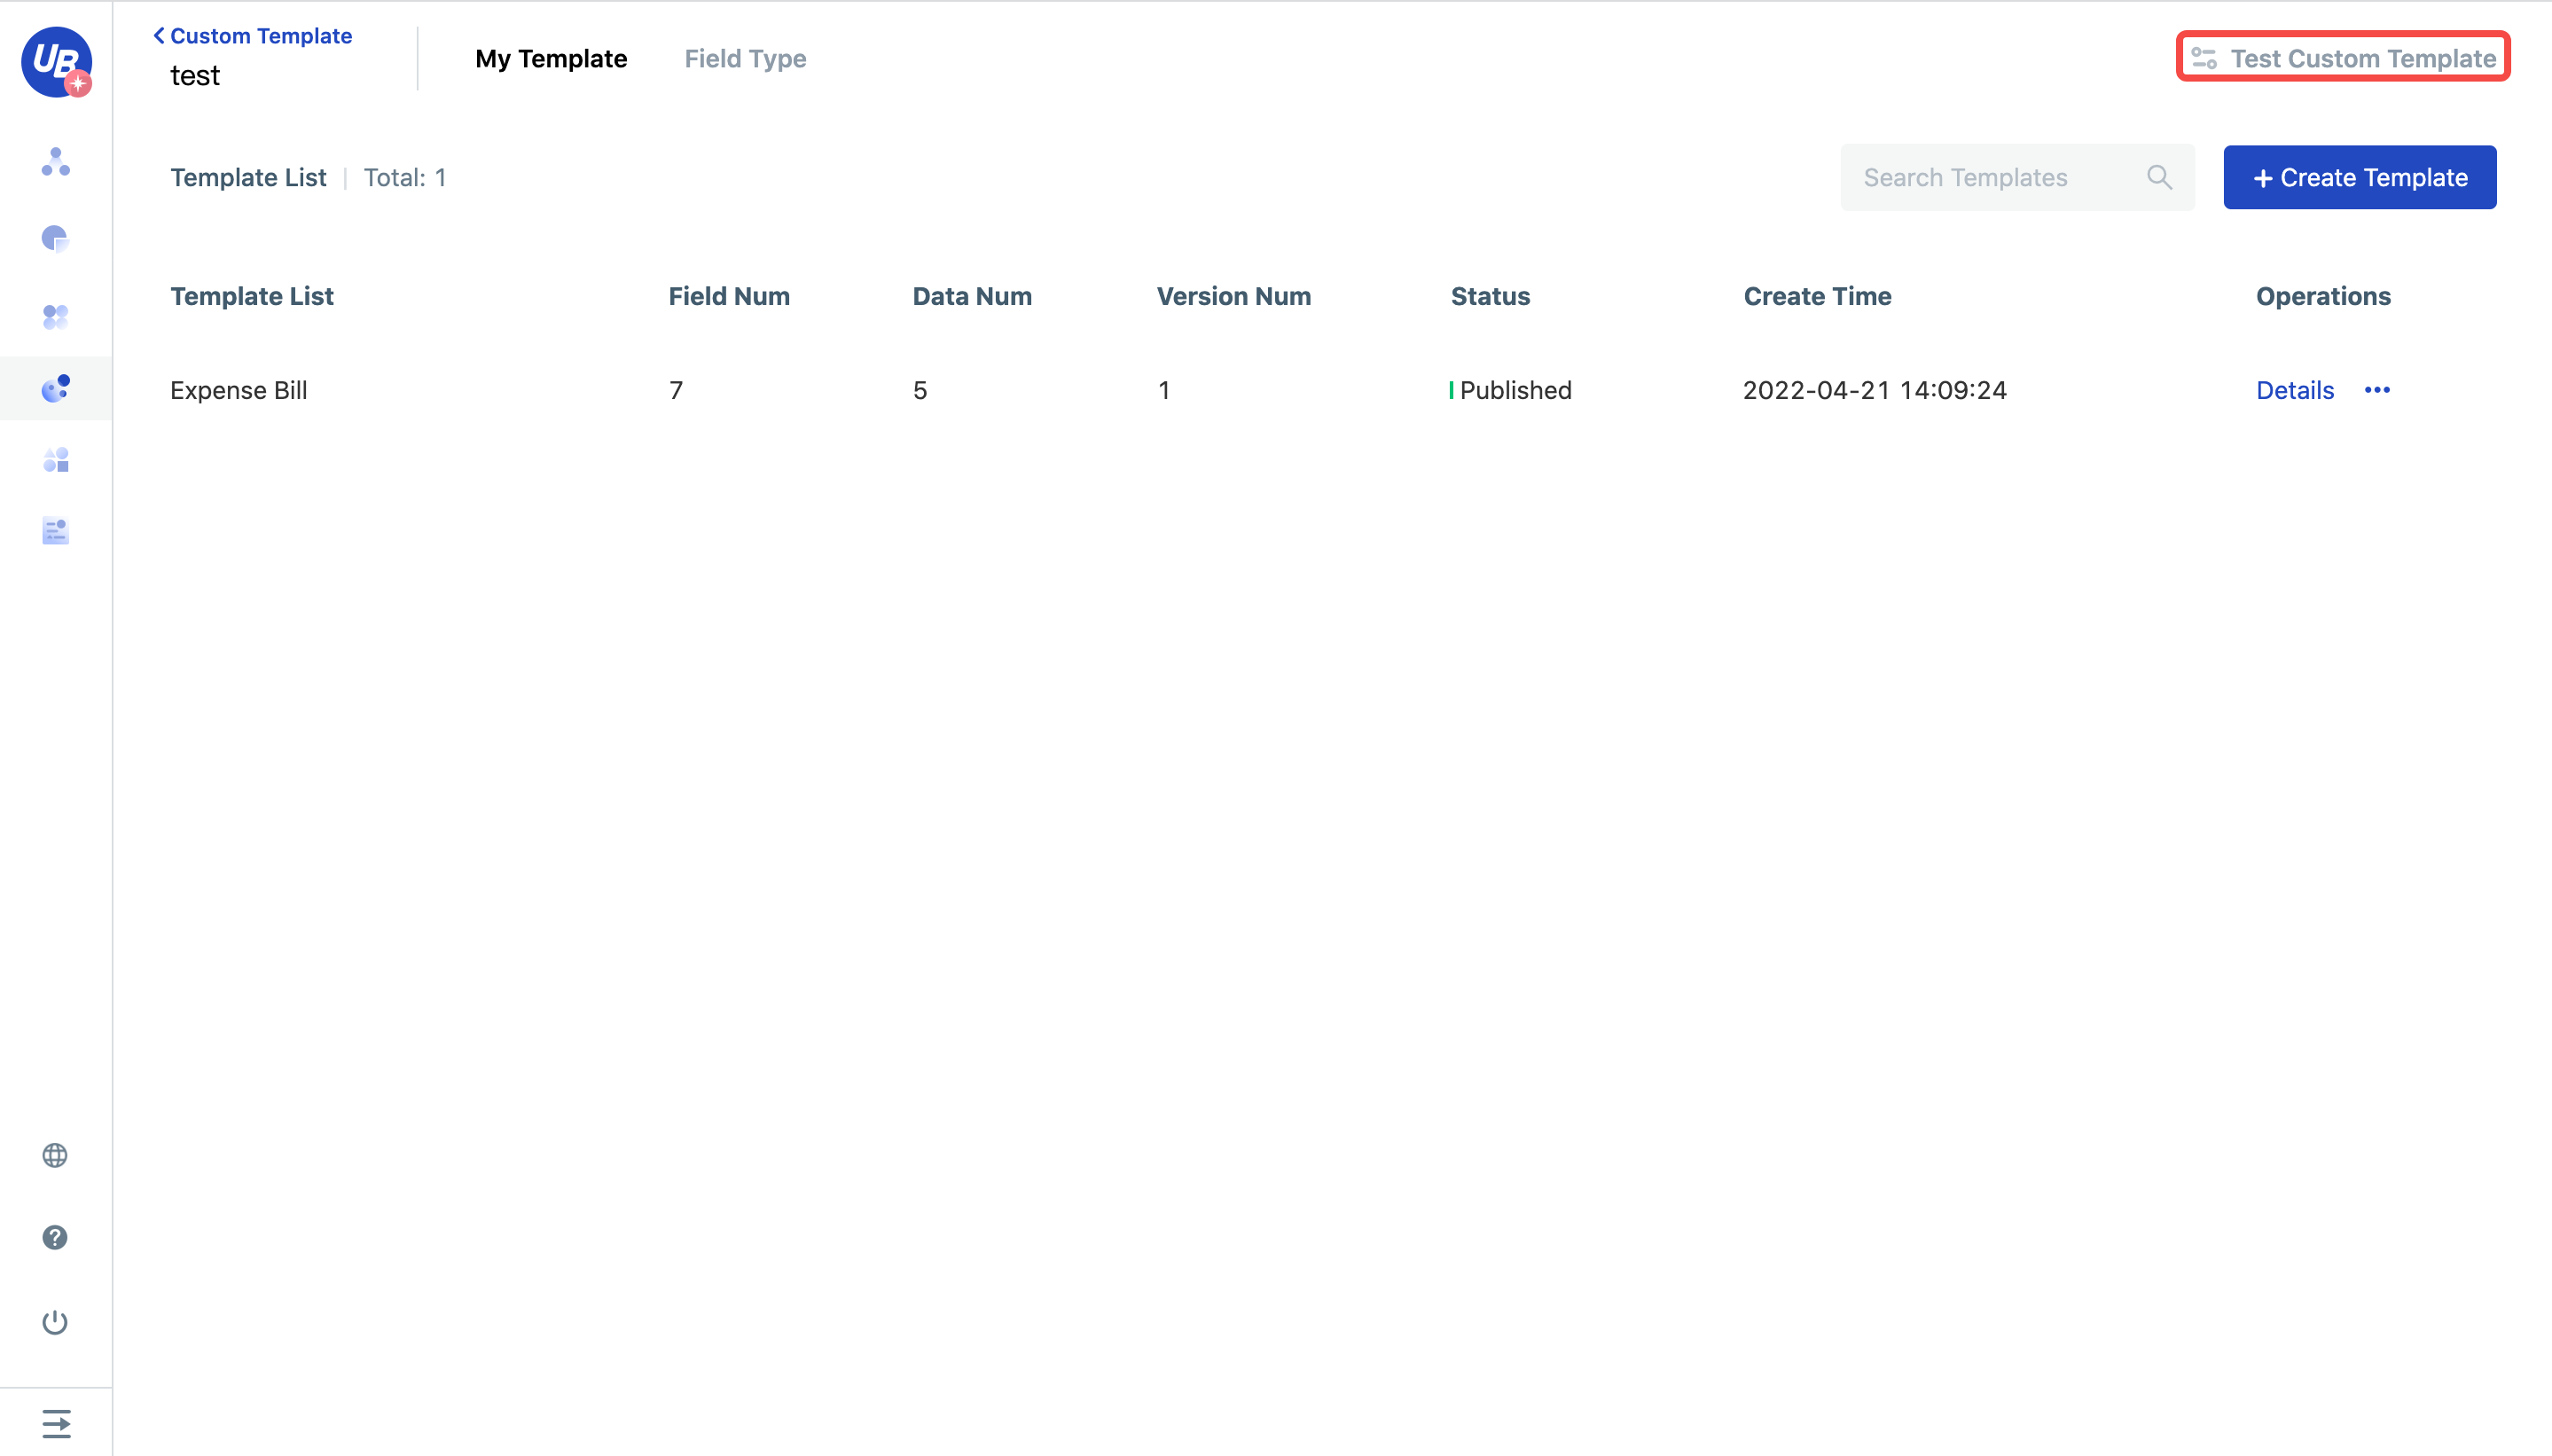
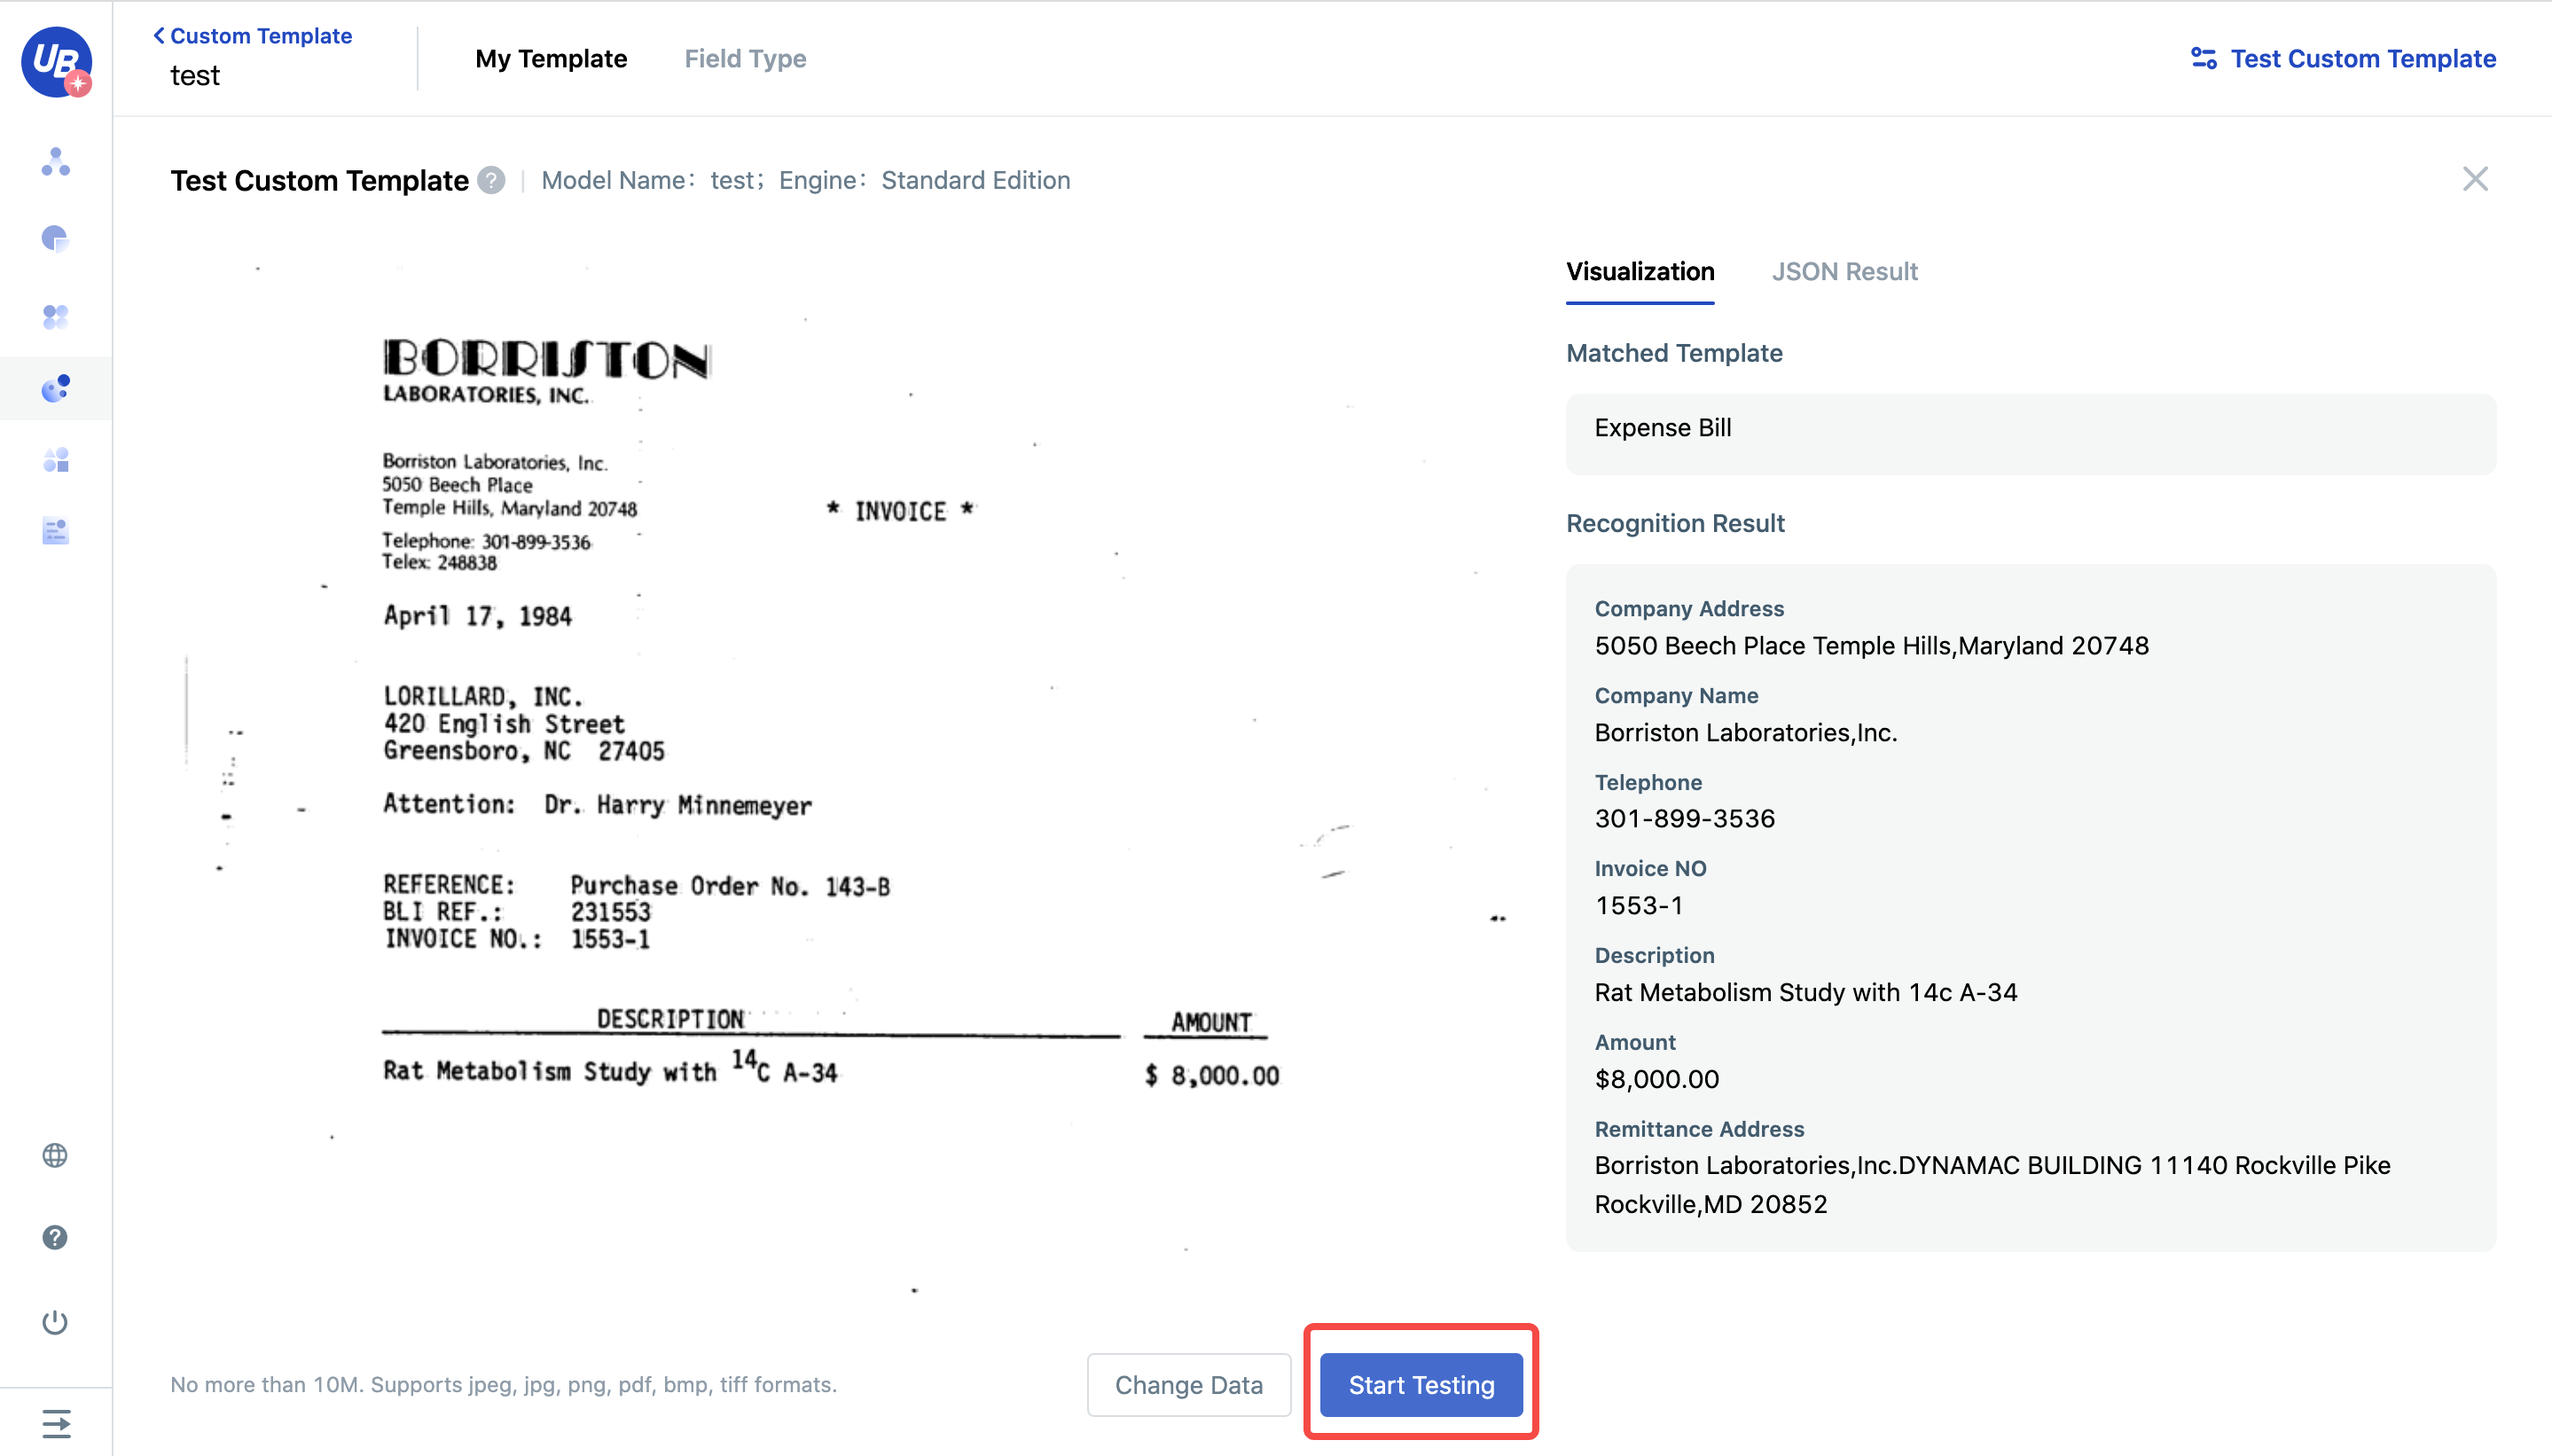
30)After the publishment, you can test the effect in the outer tester
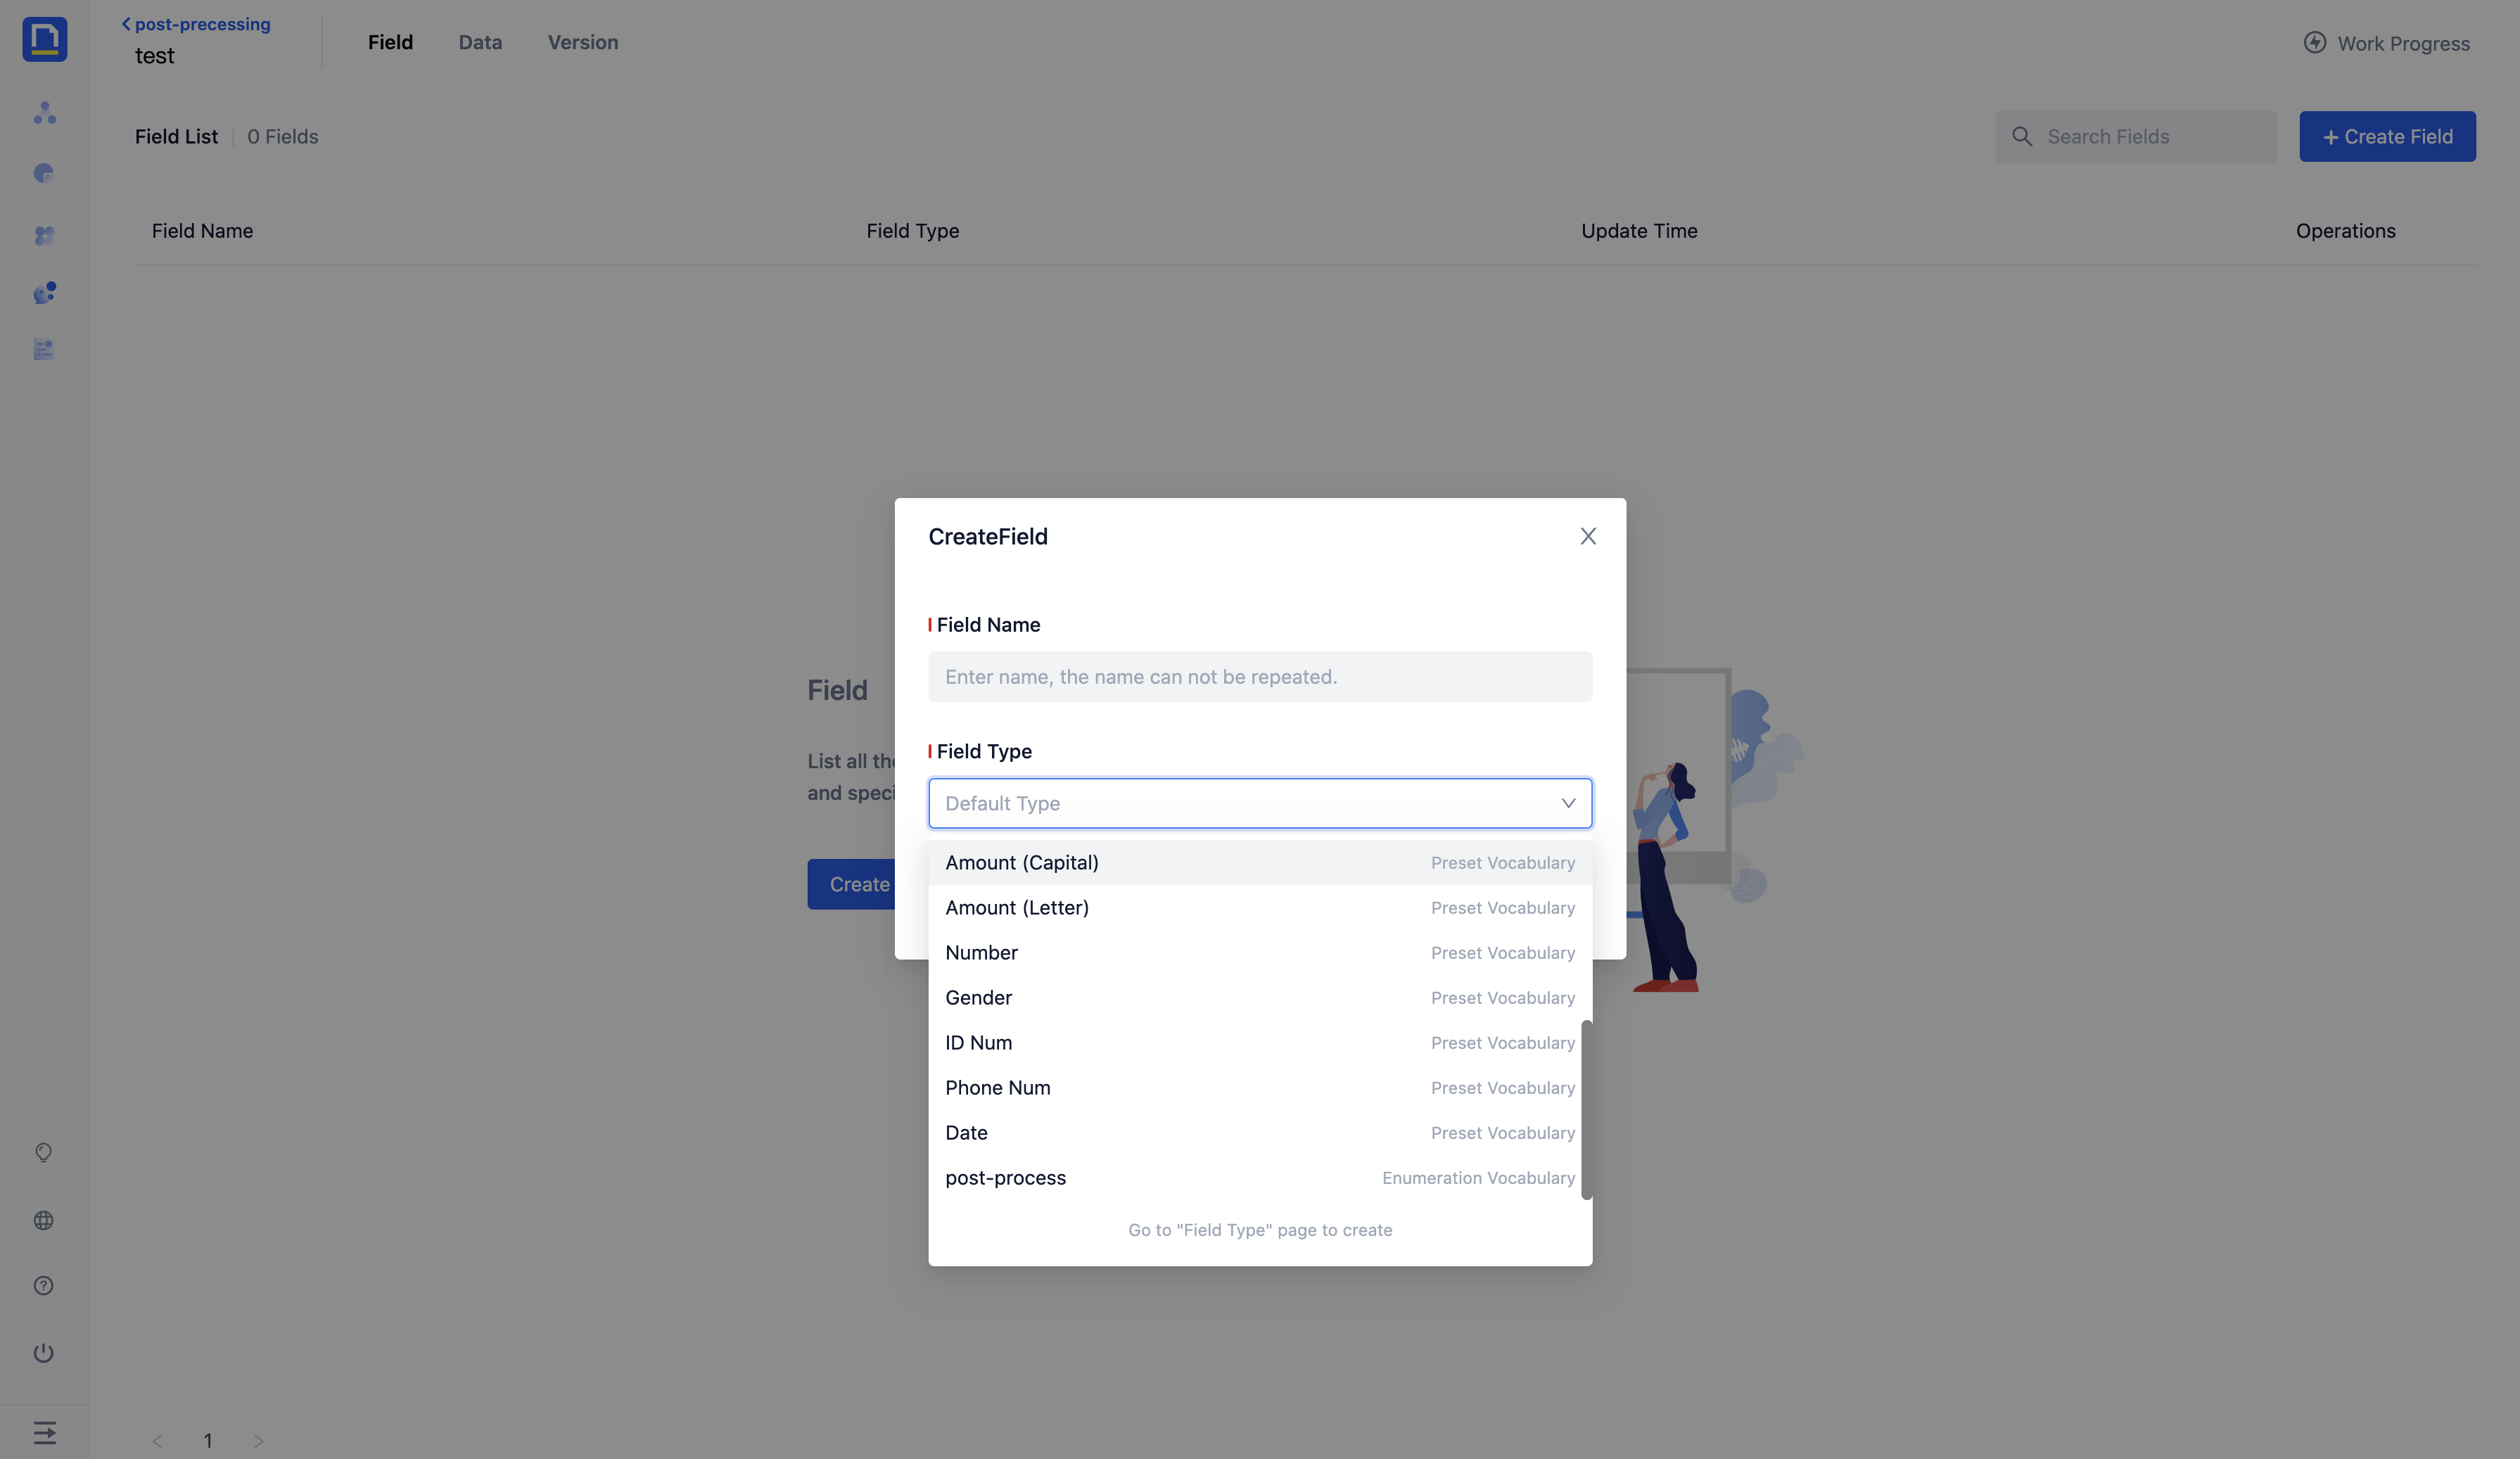
Post-Processing
Create a new word list in Fill in the field type, fill in the [Field Type Name], list all possible input results in the enumeration value, and click [OK] to complete the new creation.

Create a new field, select the field type to select the enumeration vocabulary you just created, and apply intelligent error correction to the extraction results.