New trigger
New
Similarly, due to the design of "Attended - Node-locked License" and "Attended - Floating License" authorization modes, when different authorization modes enter the "trigger" functional area, there are differences in layout and combination when creating new ones:
- "Attended - Node-locked License": only the orchestration and combination of Local Process are supported
- "Attended - Floating License": Commander process and Local Process can be combined
Time Trigger
Time Trigger refers to setting the time for process triggering, and running the specified process or Group at the specified time.
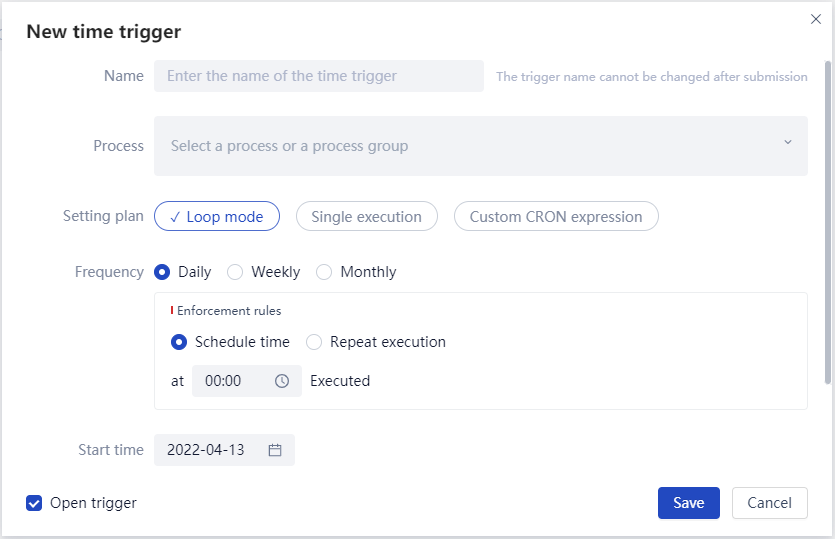
Basic steps for creating a new Time Trigger:
- Enter the name of the Time Trigger (after the first save, it cannot be changed when editing again).
- Select process.
- "Attended - Floating License" authorization mode: supports the selection of Local Process, Commander process or Group.
- "Attended - Floating License" authorization method: Local Process and Group can be selected.
- Set to run in a "daily, weekly, monthly" loop or a single run, or use a custom CRON expression.
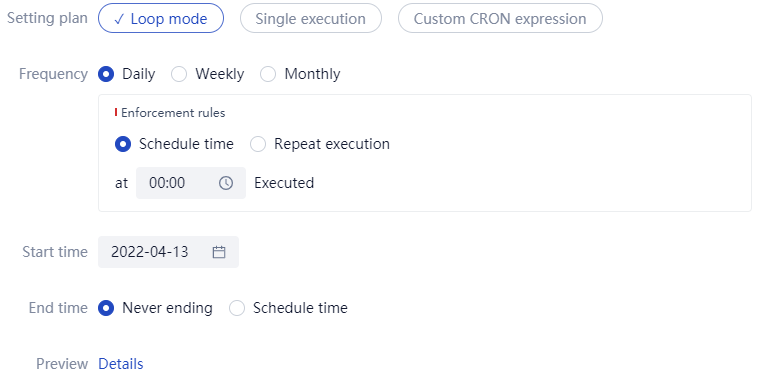
- Set the start time, which refers to the planned start date.
- Set end time, single choice:
- Never end;
- Specify a time, that is, select an end date.
The specific explanation is as follows.
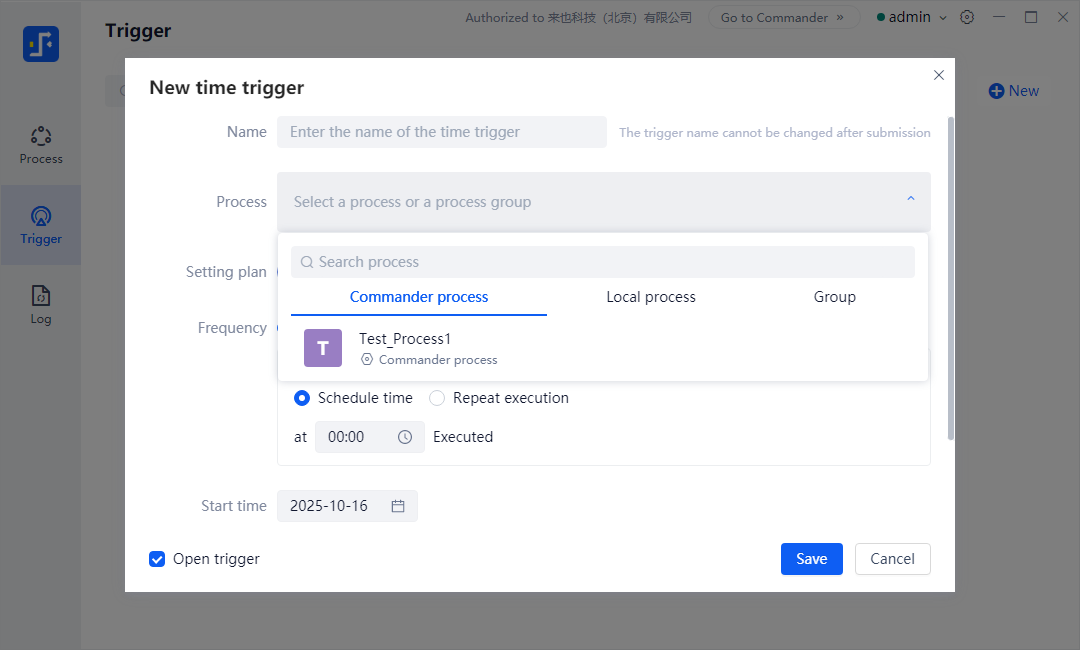
Process
- Under the authorization mode of "Attended - Floating License", Local Process, Commander process or Group can be selected, as shown below.
- Under the authorization mode "Attended - Node-locked License", Local Process and Group can be selected.
Setting plan
The Set Plan of Time Trigger supports three types: Loop mode, Single excution, and Custom CRON expression.
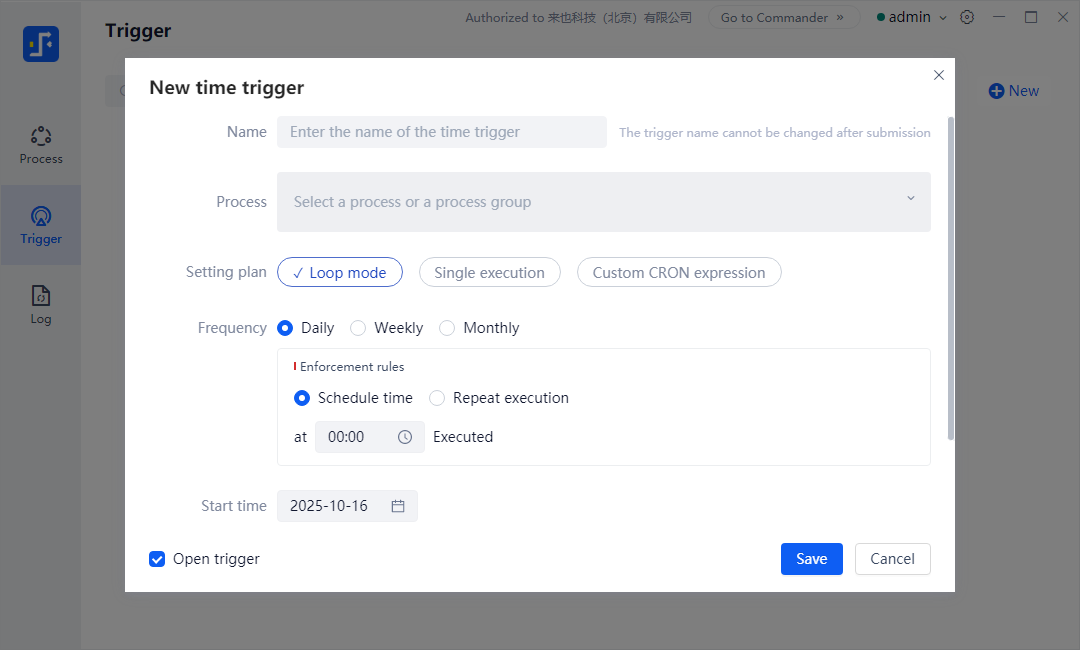
Loop mode
When selecting "Loop mode", it is also necessary to add the setting of "Frequency", which can be selected as daily, weekly, or monthly.
daily
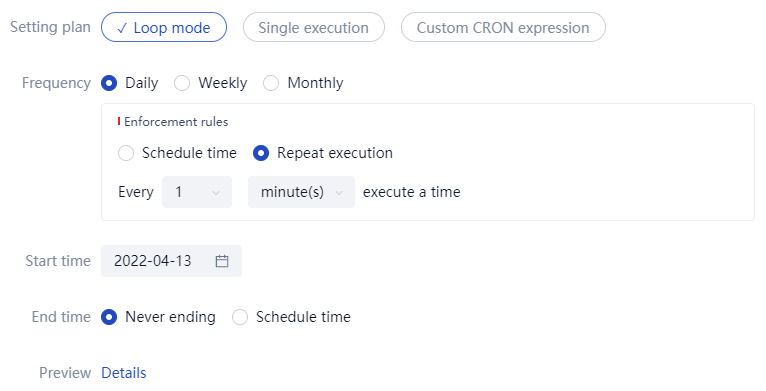
When the execution frequency is "daily", the execution rule is a single option: (1) specify the time; (2) Repeated execution requires setting rules for repeated execution.
- Specify the time, with a value range of any time from 00:00 to 23:59.
- Repeat execution, with a value range of every hour from minute 0 to minute 59 of hours 1, 2, 4, 6, 8, and 12; The value range by minute is executed once every "1, 5, 10, 15, 30" minutes.
When you select 'repeat execution', the example is as follows.
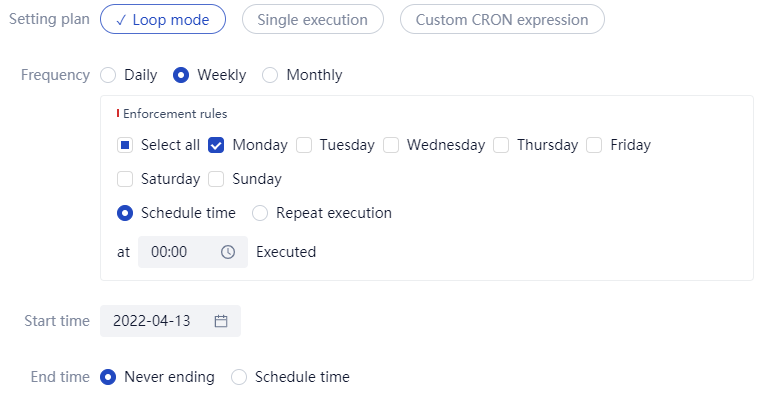
weekly
When the execution frequency is "weekly", the execution rule is to select any one or more days from "Monday" to "Sunday" and set a rule for specified time or repeated execution. The example is as follows.
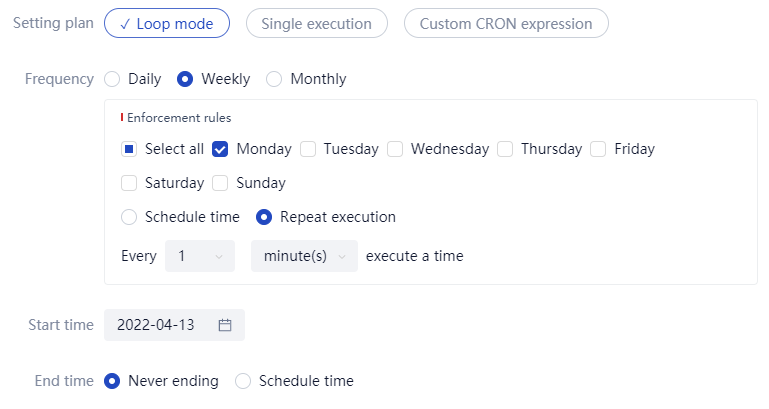
When you select 'repeat execution', the example is as follows.
monthly
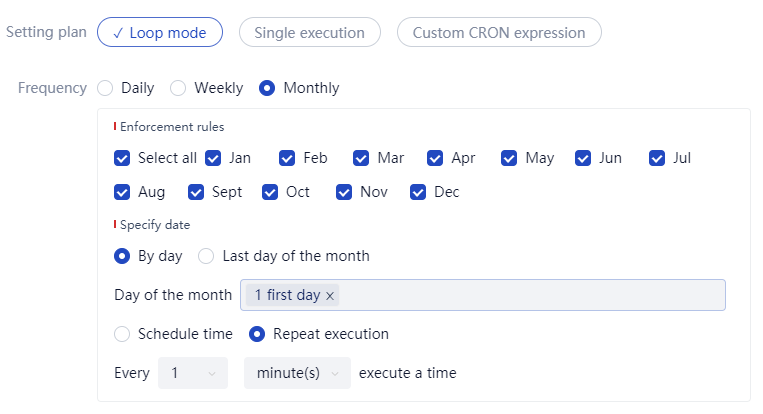
When the execution frequency is "monthly", you can choose any one or more months from "January" to "December", and then specify any one or more dates from "1st" to "31st" of each month. You can also specify the "last day of the month" for intelligent matching of dates, and finally choose a specified time or repeat the execution.
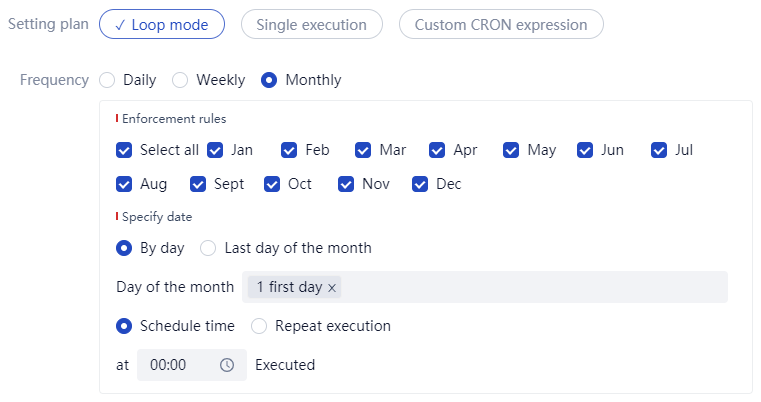
When you select 'repeat', the example is as follows.
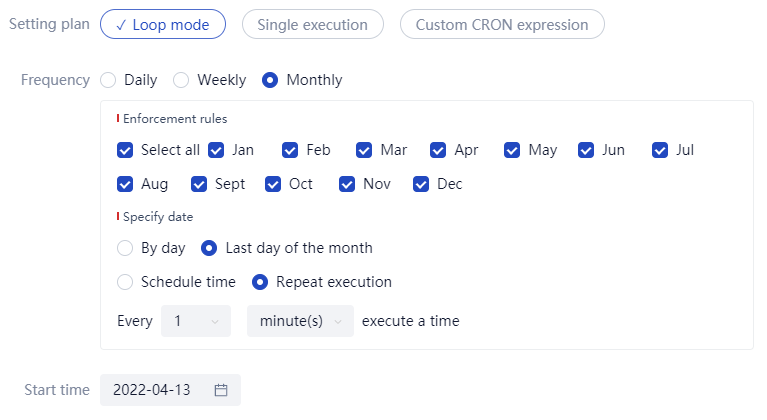
When you select 'last day of the month', the example is as follows.
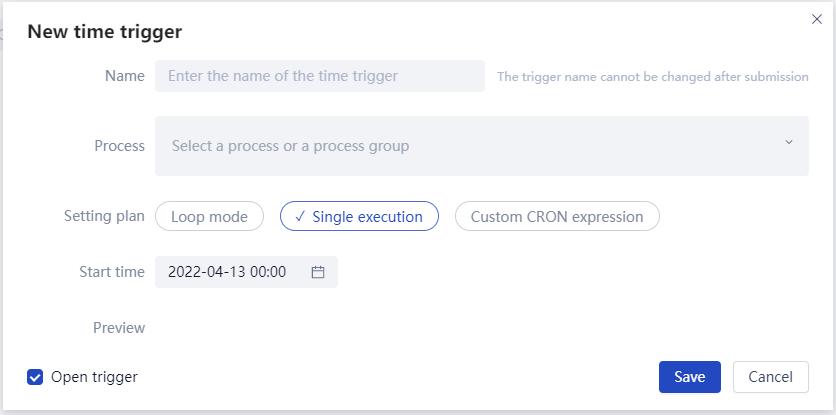
single execution
When you choose 'single execution', you only need to select a startup time (year month day hour minute), as shown in the following example.
Custom CRON expression
Custom CRON expression refers to a rule execution plan based on CRON expression representation.

Among them, CRON expressions can be explained by clicking on the "?" question mark icon on the page.
Regarding CRON expressions
The structure of CRON expression is "divided into time, day, month, and week", separated by spaces between different information fields. For example, "5 * 1 * *" represents "the 5th minute per hour, the 1st day, each month, and each week", which is "the 5th minute of the 1st day of each month and each week".
Note: Excluding "seconds" and "years".
The allowed values and special symbols for CRON expressions are as follows:
| field | allowed value | Permitted special characters |
|---|---|---|
| Minutes | Integer from 0 to 59 | * And/ |
| Hours | Integer from 0 to 23 | * And/ |
| Date (Day of Month) | Integer from 1 to 31 (taking into account the number of days corresponding to the month) | * And/ |
| Month (Month) | Integer from 1 to 12 | * And/ |
| Day of Week | Integer from 0 to 6 | * And/ |
The special symbols allowed for use are as follows:
| symbol | Instructions |
|---|---|
| / | Triggered from the starting time and then every fixed time. For example, using 5/20 in the Minutes domain means triggering from the 5th minute onwards and triggering every 20 minutes at time points such as 5, 25, and 45. |
| | | Indicate any value that matches the field. If * is used in the Minutes field, it means that an event will be triggered every minute. |
Note: Special symbols such as "L, W" and "?, #" are not supported.
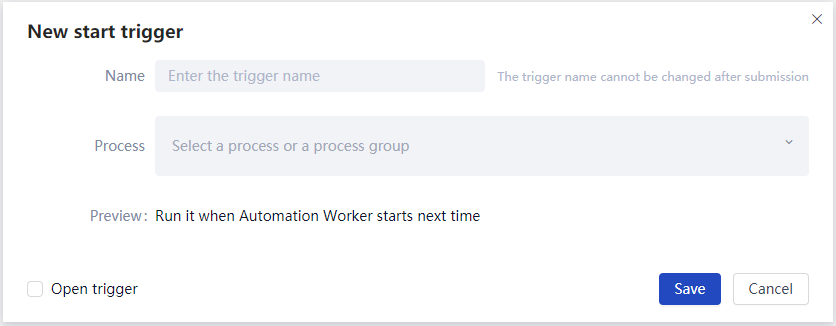
Start Trigger
Start Trigger refers to the next time Worker When the program starts, the designated process or Group will be triggered to run.
When creating a new one, select "Start Trigger", and the page is shown in the following figure.
Notes:
When there are multiple Start Trigger, only one can be enabled. If necessary, the Start Trigger can select a Group, which contains multiple process.
Mail Trigger
The Mail Trigger refers to the monitoring of the mail recipient server. When the newly received mail meets the mail matching rules, it automatically triggers the running of the specified process or Group.
When creating a new one, select "Mail Trigger", and the page is shown in the following figure.
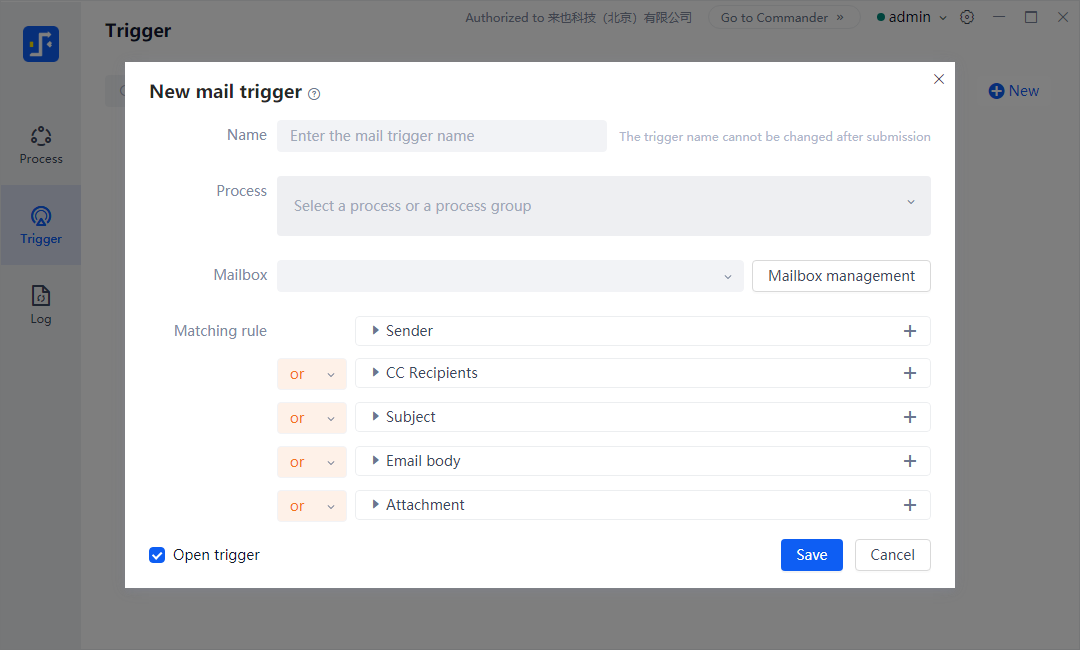
Basic steps for creating a new Mail Trigger:
- Enter the name of the Mail Trigger (it cannot be changed after the first save).
- Select process. Support the selection of Local Process, Commander process or Group.
- Select the recipient email to be monitored. If there is no recipient email available in the drop-down list, you can click the "Email Management" button on the right to add it.
- Set email matching rules.
The specific explanation is as follows.
Mailbox Management
When adding an email, you need to select the email server receiving protocol type and encryption type, enter the receiving server address, port, email account, password (authorization code), and set the email detection interval time (1~9999 minutes).
Before saving email information, you can click on "Test Recipient Server Connection" to verify if it can connect properly.

Support adding enterprise email addresses, such as Feishu email, enterprise WeChat email, DingTalk email, etc.
matching rules
The matching rules of Mail Trigger include five sub matching rules: sender address, cc address, mail subject, mail body, and attachment. Each sub matching rule can be selected or (representing satisfaction of any one of the matching conditions) and combined for matching.
Sub matching rules can create multiple new rules, which can be combined by selecting or combining (representing multiple conditions that need to be met simultaneously).
Matching criteria include: include, exclude, equal to, not equal to, equal to the beginning, not equal to the beginning, not equal to the end, not equal to the end, Regular Expression, empty, not empty.

API Interface trigger
API interface trigger refers to the operation of the designated process or Group automatically triggered when a third-party Applications on the local device where the Worker is installed calls the API interface.
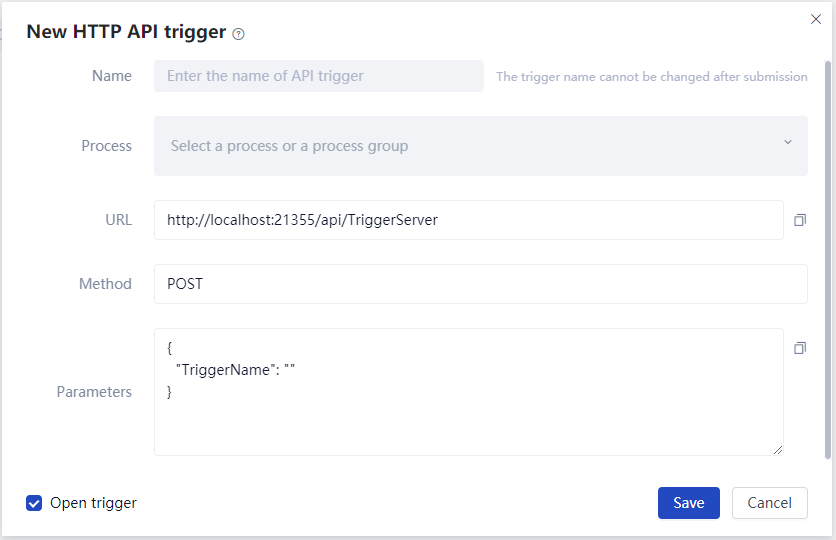
Create a new API interface trigger, enter a name, and select a process. The following URL address, HTTP request method, and HTTP request parameter are all automatically generated and cannot be edited manually. When the third-party program of the local device calls, the URL address and HTTP request parameter can be directly copied.
When creating a new one, select API Interface trigger, and the page is shown below.
File Trigger
File Trigger, which means that when installing Worker On the local device of, listen to the actions of creating and deleting files matching rules in the specified folder, and automatically trigger the operation of the specified process or Group.
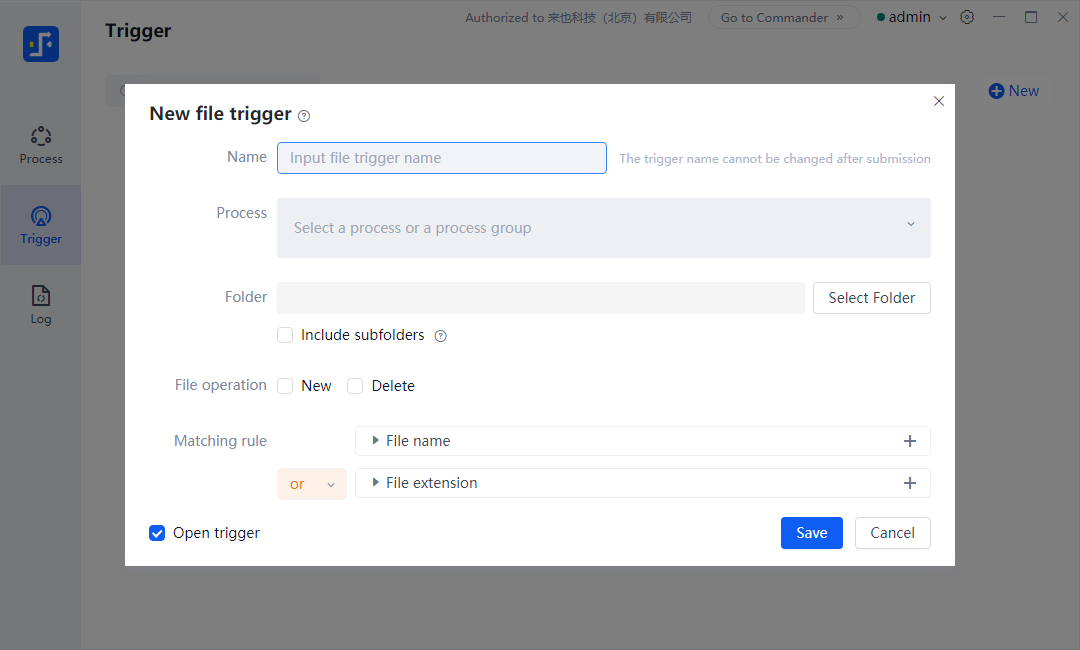
- File Trigger supports setting matching rules for the two dimensions of file name and file Extension. Each matching rule supports or, and performs combined matching
- Matching criteria include: include, exclude, equal to, not equal to, equal to the beginning, not equal to the beginning, not equal to the end, not equal to the end, Regular Expression, empty, not empty
- It is recommended to listen to the File Trigger internally No more than 1000 The folder containing the files, otherwise there may be some performance response issues
Apply trigger
Application trigger means that when a user uses a Worker in the "Node-locked License" or "Floating License" mode, he can create an "application trigger", which allows third-party applications that are not native to the machine to trigger the designated process running through the http. Post request. After the task is completed, the notification is returned through the callback URL; At the same time, it supports querying the current status of the Worker, and canceling the running task after triggering.
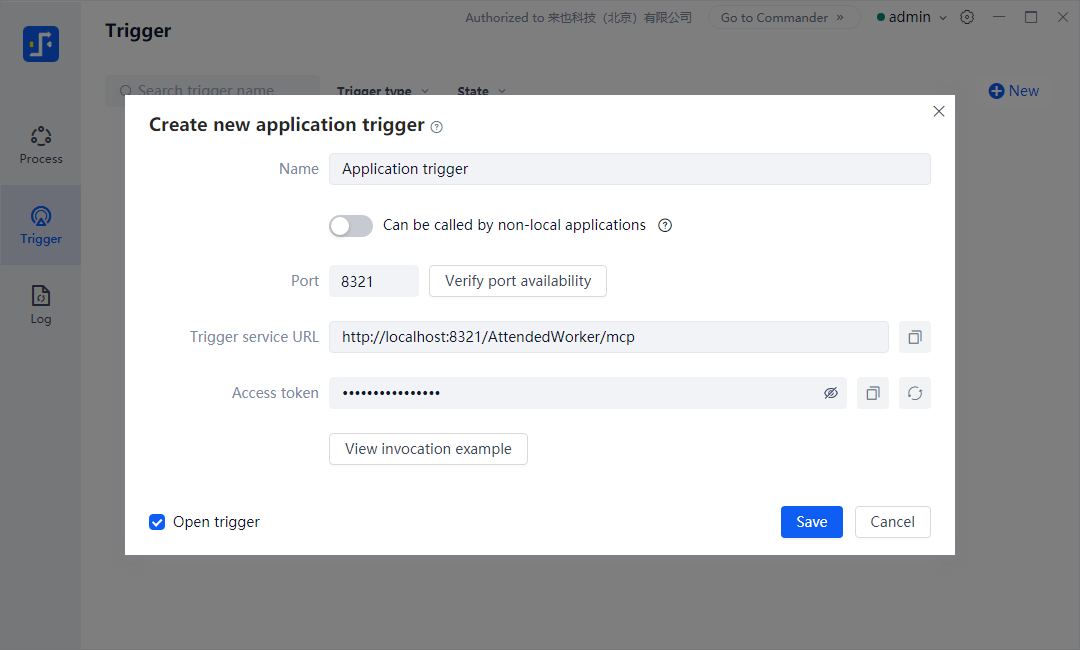
Three types of process operations can be triggered:
- Commander: Attended - Worker, process in the "Commander process" list under the "Floating License" mode
- Local: Attended - Worker, process in "Local Process" list in "Node-locked License" mode
- Unattended Bot: indicates unattended - process Worker, process that has been run locally
For specific usage, please refer to the attached Python example code
import requests
import json

# ------------------------------------------------------------
# MCP HTTP Client Example
# This script demonstrates how to interact with an MCP server
# using various call types: UnattendedBot, Commander, Local.
# ------------------------------------------------------------

# MCP HTTP endpoint (replace with actual server address)
url = "http://127.0.0.1:8321/AttendedWorker/mcp"

# HTTP headers with bearer token authorization
headers = {
    "Authorization": "Bearer YOUR_BEARER_TOKEN",  # Replace with actual token
    "Content-Type": "application/json"
}

# ------------------------------------------------------------
# 1. Unattended Bot Call (robot runs automatically on server)
# ------------------------------------------------------------
unattended_data = {
    "method": "tools/call",
    "params": {
        "id": "task-001",  # Unique task ID for tracking
        "name": "UnattendedBot",  # Tool or flow name
        "arguments": {
            "flowType": "UnattendedBot",
            "flowId": 123,
            "flowVersionId": 456,
            "parameters": [
                {
                    "parameterName": "strName",
                    "parameterType": 1,
                    "parameterValue": "strValue"
                },
                {
                    "parameterName": "numName",
                    "parameterType": 3,
                    "parameterValue": 100
                },
                {
                    "parameterName": "boolName",
                    "parameterType": 2,
                    "parameterValue": True
                },
                {
                    "parameterName": "credName",
                    "parameterType": 4,
                    "userName": "credUser",
                    "userPassword": "credPwd"
                }
            ],
            # Optional: return result to this URL via HTTP POST
            "returnUrl": "http://your-callback-server/return"
        }
    }
}

# ------------------------------------------------------------
# 2. Commander Flow Call (executed by AttendedWorker remotely)
# ------------------------------------------------------------
commander_data = {
    "method": "tools/call",
    "params": {
        "id": "task-002",
        "name": "commander flow1",
        "arguments": {
            "flowType": "Commander",
            "parameters": [
                {
                    "parameterName": "strName",
                    "parameterType": 1,
                    "parameterValue": "strValue"
                },
                {
                    "parameterName": "numName",
                    "parameterType": 3,
                    "parameterValue": 100
                },
                {
                    "parameterName": "boolName",
                    "parameterType": 2,
                    "parameterValue": True
                },
                {
                    "parameterName": "credName",
                    "parameterType": 4,
                    "userName": "credUser",
                    "userPassword": "credPwd"
                }
            ],
            "returnUrl": "http://your-callback-server/return"
        }
    }
}

# ------------------------------------------------------------
# 3. Local Flow Call (executed by local AttendedWorker)
# ------------------------------------------------------------
local_flow_data = {
    "method": "tools/call",
    "params": {
        "id": "task-003",
        "name": "local flow1",
        "arguments": {
            "flowType": "Local",
            "parameters": [
                {
                    "parameterName": "strName",
                    "parameterType": 1,
                    "parameterValue": "strValue"
                },
                {
                    "parameterName": "numName",
                    "parameterType": 3,
                    "parameterValue": 100
                },
                {
                    "parameterName": "boolName",
                    "parameterType": 2,
                    "parameterValue": True
                },
                {
                    "parameterName": "credName",
                    "parameterType": 4,
                    "userName": "credUser",
                    "userPassword": "credPwd"
                }
            ],
            "returnUrl": "http://your-callback-server/return"
        }
    }
}

# ------------------------------------------------------------
# 4. Check if worker is currently executing a task
# ------------------------------------------------------------
check_status_data = {
    "method": "tools/call",
    "params": {
        "name": "check_worker_status"
    }
}

# ------------------------------------------------------------
# 5. Stop currently running task by ID
# ------------------------------------------------------------
stop_task_data = {
    "method": "tools/call",
    "params": {
        "id": "task-001",  # Same ID used in task call
        "name": "stop_task"
    }
}

# ------------------------------------------------------------
# Select which data payload to send
# ------------------------------------------------------------
# You can replace this with commander_data, local_flow_data, etc.
request_payload = unattended_data

# ------------------------------------------------------------
# Send the HTTP POST request
# ------------------------------------------------------------
json_data = json.dumps(request_payload)
response = requests.post(url, headers=headers, data=json_data)

# ------------------------------------------------------------
# Handle and print the response
# ------------------------------------------------------------
print("HTTP status code:", response.status_code)
print("Response content:", response.text)

# ------------------------------------------------------------
# Notes on response types:
# ------------------------------------------------------------
# 1. Protocol Error (bad request/authorization/etc.)
# {
#     "error": {
#         "code": -32700,
#         "message": "Parse error"
#     }
# }

# Common error codes:
# -32700 : JSON parse error
# -32001 : Authentication failed (invalid token)
# -32600 : Invalid params
# -32601 : Method not found
# -32602 : Tool name not found (e.g., wrong flow name)
# -32603 : Internal server error

# 2. Execution Result - Failure
# {
#     "result": {
#         "content": [{"type": "text", "text": "error message"}],
#         "isError": true
#     }
# }

# 3. Execution Result - Success
# {
#     "result": {
#         "content": [{"type": "text", "text": "success message"}],
#         "isError": false
#     }
# }

# ------------------------------------------------------------
# About returnUrl:
# If specified, the client will POST execution result to it.
# The returnUrl must respond with HTTP 200 status code.
# Otherwise, the client will retry the POST up to 5 times.
# ------------------------------------------------------------